Soothe your dry skin this winter by making a bar of homemade soap. Made with cocoa butter and cooling peppermint essential oil, this melt and pour soap recipe is sure to become your new seasonal favorite. Learn how to make this simple soap recipe below.

Making soap at home is easy.
That is when you create soap using a melt and pour soap base.
When it comes to soap making there are three different types, cold process, hot process and melt and pour. Both cold and hot process require you to work hands on with sodium hydroxide, also known as lye. By using a melt and pour soap base, the handling of lye has already been done for you. All you have to do to make soap at home is to melt the soap base and toss in your desired additives.
Soap additives can include natural colorants, herbs, exfoliants such as oatmeal or coffee grounds, essential oils and more. Once the soap has been melted and your desired additives have been placed into the soap, you can pour the melted mixture into any mold you desire. I usually prefer to use a silicone mold but there are dozens of other soap mold shapes, sizes and materials to choose from. The sky is the limit, with a few small exceptions, when it comes to creating melt and pour soap at home. The best part about making this type of soap is that it is ready to use within hours. This can be quite useful if you need the soap immediately or are looking to package it up and give away as a gift.
Simple Soap for Beginners
Every season, I try to create a new soap recipe that corresponds with the times and availability of products. In the fall, I have enjoyed designing a bar of soap that combines all the favorite fragrances of autumn, including clove, cinnamon and orange. Come spring time, I scour the lawn for medicinal weeds to incorporate into my herbal infused gardener’s soap. I had yet to fashion a soap recipe for winter. I’m not one to gravitate towards winter woodsy scents like pine or cedar wood so I knew I’d have to create a bar of soap with a different fragrance. Peppermint was my go-to choice for this winter soap.
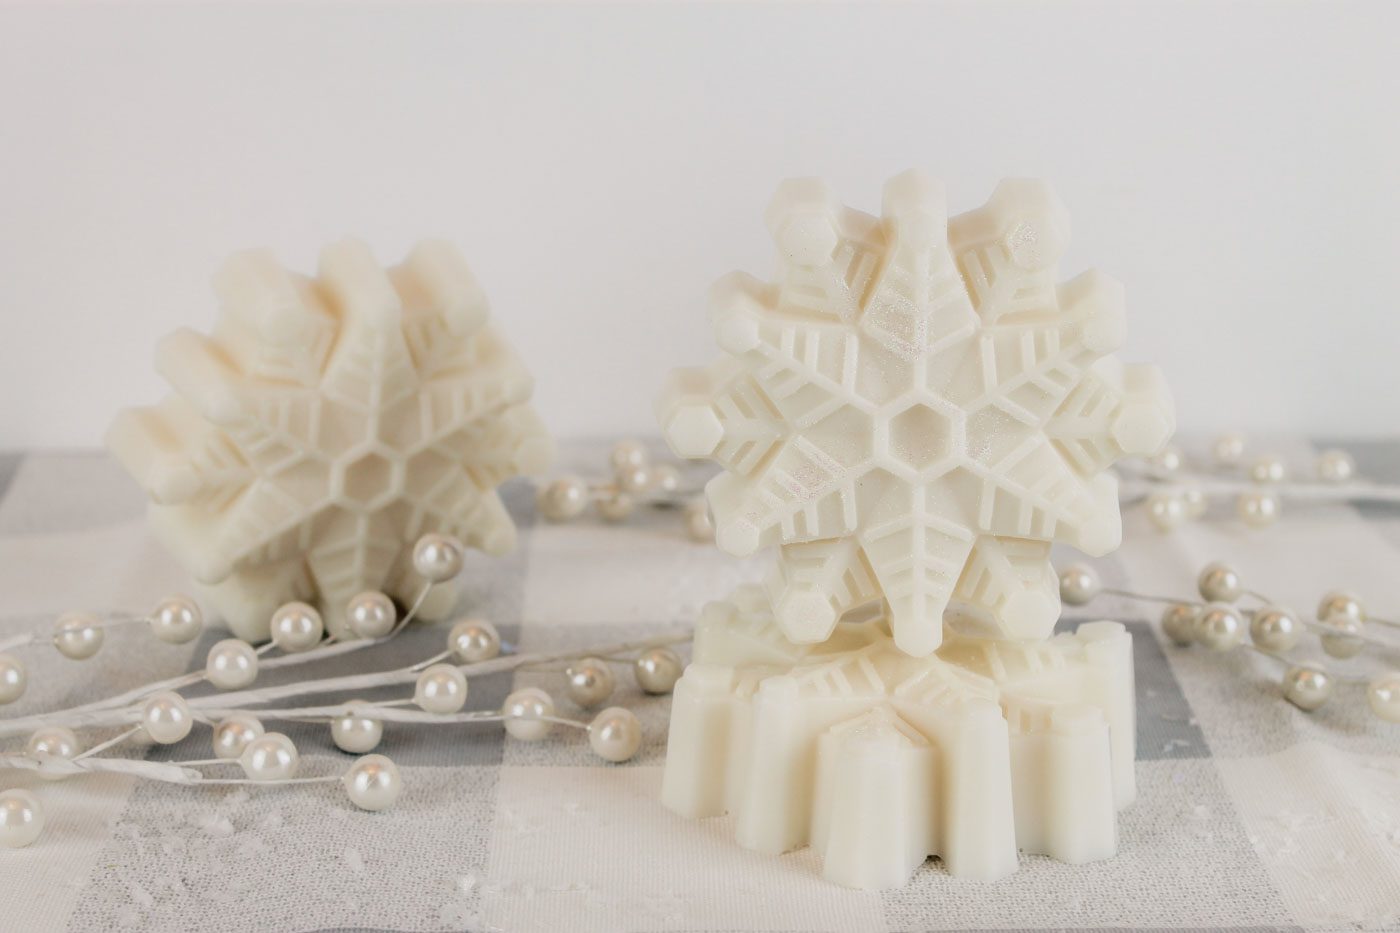
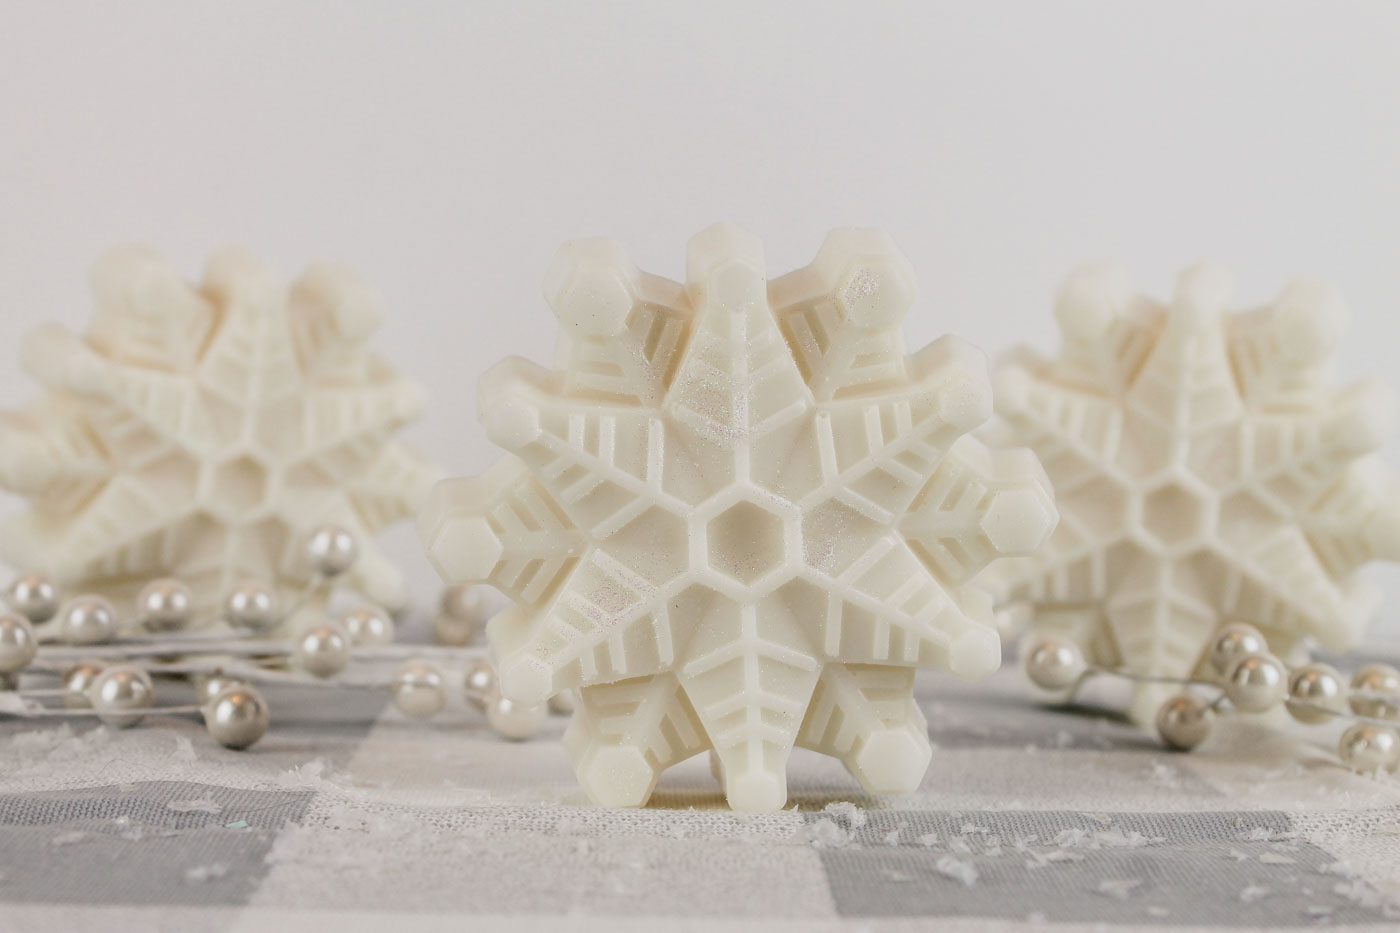
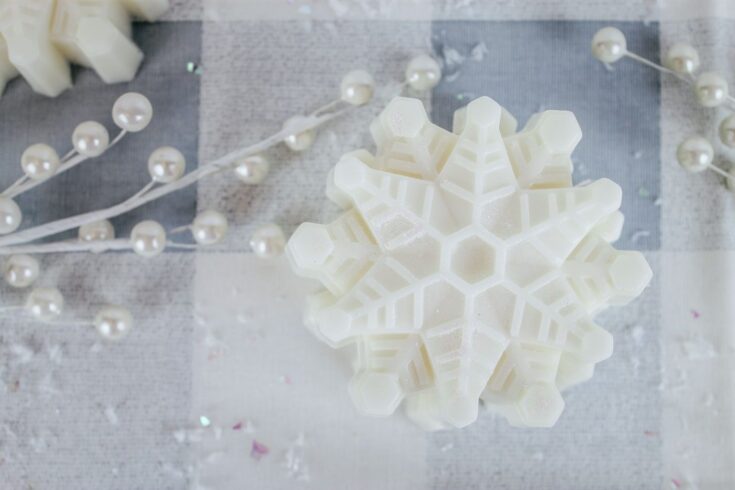
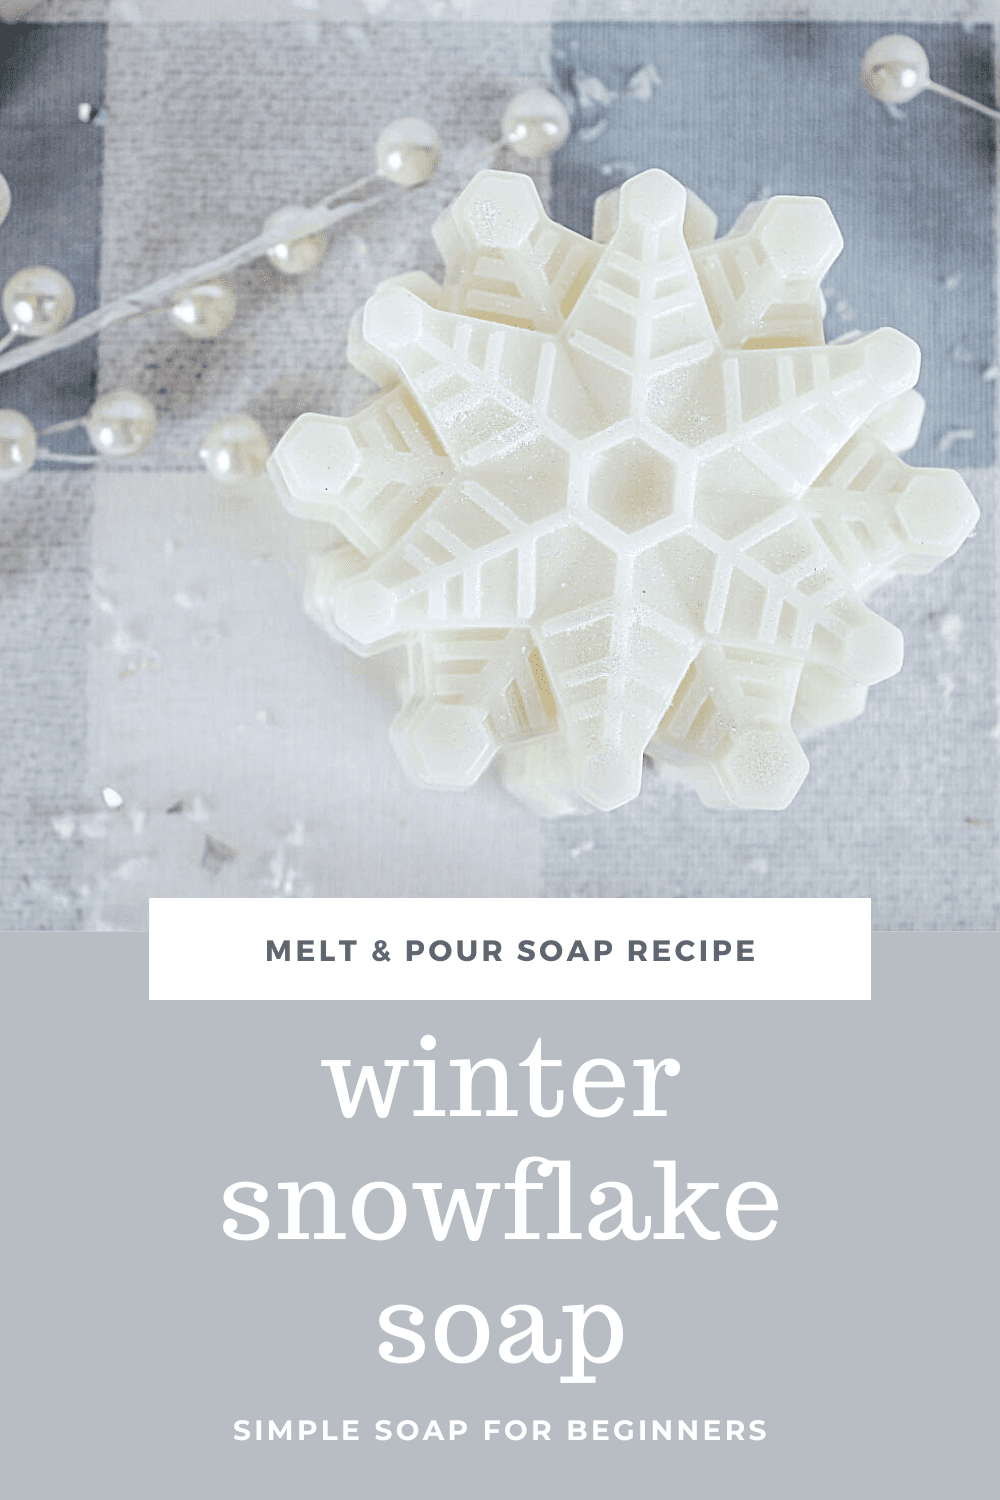
Filled with the cool and invigorating scent of mint, a touch of chocolate and formed into the shape of a snowflake, this wintertime soap is the perfect cold weather soap to keep your skin moisturized during the dry, harsh winter months. The touch of iridescent cosmetic glitter gives the melt and pour soap a subtle shimmer. If you’d prefer to leave it out, go ahead. The snowflake soap is absolutely gorgeous without it.
Why You’ll Love This Recipe
- A cocoa butter soap base gives this DIY soap recipe a light chocolate scent. The soap has a great lather and provides the skin with a smooth, softened feeling.
- The addition of an all-natural liquid sweetener like honey or agave gives the soap a little extra lathering power.
- Peppermint essential oil revitalizes the mind and provides the skin with a cool, refreshed feeling. If peppermint isn’t your thing, try wintergreen or skip the scent altogether and allow the natural fragrance of the cocoa butter to shine through.
- This soap is simple and easy to make. No special tools, chemicals or skills required. It is a great soap recipe for beginners.
- Makes an amazing handmade gift for friends and family.
- Perfect soap for celebrating the holidays or embracing the snowy winter season.
- Moisturizing bar of soap
- Leaves skin feeling clean
How to Make Peppermint Soap
Cool and refreshing with a light chocolate scent, this DIY snowflake soap is a beautiful, easy soap to create this winter. Made with only a handful of ingredients and a touch of sparkle, this melt and pour soap recipe is one you’ll want to make not only for yourself but to give away as a thoughtful gift.
Makes: 4 (4 ounce) bars
Melt & Pour Soap Ingredients
21 ounces (595 grams) cocoa butter soap base, cut into 1-inch cubes
1 tsp honey or agave
1 1/4 teaspoons (125 drops) peppermint essential oil
Silver or white cosmetic glitter
Snowflake soap mold ( I used Trudeau Snowflake Jumbo Cupcake Baking Pan)
Paint brush
How to Make Soap for the Winter

To make the snowflake soap, chop the cocoa butter soap base into small 1-inch cubes. In a heatproof glass bowl, add the soap cubes and set on top of a saucepan with a few inches of water inside the pan. This will be our makeshift double boiler. Turn the stove heat to medium low.
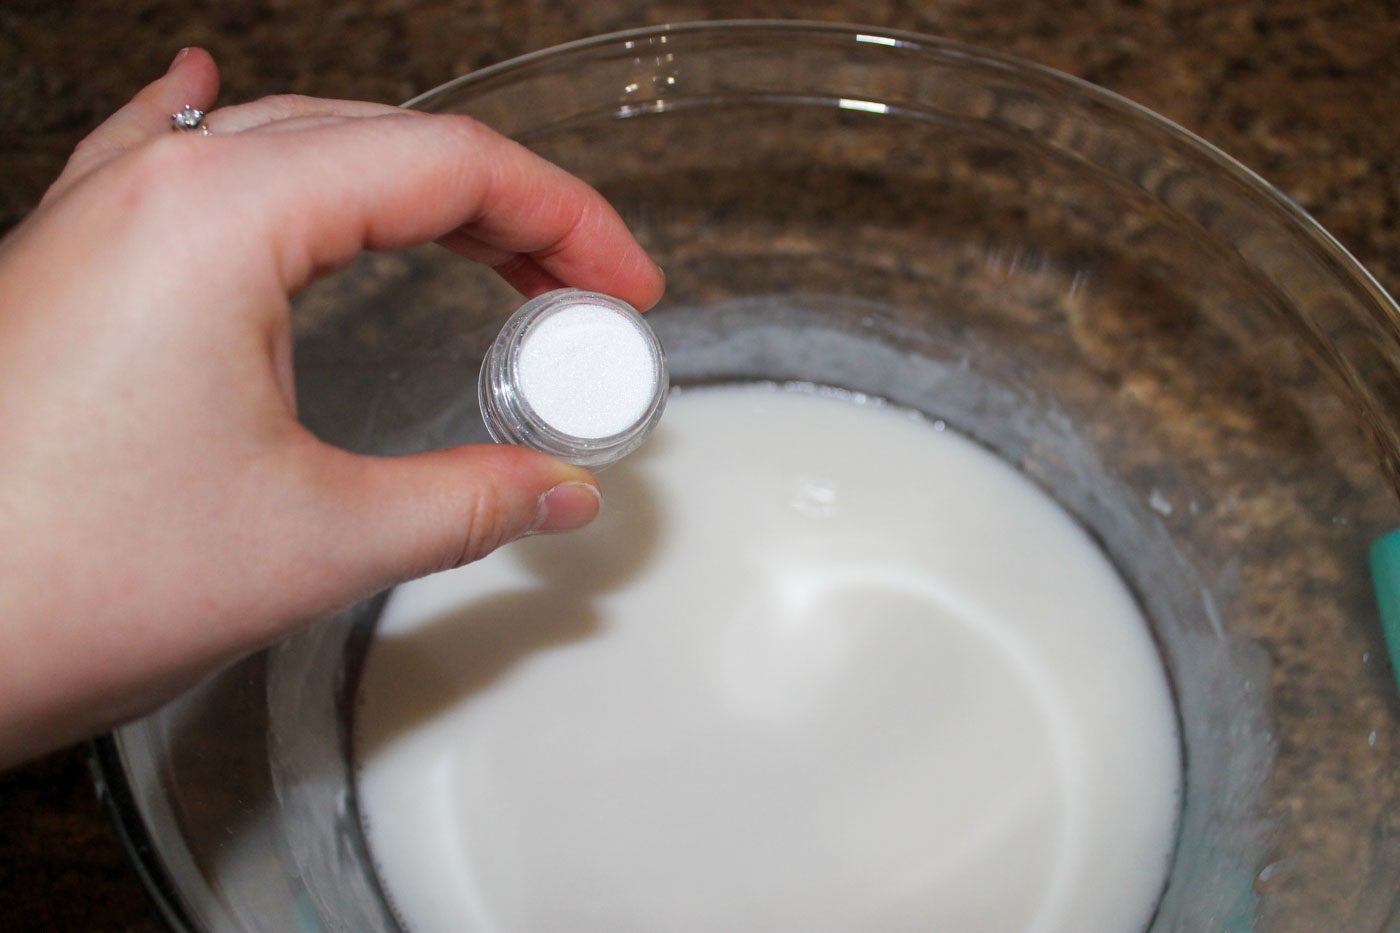
Once the soap has melted, remove the bowl from heat. Stir in the honey, peppermint essential oil and a two big pinches of glitter. Mix well.

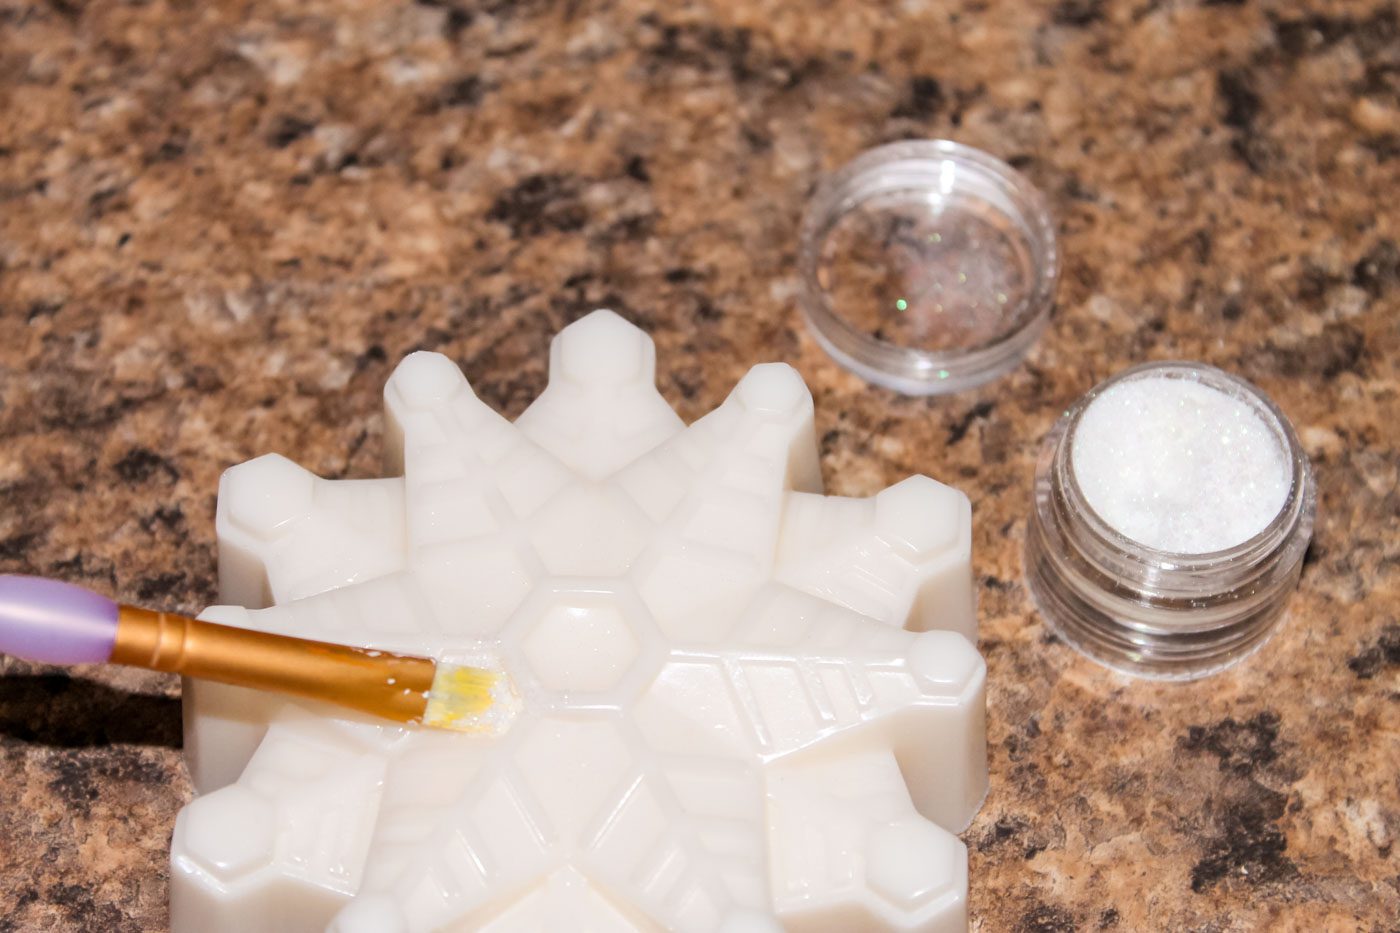
Pour the soap into your snowflake silicone mold. Let settle and cool in a dry place for about 2 hours or until solidified. Remove the soap from the mold. Use a small paint brush with a little bit of glitter to lightly dust the top of the snowflakes.
Store bars in a cool, dry place. Or wrap tightly and give away to a co-worker, friend or loved one for Christmas!
More Melt & Pour Soap Recipes You May Like
Vanilla Mocha Melt & Pour Soap
DIY Snowflake Soap
Soothe your dry skin this winter by making a bar of homemade soap. Made with cocoa butter and cooling peppermint essential oil, this melt and pour soap recipe is sure to become your new seasonal favorite. Learn how to make this simple soap recipe below.
Materials
- 21 ounces (595 grams) cocoa butter soap base, cut into 1-inch cubes
- 1 tsp honey or agave
- 1 1/4 teaspoons (125 drops) peppermint essential oil
- Silver or white cosmetic glitter
- Snowflake soap mold ( I used Trudeau Snowflake Jumbo Cupcake Baking Pan)
- Paint brush
Instructions
- To make the snowflake soap, chop the cocoa butter soap base into small 1-inch cubes. In a heatproof glass bowl, add the soap cubes and set on top of a saucepan with a few inches of water inside the pan. This will be our makeshift double boiler. Turn the stove heat to medium low.
- Once the soap has melted, remove the bowl from heat. Stir in the honey, peppermint essential oil and a two big pinches of glitter. Mix well.
- Pour the soap into your snowflake silicone mold. Let settle and cool in a dry place for about 2 hours or until solidified. Remove the soap from the mold. Use a small paint brush with a little bit of glitter to lightly dust the top of the snowflakes.
- Store bars in a cool, dry place. Or wrap tightly and give away to a co-worker, friend or loved one for Christmas!
Pin for Later


The best soap and so pretty! Leaves hands moisturized while still providing a good clean.