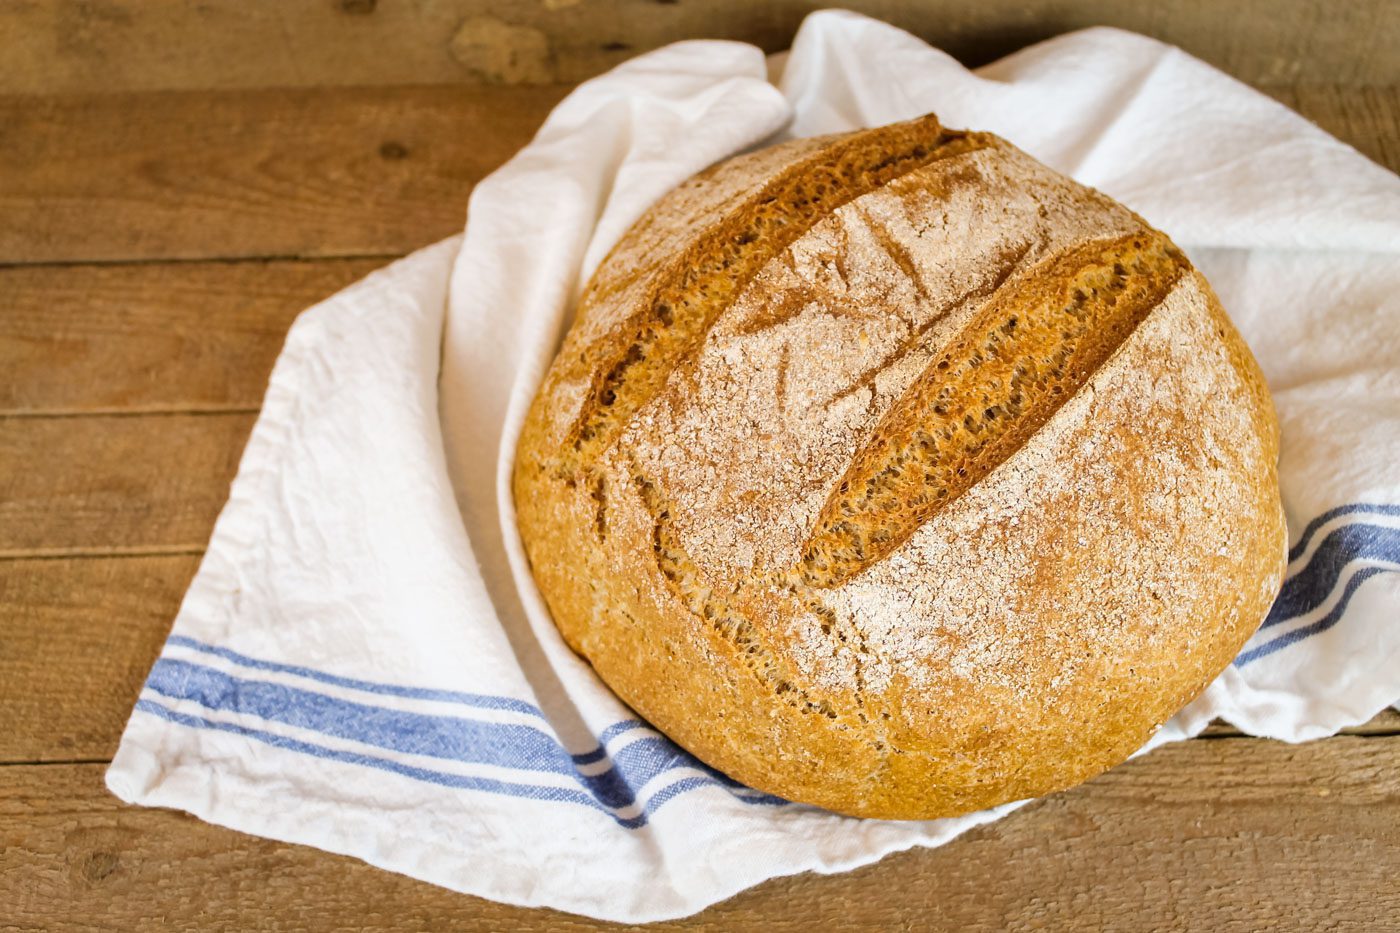
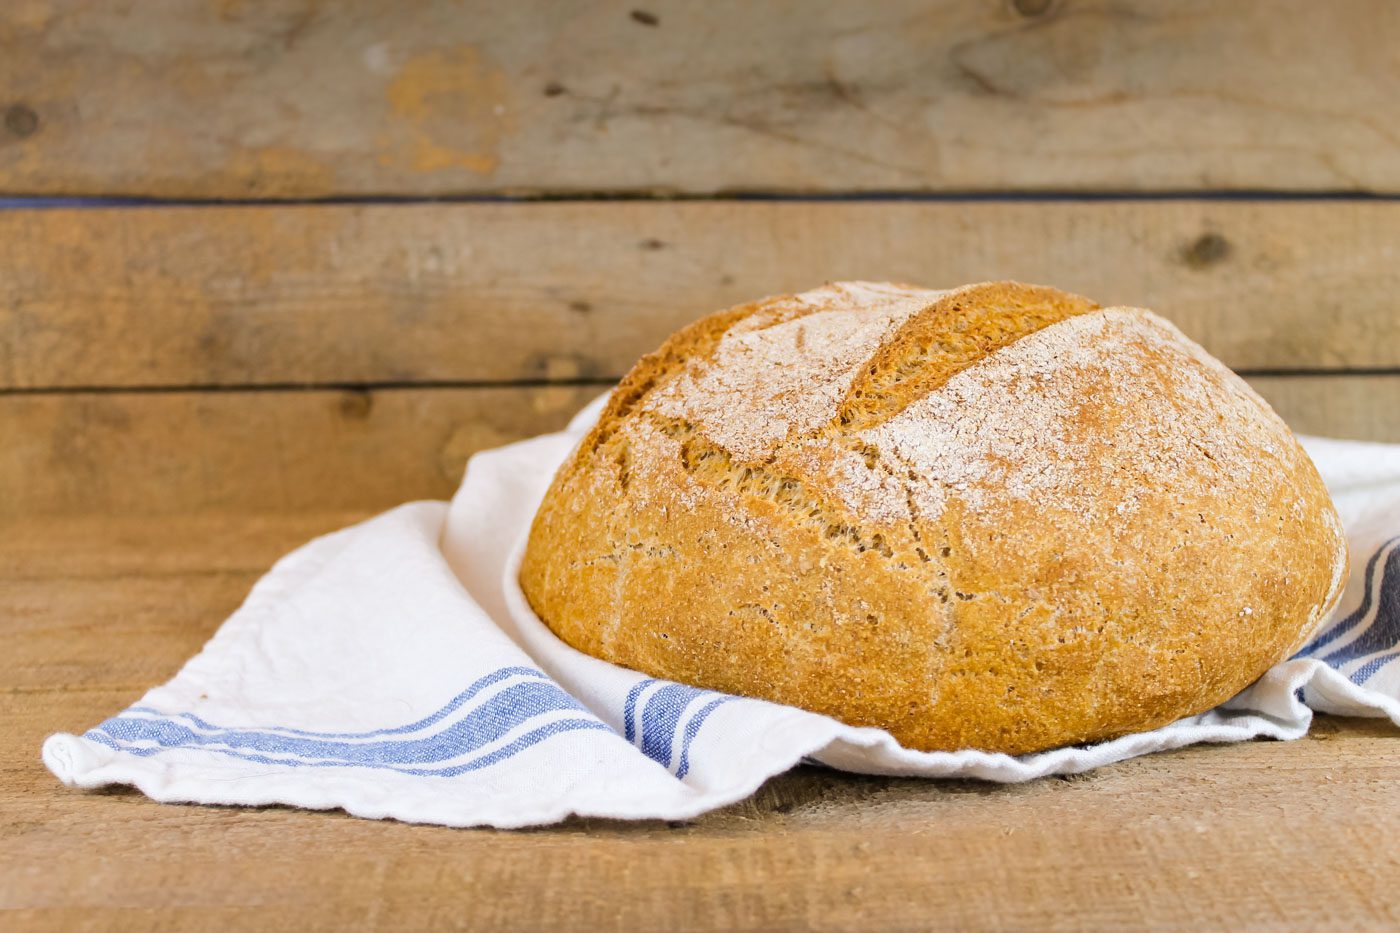
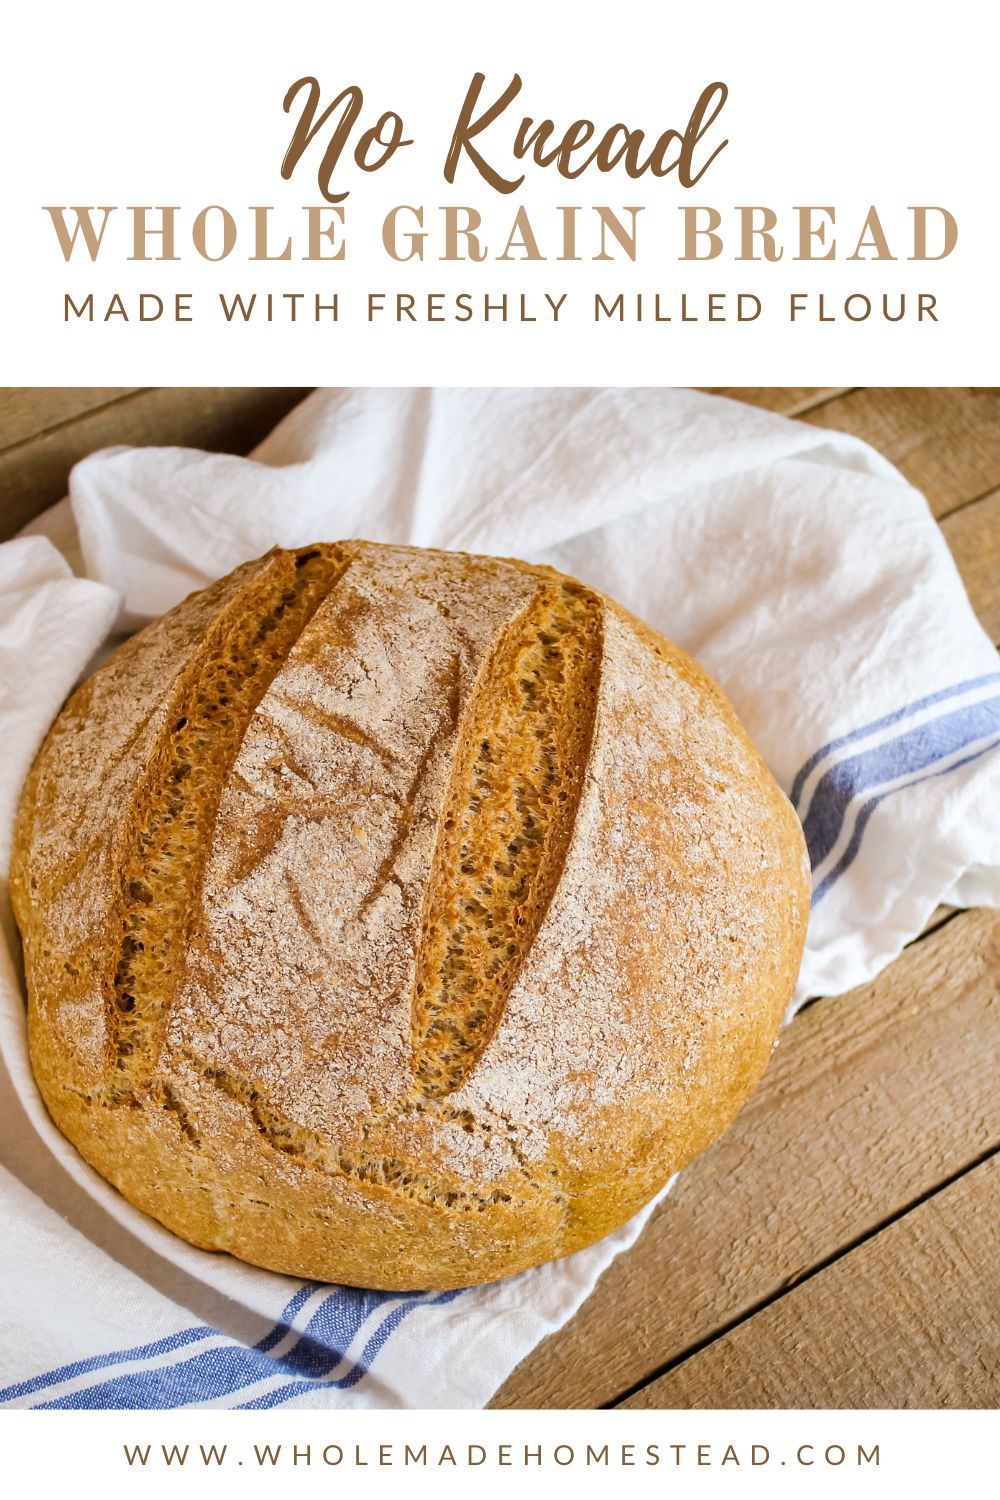
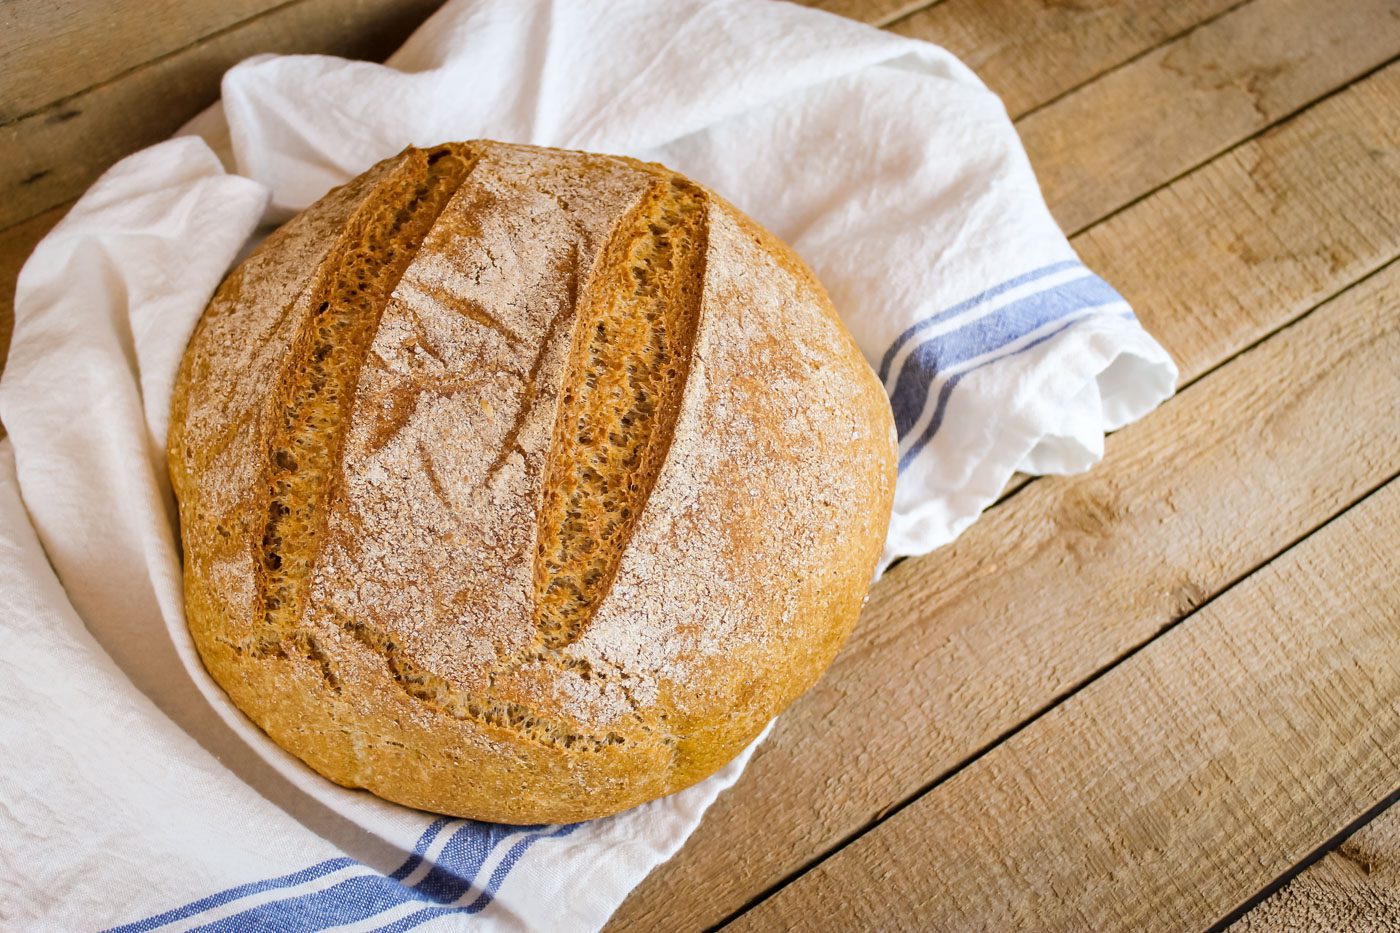
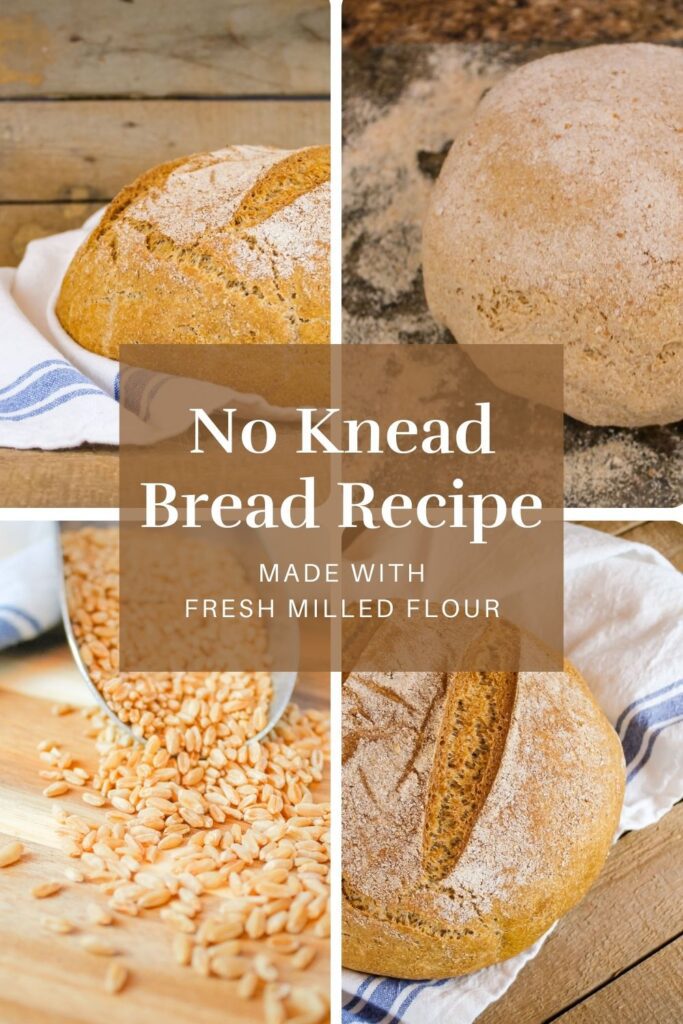
Homemade artisan style bread is achievable with this recipe for no knead bread with fresh milled flour! Crispy, crunchy and satisfying, this simple loaf of bread is made with only a handful of ingredients. Get baking this wholesome recipe today!
The rise and fall of a kingdom … or in this case, a loaf of bread. That is what it feels like when you’re just learning to make bread. Or when you’re experienced baker and you are testing out new recipes. Some succeed. Some fail.
For years I have made bread at home. In fact, I can’t remember the last time I’ve eaten bread from the store. Perhaps when I was a child. Well, I digress. My mother has always been a baker. Growing up she would make us homemade pretzels for snacks, fresh baked bread for dinner and plenty of sugar free desserts. Even now, she is often whipping up some delicious concoction in the kitchen. I believe that is where I discovered my love for cooking and baking.
Most of my life my mom and I have baked with commercial made flour. Organic all-purpose flour and organic whole wheat were used frequently in our home. That is until we discovered the truth about store bought flour. Upon enlightenment, we quickly jumped on board the whole grain train and began milling our own flour at home. Learning to use fresh ground flour in recipes took a wee bit of practice. But once we got the hang of it, the possibilities of what we could bake are endless.
Artisan Bread With Fresh Milled Flour
In my recipe box, I’ve got directions for making homemade bread, pita chips, whole grain rolls, tortillas, pumpkin bread and hamburger buns. But what I wanted was a delicious no-knead artisan style bread with fresh ground flour. After flipping through my cookbooks and searching online, I couldn’t find what I was looking for. Sure, there were plenty of recipes using all-purpose flour. And a wealth of sourdough artisan breads. But that wasn’t what I had in mind.
I wanted an easy bread recipe. One that didn’t require a lot of hands on time. A loaf that had a crisp outer crust. Was made with fresh, flavorful wheat. And, of course looked like it was purchased from the local bakery. In order to fulfill the dream, I had to head into the kitchen. After some experimentation … a bit of rising and falling … and a lot of flour covered countertops, today I am pleased to share with you my treasured no-knead whole grain bread recipe.
This overnight bread recipe is practically effortless to make. With just a few moments of time and a good dutch oven, you will have a large, golden brown loaf of bread with a crisp outer crust and soft, moist crumb inside. It is an excellent recipe for beginner bakers and is absolutely delicious to serve with soup! My husband is particularly fond of cutting a couple of slices to make a grilled cheese sandwich. The crusty loaf also is perfect for French toast and stuffing!
What is Fresh Milled Flour?
Freshly milled flour is created when you take a grain, such as hard white wheat berries and run it through a flour mill transforming it into fresh ground flour that can be use to make breads and various other baked goods. The reason people choose to grind flour at home is largely due to the fact that fresh ground flour retains essential nutrients unlike processed commercial flour.
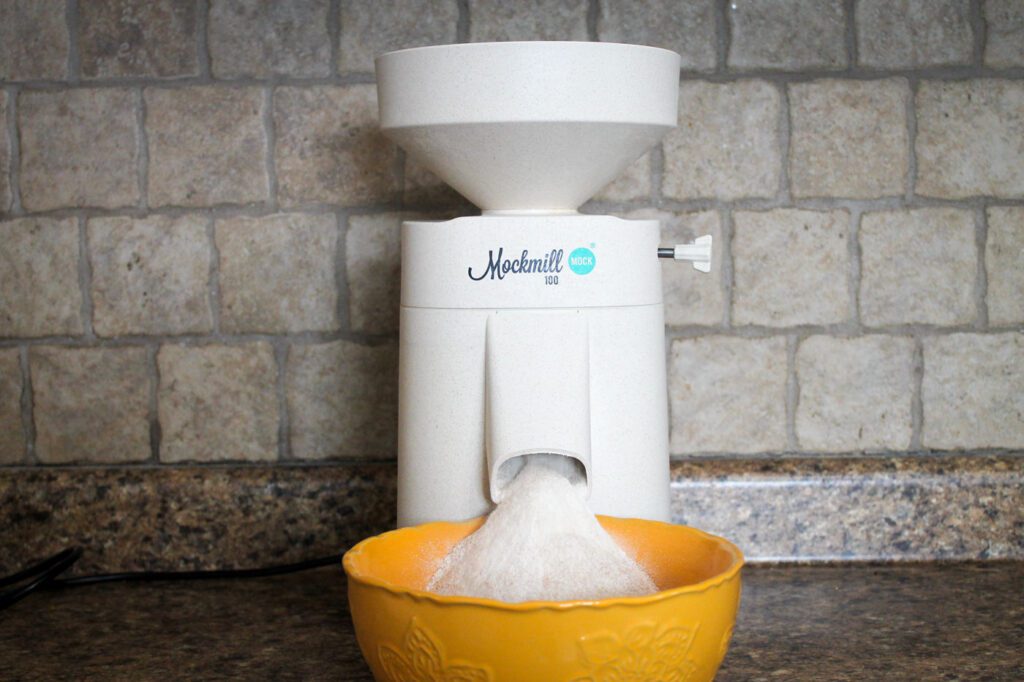
How to Mill Flour at Home
The thought of grinding flour at home may seem like a tedious, time consuming task. But that couldn’t be further from the truth. Transforming wheat berries into flour takes just a few moments longer then it does to scoop out store bought flour from a bag. Grinding flour at home is easy when you have the right tools for the job! There are a variety of mill styles to choose from but most modern flour mills make it easy to grind flour at home. I have an electric flour mill from Mockmill. The Mockmill 100 Stone Grain Mill uses two stones to grind the grains. I simply turn the mill on, pour my desired grain into the hopper and within minutes I have fresh ground flour! No fuss or putting forth the effort of grinding flour by hand.
Is Freshly Milled Flour Better for You?
Yes! Today a bag of flour from the grocery store does not provide the vital fiber and nutrients that your body needs. When grain is kept whole, it retains all of its nutrients and oils. As soon as the bran (the outer hard shell) is broken, the nutrients deteriorate quickly. Commercially sold flour can turn rancid if the oil-rich germ and other nutrients are left. In order to avoid this, commercial flour must remove these components so that the flour is shelf stable. Even if the flour is organic or labeled as enriched, there is absolutely no comparison to the health benefits of milling your own flour at home. Milling your own flour ensures you get the most nutrients, vitamins and fiber.
Tips for Baking Bread With Fresh Milled Flour
Baking with fresh ground flour is a little different than using store bought flour. Here are a few tips I’ve learned along the way.
- Hard wheat such as white or red wheat berries has the highest amount of protein which means it is ideal for baking bread!
- Bread recipes made with fresh milled flour are not as light as the loaves of bread you buy from the store. This is due to a high amount of starch and gluten in processed flour.
- Vital wheat gluten helps bread made with fresh ground flour to rise higher.
- A bread lame is an excellent tool for scoring bread.
- Having a sharp serrated bread knife is very handy when slicing an artisan bread, due to its crispy outside.
- When you mill your own flour there is no need to sift it. Simply grind, measure and get baking!
- A 5-quart dutch oven works best for making artisan style breads.
Tools You May Need
This post contains affiliate links, which means I make a small commission at no extra cost to you. In any case, I only link to products we actually use on our homestead and that I believe can truly benefit to you. See my full disclosure here.
Grain mill
Banneton basket or large colander
Mixing bowl
Spatula
Watch Video Tutorial
Dutch Oven Bread Made With Fresh Milled Flour
Homemade bread couldn’t be easier with this no knead bread with fresh milled flour! Packed full of nutrients and flavor, this delicious loaf is great to serve at breakfast, lunch or dinner time!
Makes: 1 loaf
Ingredients
3 cups warm water
1 teaspoon honey
1 teaspoon instant yeast
1 1/2 tablespoons oil
1 1/2 teaspoons vital wheat gluten, optional
7 cups freshly milled hard white wheat flour
1 1/2 teaspoons salt
How to Make No Knead Bread
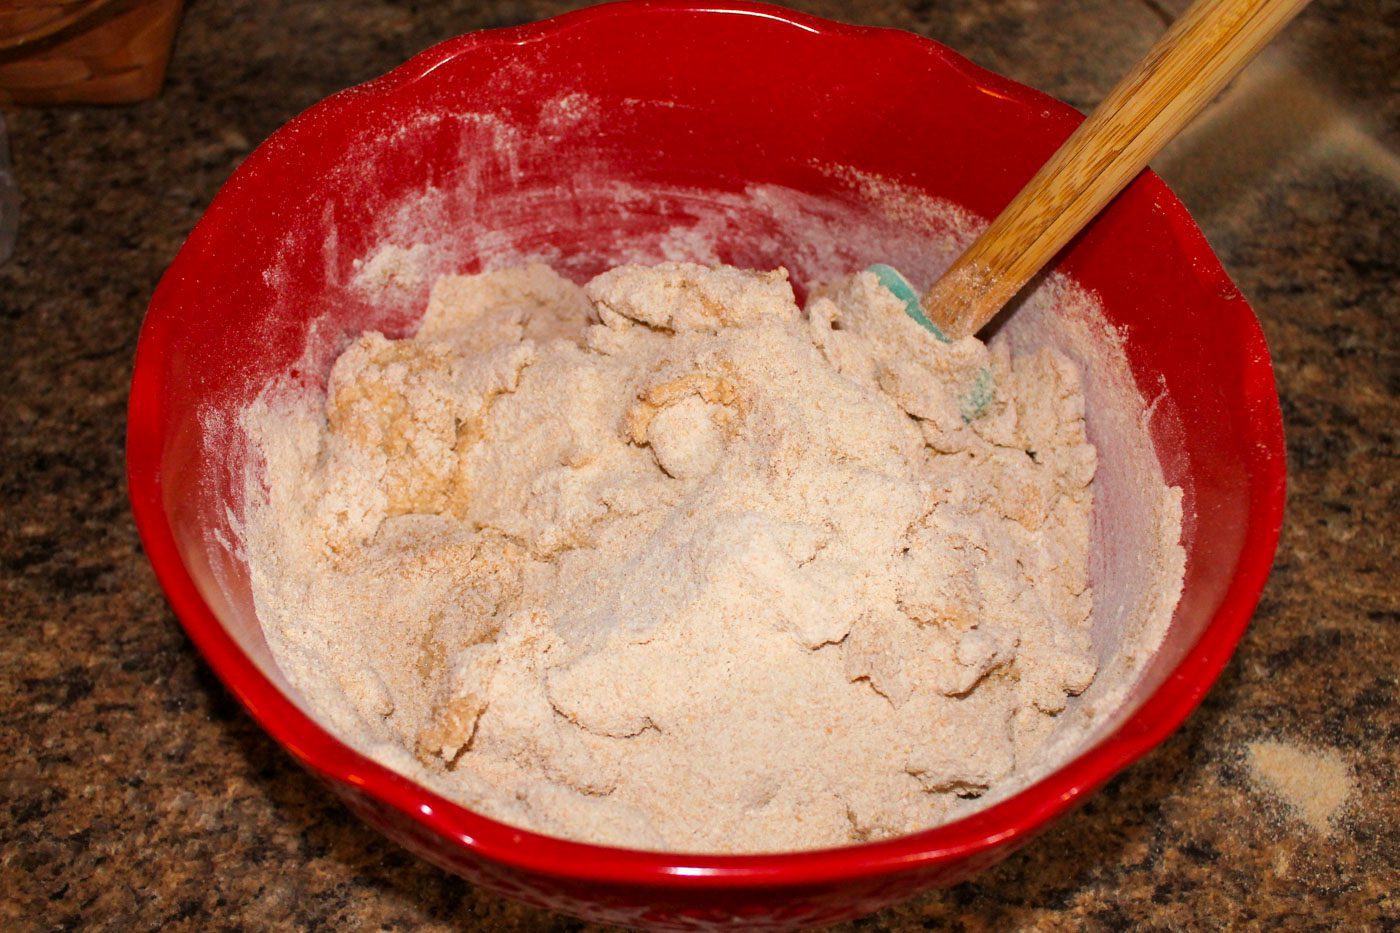
In a large bowl, combine the warm water, honey and yeast until slightly creamy looking. Stir in the oil. Add the vital wheat gluten, flour and salt and mix until combined. Initially the dough may look dry but as you mix it, it will become sticky. Use your hands instead of a spatula, if desired, to combine the ingredients. Cover bowl with plastic wrap and allow to rise for 12-15 hours or until the dough has doubled.
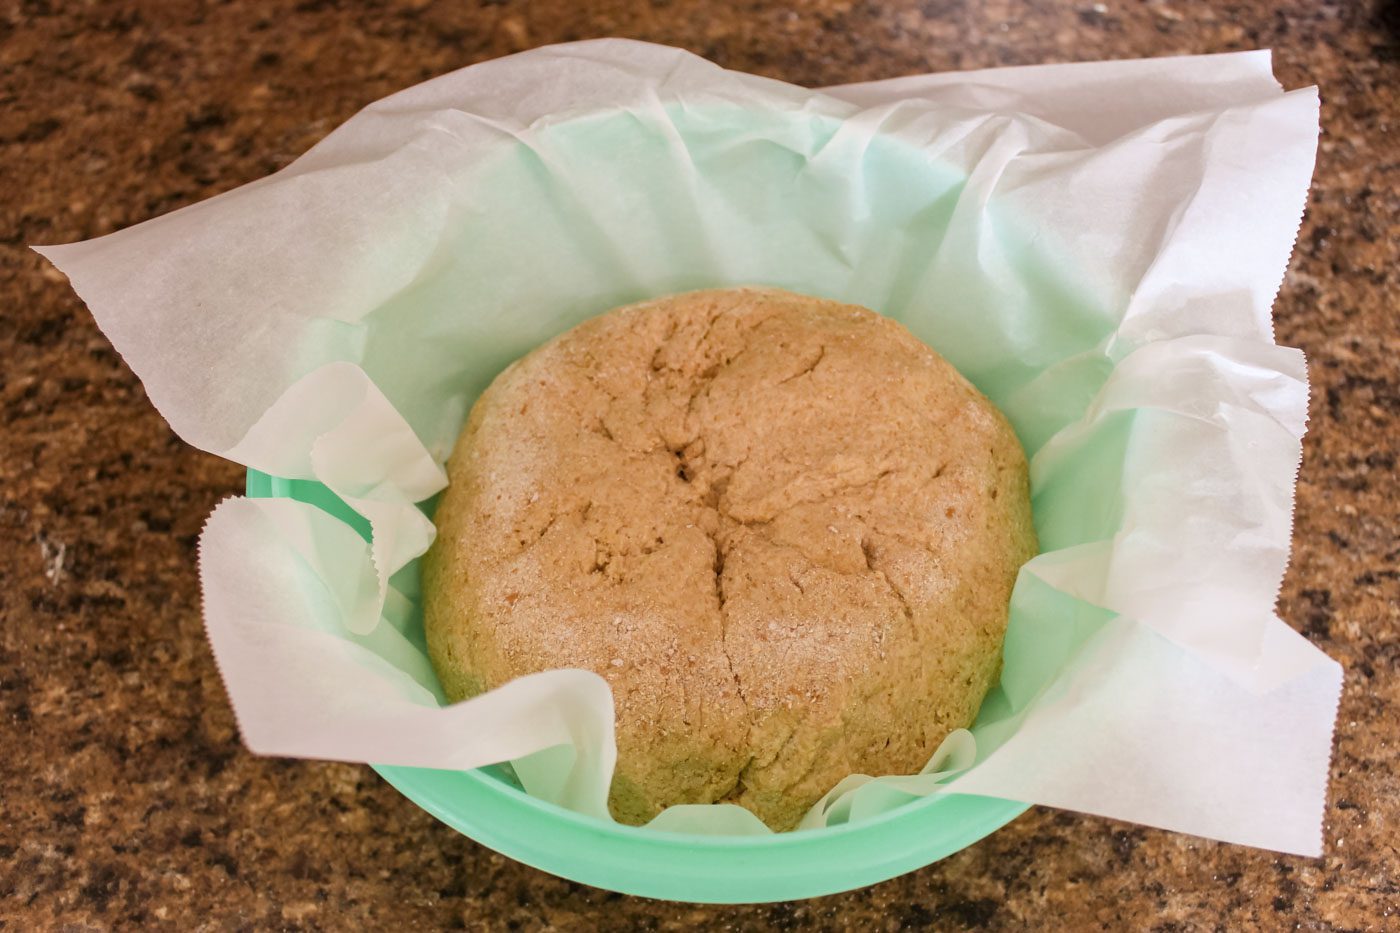
Remove the dough from the bowl. Transfer the dough to a floured surface. Carefully shape into a round loaf. Lightly dust the top of the loaf with flour. Using a banneton basket or a colander lined with parchment paper place the loaf seam side up. Cover with a tea or kitchen towel. Allow the dough to rise at room temperature for 30 minutes.
While the loaf is rising, preheat the oven to 475° F. Place the dutch oven with the lid on inside the oven for at least 30 minutes.
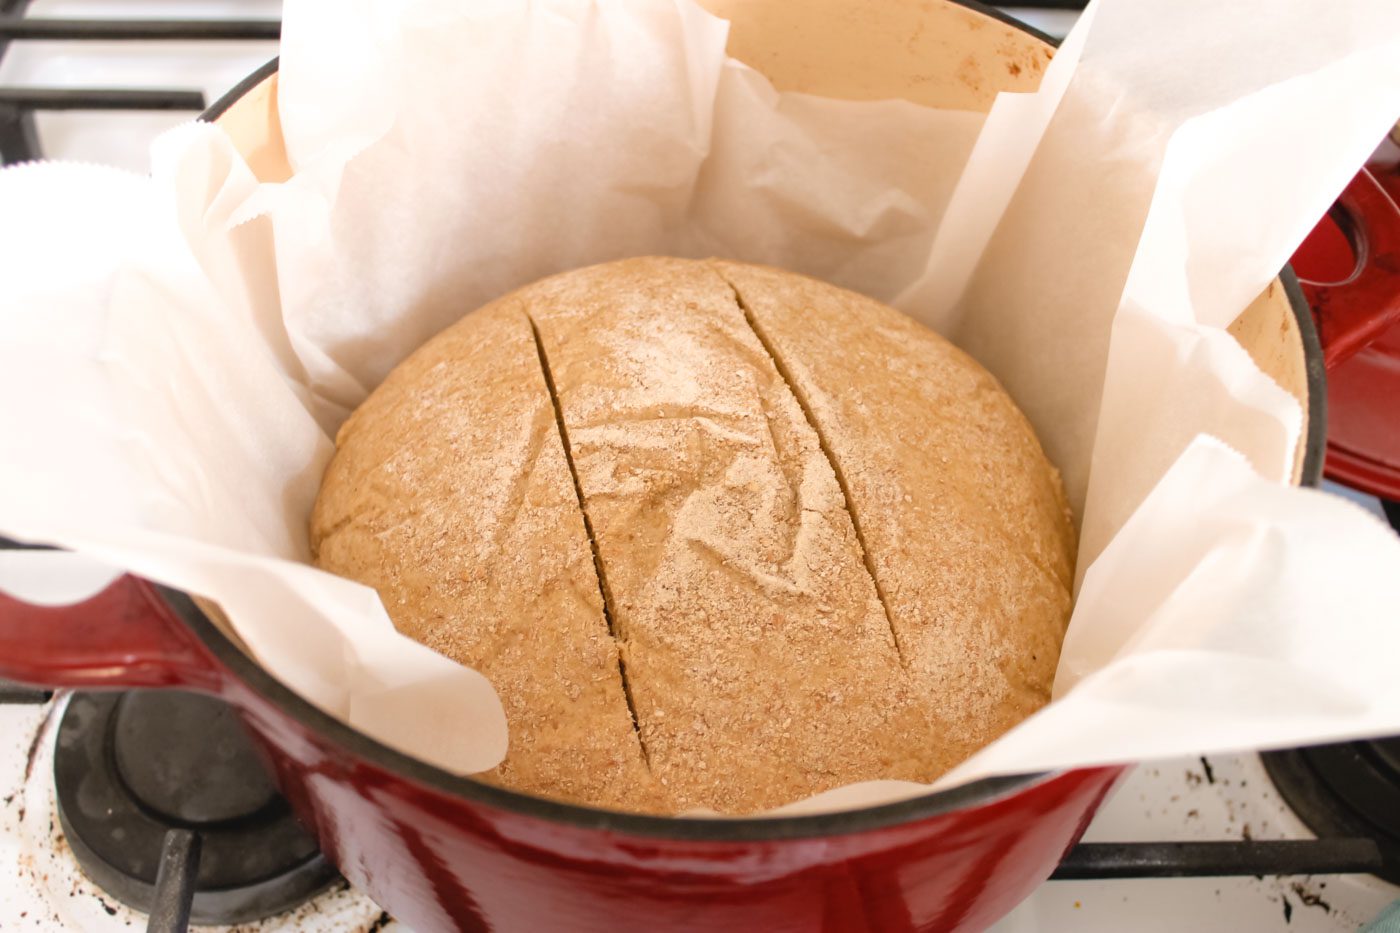
When the loaf is ready to bake, place a sheet of parchment paper over the top of the banneton basket or colander. Invert the loaf and place it seam side down onto the sheet of parchment paper. Remove dutch oven and carefully lower the parchment and loaf into the pot. Put the lid back on and bake the loaf for 30 minutes. Remove the lid and bake for an additional 15 minutes until the bread it golden brown and crisp.
Lift the loaf of bread out and place on a wire rack to cool. Slice and serve. Leftovers can be stored in an airtight container.
FAQ
Why Use a Dutch Oven to Bake Bread?
To make artisan style bread at home! The key to making a crisp, golden loaf is a dutch oven. When you place a loaf of dough into a very hot dutch oven, the moisture from the unbaked bread is transformed into steam. The steam is what creates the crispy outer layer of the bread. There is no alternative tool that can create the same amazing results.
How to Store Bread
Keep your bread fresher longer by storing it in an airtight container, plastic bag with as much air removed as possible or a bread box. I often place my bread into a twist tie plastic bag, then place it into a Tupperware container. If you don’t plan to eat the bread right away, stick the loaf into a ziplock bag and freeze it for later.
More Fresh Milled Recipes
No Knead Rolls With Fresh Milled Flour
Cranberry Fruit Bread
Cornbread Recipe With Fresh Milled Flour
Herbed Artisan Bread
Free Wheat Conversion Chart Printable
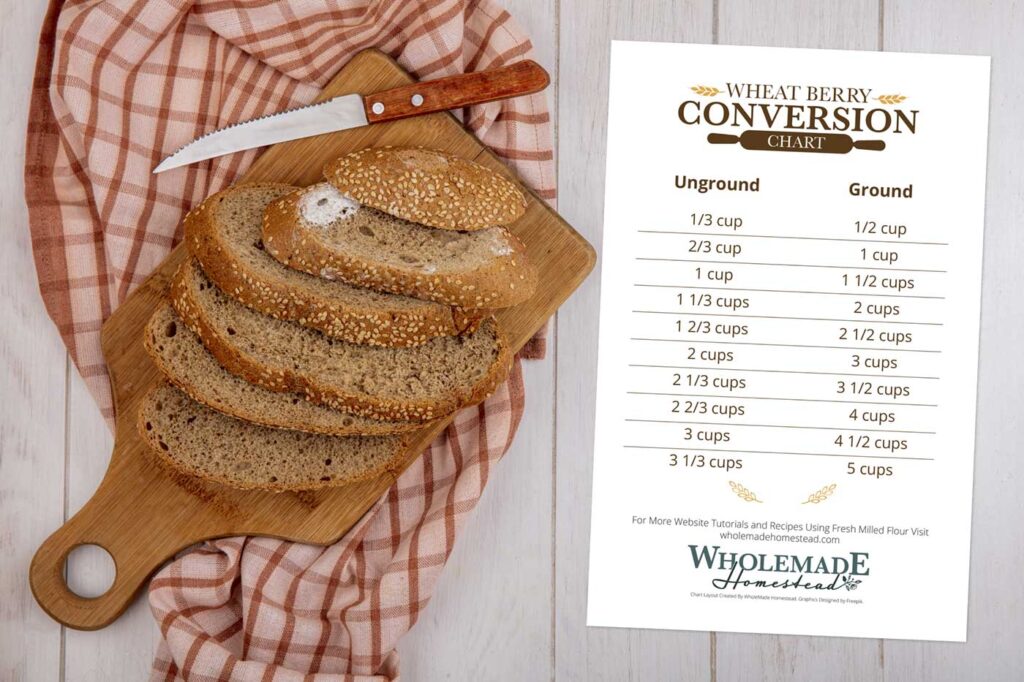
Easily convert a cup of wheat berries to fresh ground flour with this free printable chart. Click on the image above or on this link right here to instantly download and print. Great for hanging up on your fridge or attaching to the inside of a cabinet!
No Knead Bread With Fresh Milled Flour

Homemade artisan style bread is achievable with this recipe for no knead bread with fresh milled flour! Crispy, crunchy and satisfying, this simple loaf of bread is made with only a handful of ingredients. Get baking this wholesome recipe today!
Ingredients
- 3 cups warm water
- 1 teaspoon honey
- 1 teaspoon instant yeast
- 1 1/2 tablespoons oil
- 1 1/2 teaspoons vital wheat gluten, optional
- 7 cups freshly milled hard white wheat flour
- 1 1/2 teaspoons salt
Instructions
- In a large bowl, combine the warm water, honey and yeast until slightly creamy looking. Stir in the oil. Add the vital wheat gluten, flour and salt and mix until combined. Initially the dough may look dry but as you mix it, it will become sticky. Use your hands instead of a spatula, if desired, to combine the ingredients. Cover bowl with plastic wrap and allow to rise for 12-15 hours or until the dough has doubled.
- Remove the dough from the bowl. Transfer the dough to a floured surface. Carefully shape into a round loaf. Lightly dust the top of the loaf with flour. Using a banneton basket or a colander lined with parchment paper place the loaf seam side up. Cover with a tea or kitchen towel. Allow the dough to rise at room temperature for 30 minutes.
- While the loaf is rising, preheat the oven to 475° F. Place the dutch oven with the lid on inside the oven for at least 30 minutes.
- When the loaf is ready to bake, place a sheet of parchment paper over the top of the banneton basket or colander. Invert the loaf and place it seam side down onto the sheet of parchment paper. Remove dutch oven and carefully lower the parchment and loaf into the pot. Put the lid back on and bake the loaf for 30 minutes. Remove the lid and bake for an additional 15 minutes until the bread it golden brown and crisp.
- Lift the loaf of bread out and place on a wire rack to cool. Slice and serve. Leftovers can be stored in an airtight container.


Is the vital wheat gluten a must? I have everything besides this.
Vital wheat gluten improves the rise of the bread but it is completely optional. If you don’t have it on hand, your bread will still turn out delicious without it.
7 cups is how much in grams??
The weight depends on what kind of flour you use for this bread recipe. If you plan to use freshly milled hard white or hard red flour as the recipe states, the weight is 130 grams per cup, giving you a total of 910 grams (for 7 cups).
What should be the weight of 7 cups of milled whole wheat flour?
7 cups of freshly milled hard wheat flour totals 910 grams.
You don use any sourdough starter ?
No sourdough starter is needed to help the bread rise. If you’d like to add it for flavor, I am sure it would make a nice addition to the bread.
Hi there! Do you happen to have a no knead FM SANDWICH bread recipe? Currently out of a stand mixer for the time being, and I’m needing to keep it simple (& not time consuming) with no kneading!
I totally get that! No, sorry, at this time I do not have a no knead sandwich bread recipe.
This came out delicious although I probably should have let it bake the full time. I got nervous it was looking too brown and pulled it out too early. Ended up putting it back in. Next time, I’ll just follow the directions . I let mine rise for almost 24 hours on the counter.
I am so pleased it turned out so well! Thanks for sharing. 🙂
Hi! I have active dry yeast, not instant. Am I able to use that instead? Thanks!
As long as you activate the dry yeast prior to mixing it into the dough, it should work just fine!
Do you let your dough rise in the refrigerator or on the counter for the 12-24 hours in the bowl covered with plastic wrap?
Just on my kitchen counter
Do you refrigerate your dough for the bread? I read you do for the rolls but wasn’t sure if it’s just for the rolls and not for the bread.
No, i do not refrigerate the dough for the bread. I do so for the no knead rolls due to the butter and milk in the recipe.
Do you think I can use hard red wheat for this recipe?
Yes! Hard red wheat will work perfectly fine.
this seems like it would make a huge loaf of bread, a 2 pound loaf takes about 600 grams of FMF flour
What could I use instead of a Dutch oven? I’ve heard for sourdough people create steam with a separate pan and boiling water, putting the loaf just on a cookie sheet or pizza pan. Would something like that work here?
Using a dutch oven helps to create a steamy environment for the bread so that the outer layer is nice and crisp. The dutch oven is also used to help form the shape of the bread and make it rise upwards. By adding a separate pan of water to the oven, you would create the steam you need but the cookie sheet or pizza pan would not create the structure for the bread to rise up. Rather the bread would ooze to the sides and bake flat. It wouldn’t be the most beautiful bread but it would still be edible. If you don’t have a dutch oven, you could always use a couple standard size loaf pans. Just divide the dough between two pans. The bread won’t be quite the same as the original recipe but the pans will give structure to the bread and it woill still be very tasty. Hope that helps you!
Just for fun I added an extra 1/2 cup of water so that I was able to do some stretch & folds. I did 4 of them about 15 minutes apart & it rose in about an hour (on a chilly day). I wasn’t able to bake it then so I so I stuck it in the fridge overnight. It turned into a beautiful jiggly dough. Thank you for this recipe!