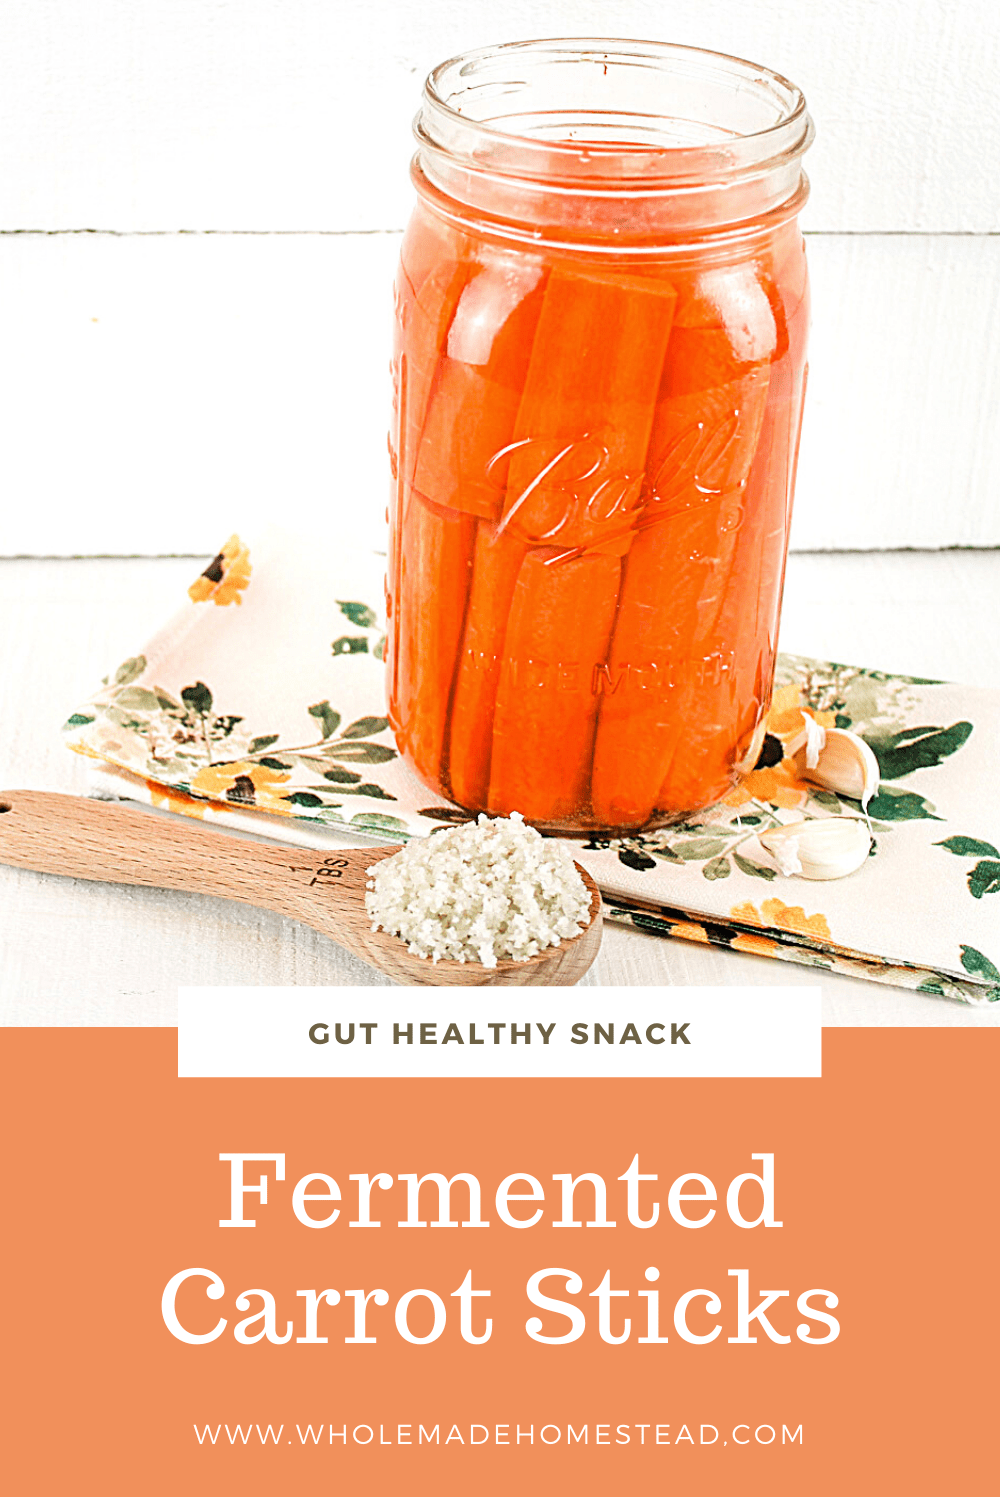
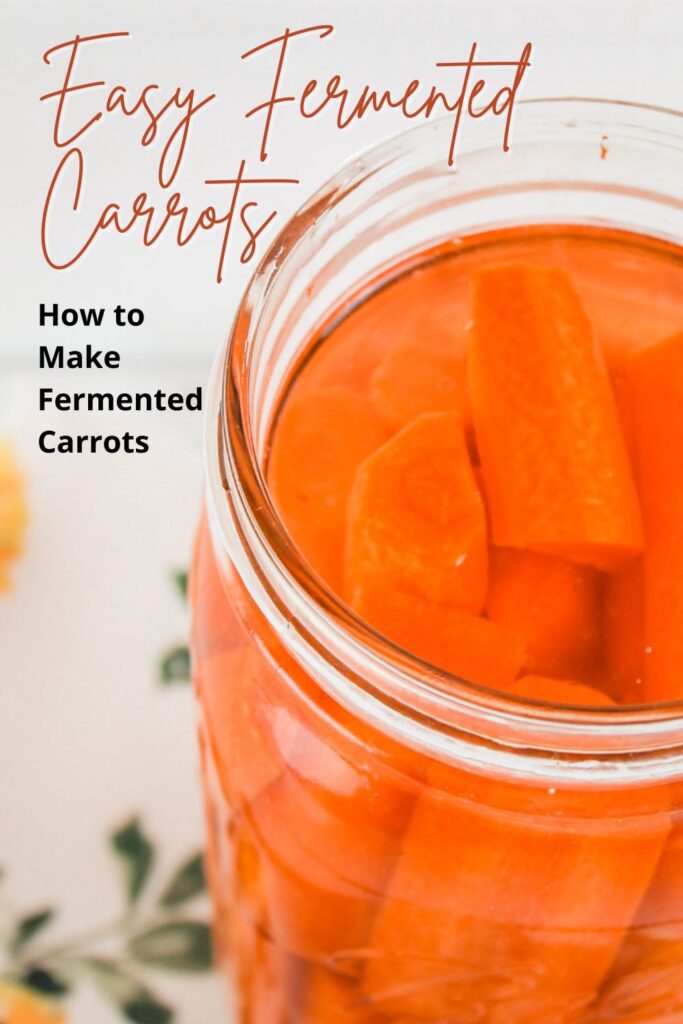
Add more nutrients and probiotics into your diet with these flavorful fermented carrots. Learn how to lacto-ferment a bag of carrots with just a little salt, water and a mason jar.

Fermenting is my friend. Little did I know that fact for most of my life.
Sure, I had heard of kombucha. It was some probiotic drink that was supposed to be good for the gut. But boy did that store bought stuff have quite the acquired taste.
And yeah, I knew what sauerkraut was. But that mush came in a can, right? And went on top of a grilled brat. I did not know anything about fermenting cabbage or the digestive benefits of making kraut.
It wasn’t until I went through a season of gut trouble that I discovered the power of fermentation. In the past I had tried probiotics in a capsule form. I took a few different varieties over the years and initially they may have helped to regulate my digestive movements but overall they didn’t make a giant impact in the health of my microbiome.
Later on in life when I heard that just one spoonful of homemade fermented foods had more probiotics in it that an entire bottle of capsules, I dove right in.
I was a little nervous at first. Leaving food out on the counter to ferment for an extended amount of time is very much the opposite of what I had been taught. I didn’t want to poison myself. Or my family. But this couldn’t be further from the truth. The process of lactic-acid fermentation is a safe way to preserve vegetables. By adding some salt into water, you allow the lactic-acid bacteria to overtake the “bad guys” and prohibit the decay that could make you sick.
How to Ferment Carrots
One of the easiest vegetables to ferment are carrots. These whole vegetables cannot create their own brine, unlike cabbage. Instead they are placed in a simple salt water solution where the lactic-acid fermentation process begins. Fermented carrots are tasty just on their own but I prefer to add a little pizazz to them and toss in a few cloves of garlic.
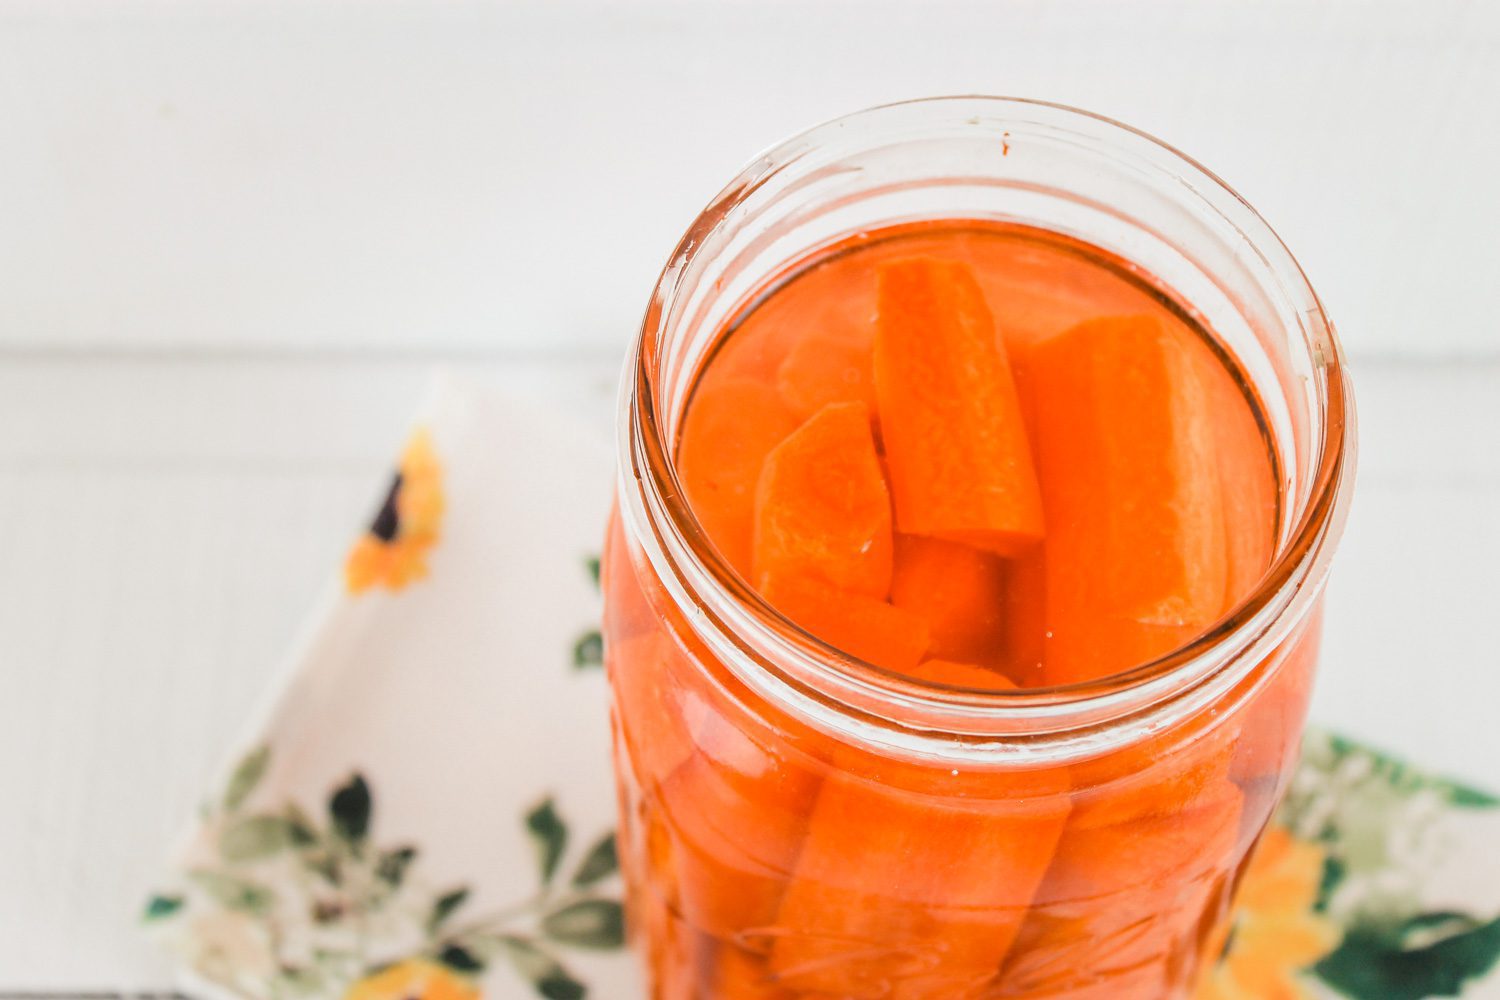
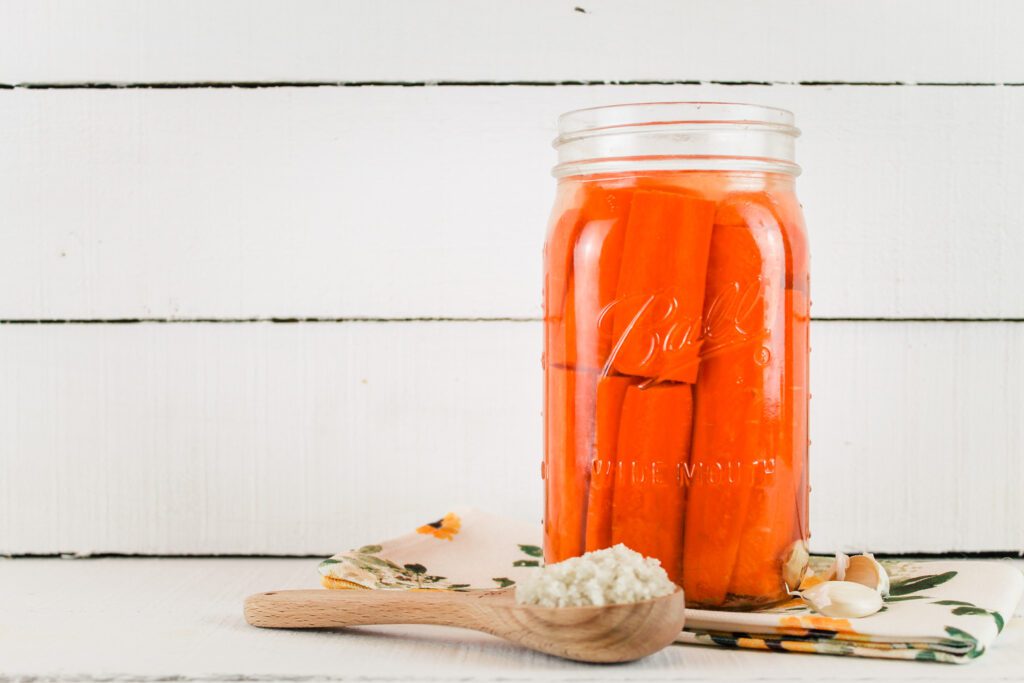
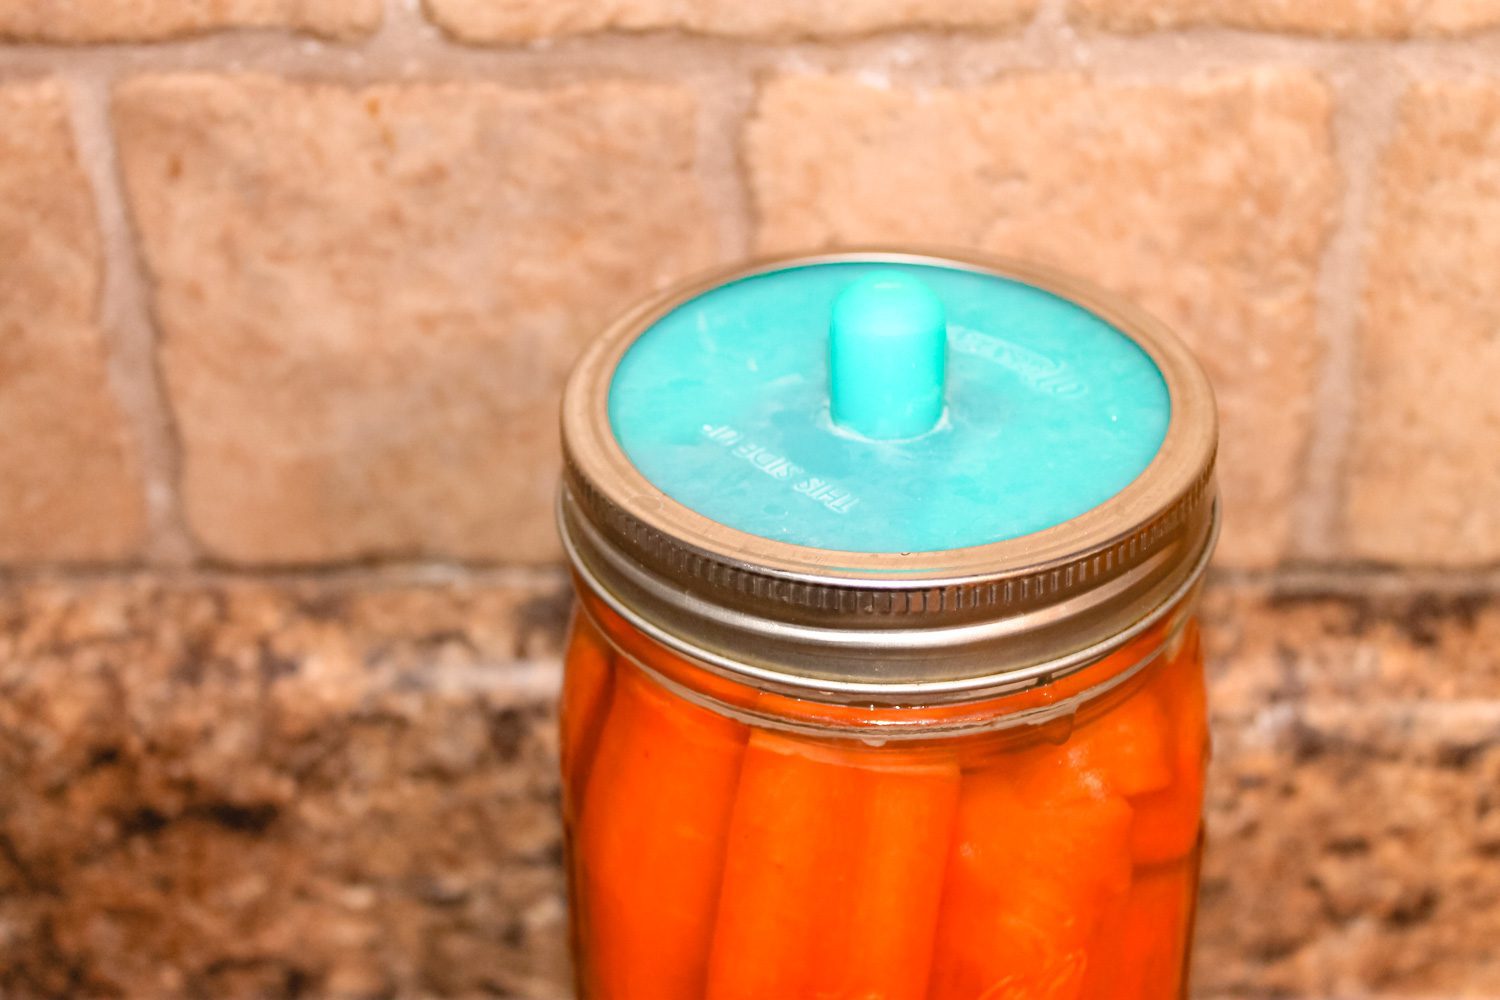
To begin fermenting your carrots, dissolve a couple of tablespoons of sea salt into a cup of water. There is some debate as to whether you should peel the carrot or not. The carrot peel is full of nutrients but sometimes those peels are dirty and have strange spots. I tend to peel mine but have successfully fermented and eaten unpeeled carrots as well. The choice is yours. Cut the carrots into sticks and fill your jar, just below the shoulder leaving enough room to place the weight. Add in a few garlic cloves. Pour in the brine, top with a weight, making sure your carrots stay below the brine and then add an airlock lid.
Now you’ll have to practice some patience. Your carrots won’t be ready to snack on for at least a week.
Since I have a small family, I prefer to make one quart at a time. But if you love carrots or have a large family, you can easily double this recipe to make a half gallon of fermented carrots.
Why Eat Fermented Food?
This is a question that can have quite an in-depth answer. But to keep it short and sweet, the reason you should eat fermented food is for the probiotic benefits. These little fellas are your friends and help to create a happy, healthy microbiome. In addition to the probiotics, fermented foods are rich in enzymes, vitamins and are easy for your body to digest. Fermented foods are basically an enhanced super food that you should make a daily part of your diet.
How to Eat Fermented Vegetables
Fermented carrots are a great way to introduce fermented vegetables into your diet. They are incredibly easy to make and have a mildly sour taste. Kids will love to crunch on them for a snack or at mealtime. My favorite way to eat them, besides straight from the jar, is sliced up on top of a salad. They add a great salty taste alongside some kale, tomatoes, sunflowers seeds and dressing. I haven’t tried it yet but I bet they’d make a great addition to a grated carrot salad.
Tips
When fermenting vegetables, it is best to use a mineral rich salt such as sea salt or pink Himalayan salt. I often use Celtic sea salt in my ferments. The sea salt that I purchase is coarse so it takes longer for it to break down to create the brine. I often use a salt grinder or the back of a wooden spoon to crush the salt crystals so that they dissolve quicker into the water.
During the fermentation process, sometimes you will seem scum on the top of the weight or edges of the jar. This is harmless.
The addition of garlic adds a nice punch of flavor to the carrots. You can leave them out if you’d prefer not to give your carrots a garlic flavor. Other flavoring options include dill, rosemary, thyme or your favorite herb.
I strongly suggest purchasing an airlock lid if you plan to ferment often. If you do not have a lid specifically designed for fermenting, you may need to burp the lid occasionally to release any excess gas.
If your carrots are neatly wedged into the jar, you can get away without using a weight. However, I always seem to have a carrot or two that wants to float on the top so I add the fermenting weight to keep the carrot sticks below the salt water brine.
Tools I Recommend
This post contains affiliate links, which means I make a small commission at no extra cost to you. In any case, I only link to products we actually use on our homestead and that I believe can truly benefit to you. See my full disclosure here.
Wide mouth mason jar or crock
Fermented Vegetables Book (a great starter guide to fermentation)
Cultured Food in a Jar Book (packed full of beginner fermentation recipes)
Watch Video Tutorial on How to Make Fermented Carrots
Fermented Carrots Recipe
Among the easiest ferments to make, especially for beginners, this fermented carrot recipe with garlic is simple and delicious! Make up the salt water brine, cut the carrots and add them to a jar. Within just a short seven days, you’ll have a terrific probiotic-rich food. Easy peasy.
Makes : 1 quart
Ingredients
1/2 lb carrots, peeled and cut into sticks
2 Tbs sea salt
3-5 cloves garlic, optional
Supplies
Wide mouth quart size jar
Fermentation weight
Fermentation airlock lid
Directions
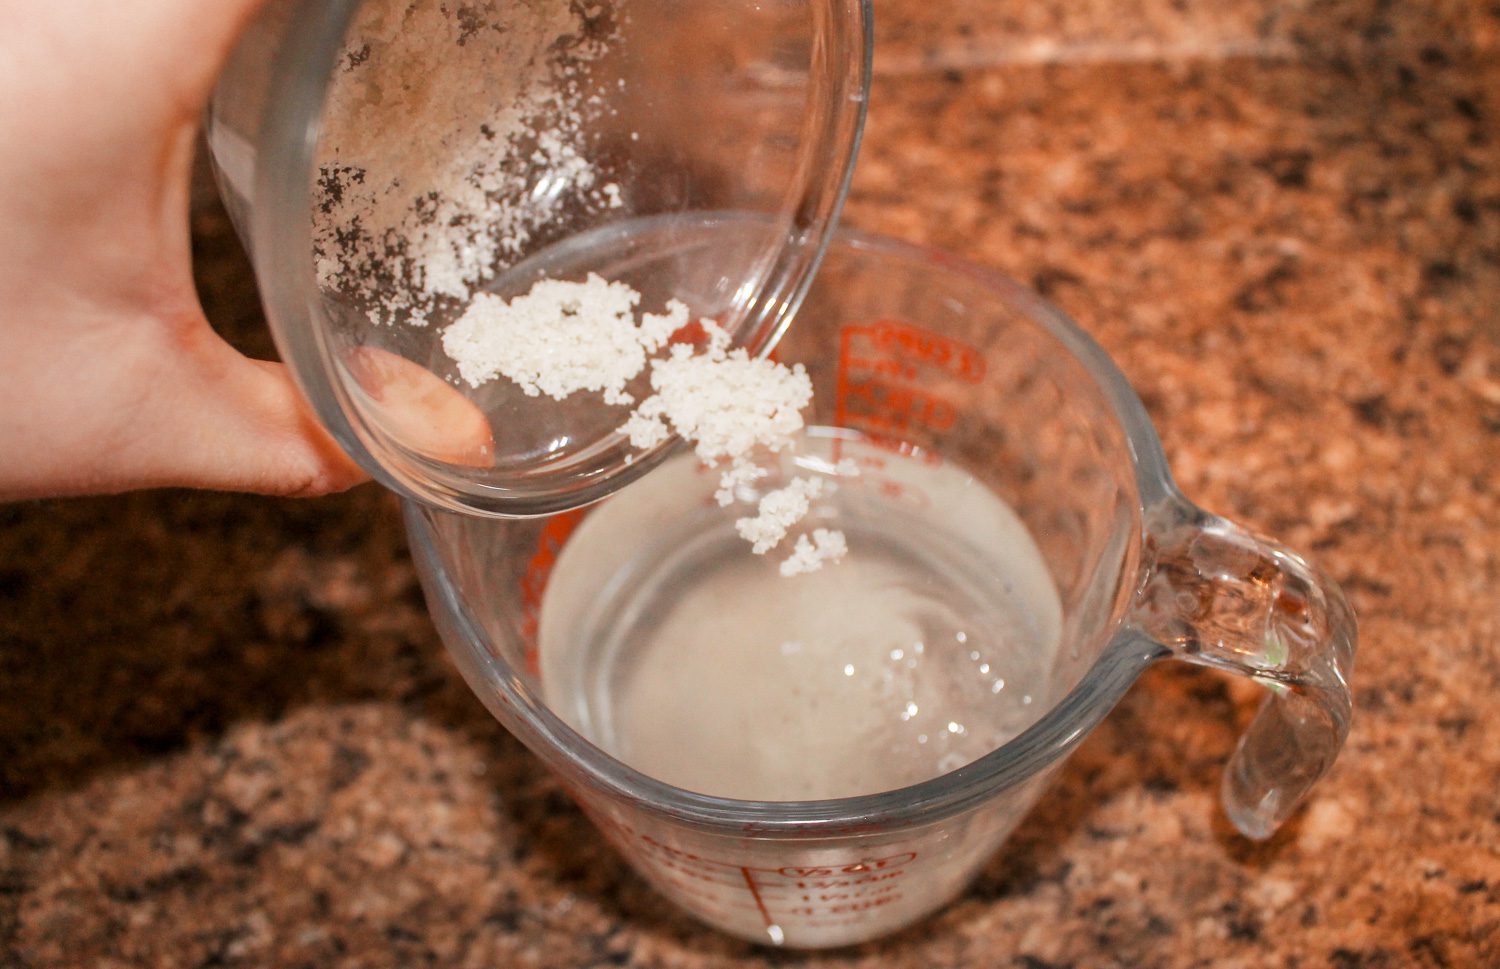
In a measuring cup, dissolve the salt into about a cup to a cup and a half of room temperature water (non-chlorinated). Stir until dissolved.
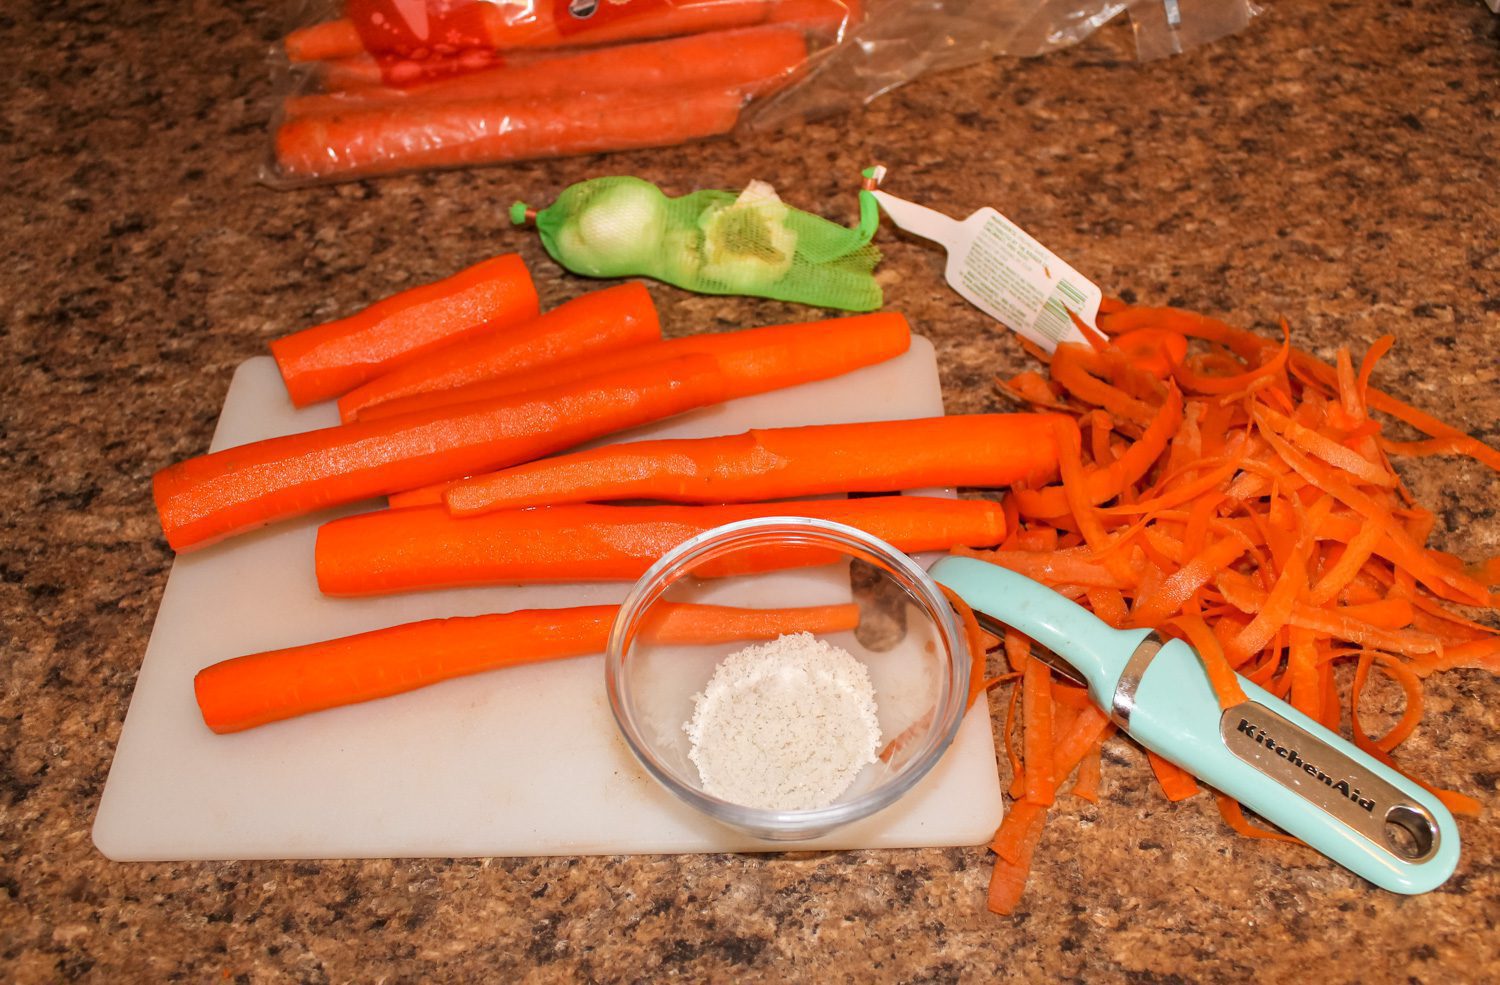
Peel, then slice slice the carrots into small sticks. Add the garlic cloves into the jar. Arrange the carrots, wedging them just under the shoulder of the jar leaving about 1 to 2 inches of headspace. Pour the brine over the the carrots until they are covered completely.
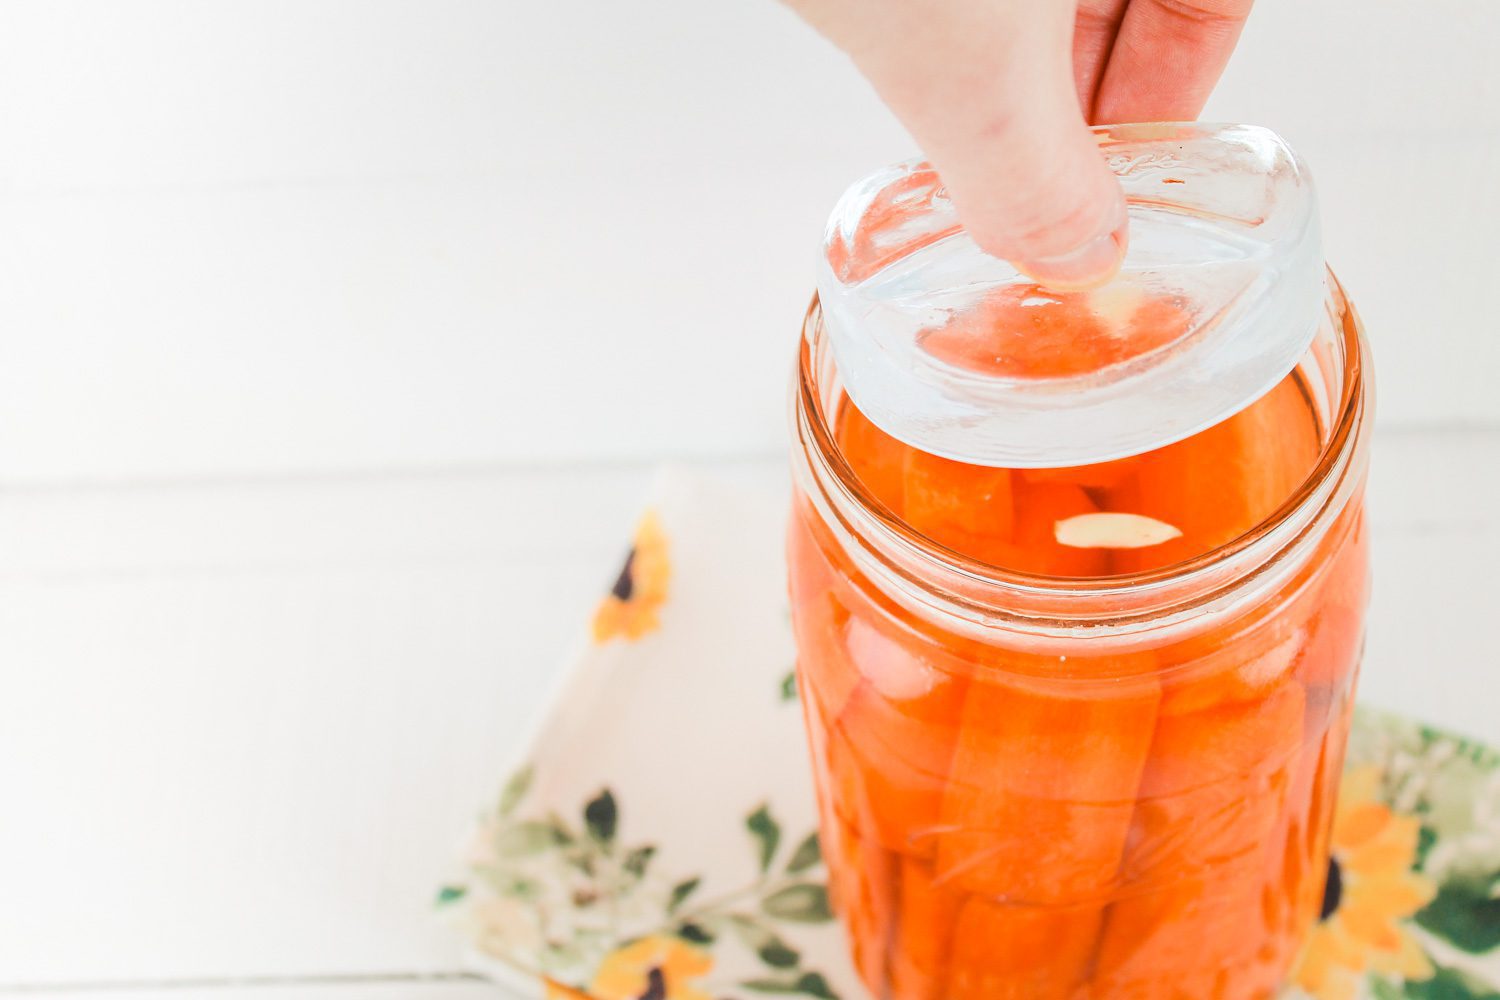
Place a fermenting weight on top to keep the carrots submerged under the brine. Add a fermentation airlock lid or cover with a loose lid. Set the jar away from direct sunlight and allow to ferment for 7-10 days, depending on the temperature of your home. Your fermented carrot sticks are ready when the water is a bit cloudy, the carrots have a less vibrant orange coloring to them and they taste sour.
When finished, remove the airlock lid, cover with a sealed lid and place in the fridge. The fermented carrots can keep up to twelve months if they remain in the refrigerator.
FAQ
What is the Difference Between Pickled Carrots and Fermented Carrots?
Both pickling and fermenting are preservation methods that use acid to preserve the vegetables, however pickling often uses vinegar and heat while fermentation makes use of a salt water brine to transform the environment into lactic acid. Pickled vegetables are heated, killing some nutrients in the process. Fermentation not only preserves the important nutrients, it often enhances the nourishment, while adding gut-supporting probiotics to the jar of fermented carrots.
Are Fermented Carrots Crunchy?
Yes! The salt in the brine helps to harden the pectin cells in the vegetable thus preserving the carrots and keeping them crunchy.
How Long Does it Take to Ferment Carrots?
The warmer your home is, the quicker the carrots will ferment. 7 days is the typical timeframe for a warm environment where 10 days is the minimum amount of time for a cooler environment. Taste test your carrots as they ferment to determine your optimal level of sourness. I find about a week, give or take is ideal for my liking.
How Long Do Fermented Carrots Last?
Fermented carrots can keep for 6 to 12 months, provided they are kept in the fridge.
More Fermented Food Recipes

Fermented Carrot Sticks

Add more nutrients and probiotics into your diet with these flavorful fermented carrots. Learn how to lacto-ferment a bag of carrots with just a little salt, water and a mason jar.
Ingredients
- 1/2 lb carrots, peeled and cut into sticks
- 2 Tbs sea salt
- 3-5 cloves garlic, optional
Instructions
- In a measuring cup, dissolve the salt into about a cup to a cup and a half of room temperature water. Stir until dissolved.
- Peel, then slice slice the carrots into small sticks. Add the garlic cloves into the jar. Arrange the carrots, wedging them just under the shoulder of the jar leaving about 1 to 2 inches of headspace. Pour the brine over the the carrots until they are covered completely.
- Place a fermenting weight on top to keep the carrots submerged under the brine. Add a fermentation airlock lid or cover with a loose lid. Set the jar out of direct sunlight and allow to ferment for 7-10 days, depending on the temperature of your home. Your fermented carrot sticks are ready when the water is a bit cloudy, the carrots have a less vibrant orange coloring to them and they taste sour.
- When finished, remove the airlock lid, cover with a sealed lid and place in the fridge. The fermented carrots can keep up to twelve months if they remain in the refrigerator.


