Simple, sturdy and long-lasting, this teepee trellis is a great way to grow vertically and save space in your garden. Learn how we built this DIY garden trellis with just a few supplies and old tree branches from our property.
Up, up and away they go!
A garden trellis is an amazing tool to have on a homestead. Especially when you have limited space and need to maximize your growing capabilities. There are a variety of different trellis systems to choose from.
But before we get into the specifics, what is a trellis?
A trellis is some type of framework, typically built with either wood or metal. The framework helps to support climbing plants to grow vertically, such as cucumbers or flowers. A trellis can be something as simple as a cattle panel staked to a few T posts. Or a more decorative version such as a lattice panel.
One of our first trellis systems was built using two old barn ladders and some metal fencing. You can learn how we repurposed these items into a DIY garden trellis here. The trellis allowed us to grow more in our small backyard garden and added a unique, decorative touch to our space. Up to 9 pole beans are able to grow on this trellis system which provides us with many months worth of delicious green beans.
This gardening season, we wanted to add to our abundant green bean harvest by creating another trellising system. The plan was to use the garden space my parents lent us on their property to grow more of our own food. Our top two trellis contenders were Kentucky Wonder pole beans and hops (for their medicinal properties).
What kind of vertical gardening system would work for both types of vining plants?
A cattle panel would take up too much space in the garden plot. We didn’t want to purchase a prebuilt trellis as they are often not budget friendly. And we were all out of old barn ladders to use. Plus we needed a unit that was sturdy since my parents property can get pretty windy.
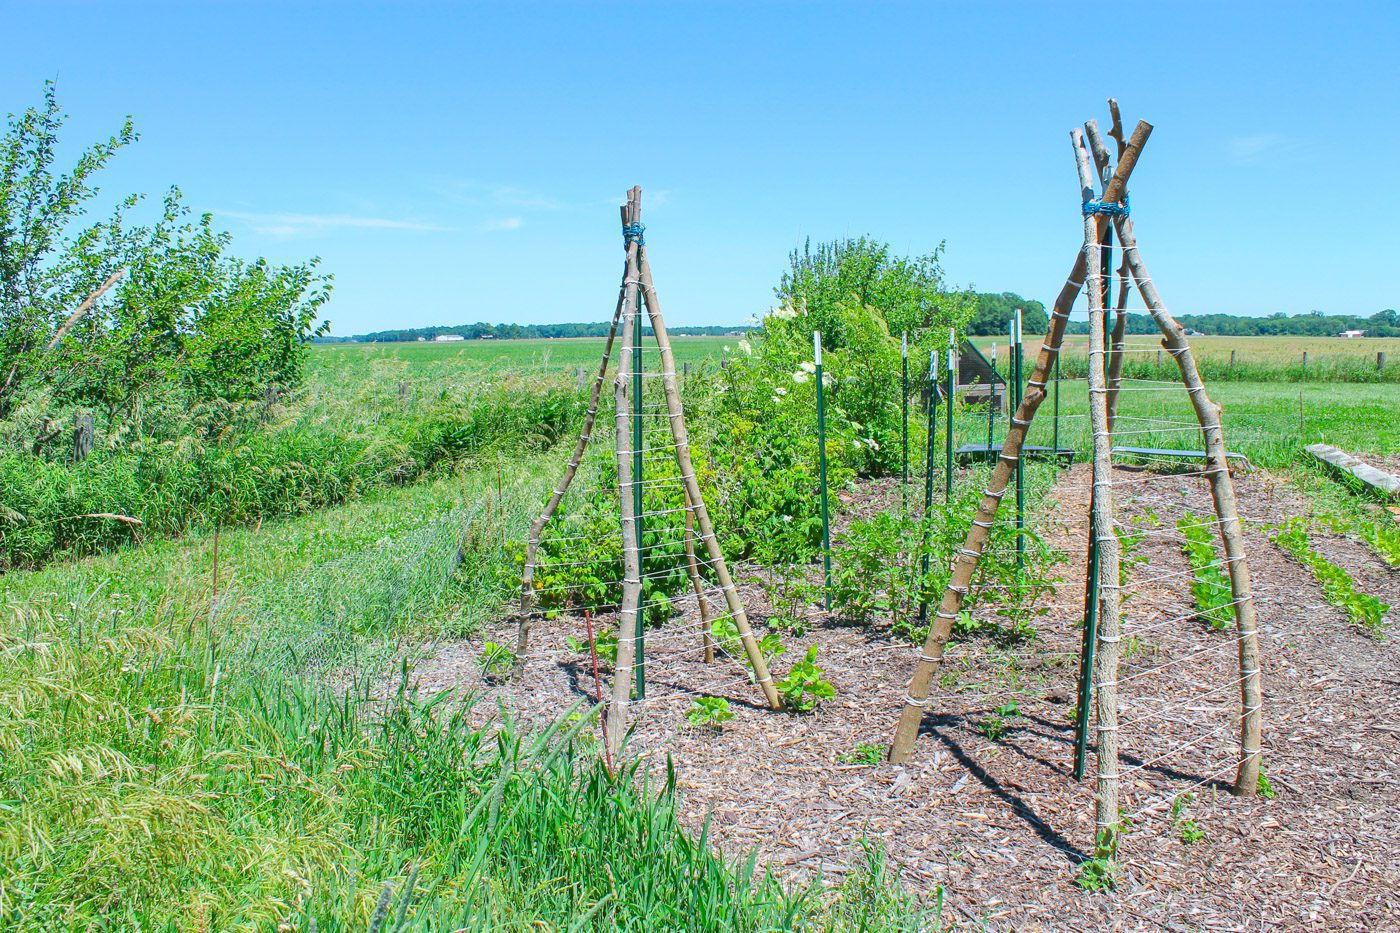
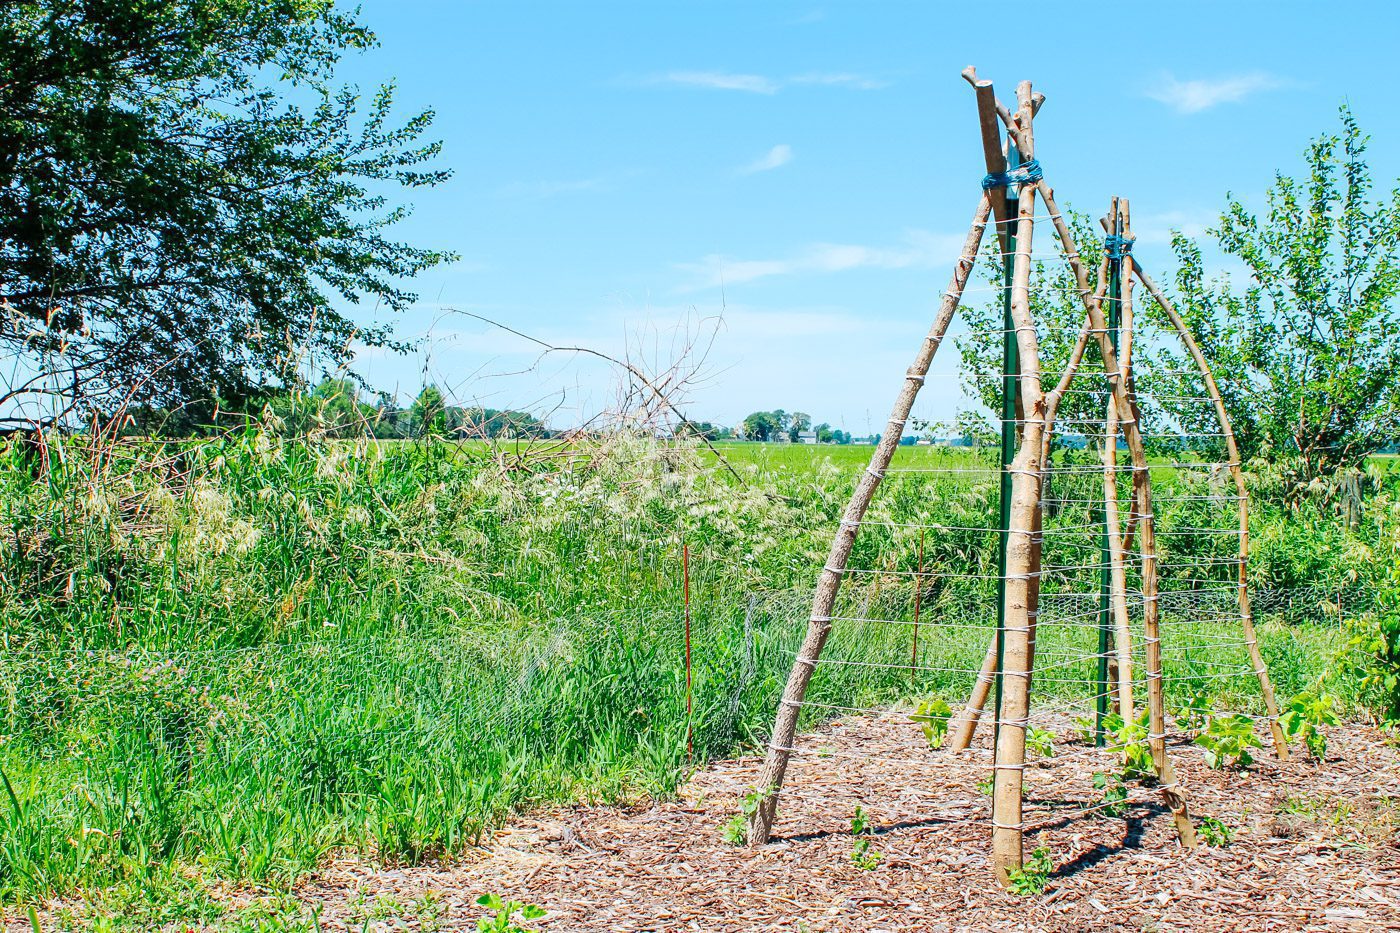
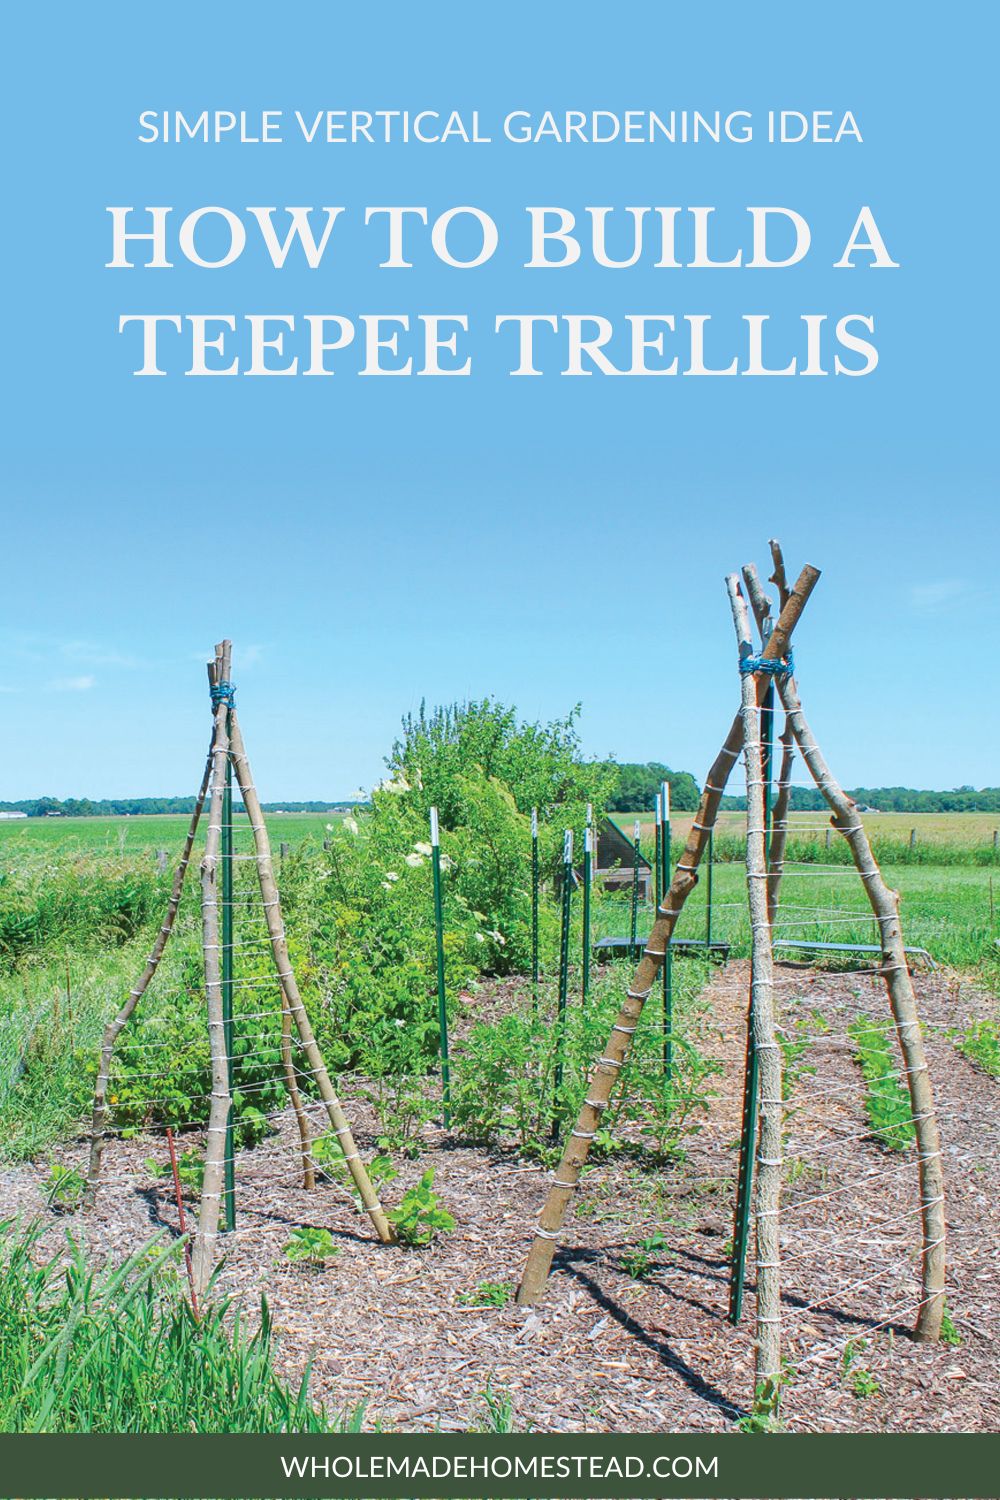
A teepee trellis was the solution.
The teepee trellis would allow us to grow vertically, saving space in the garden and was sturdy and simple to create.
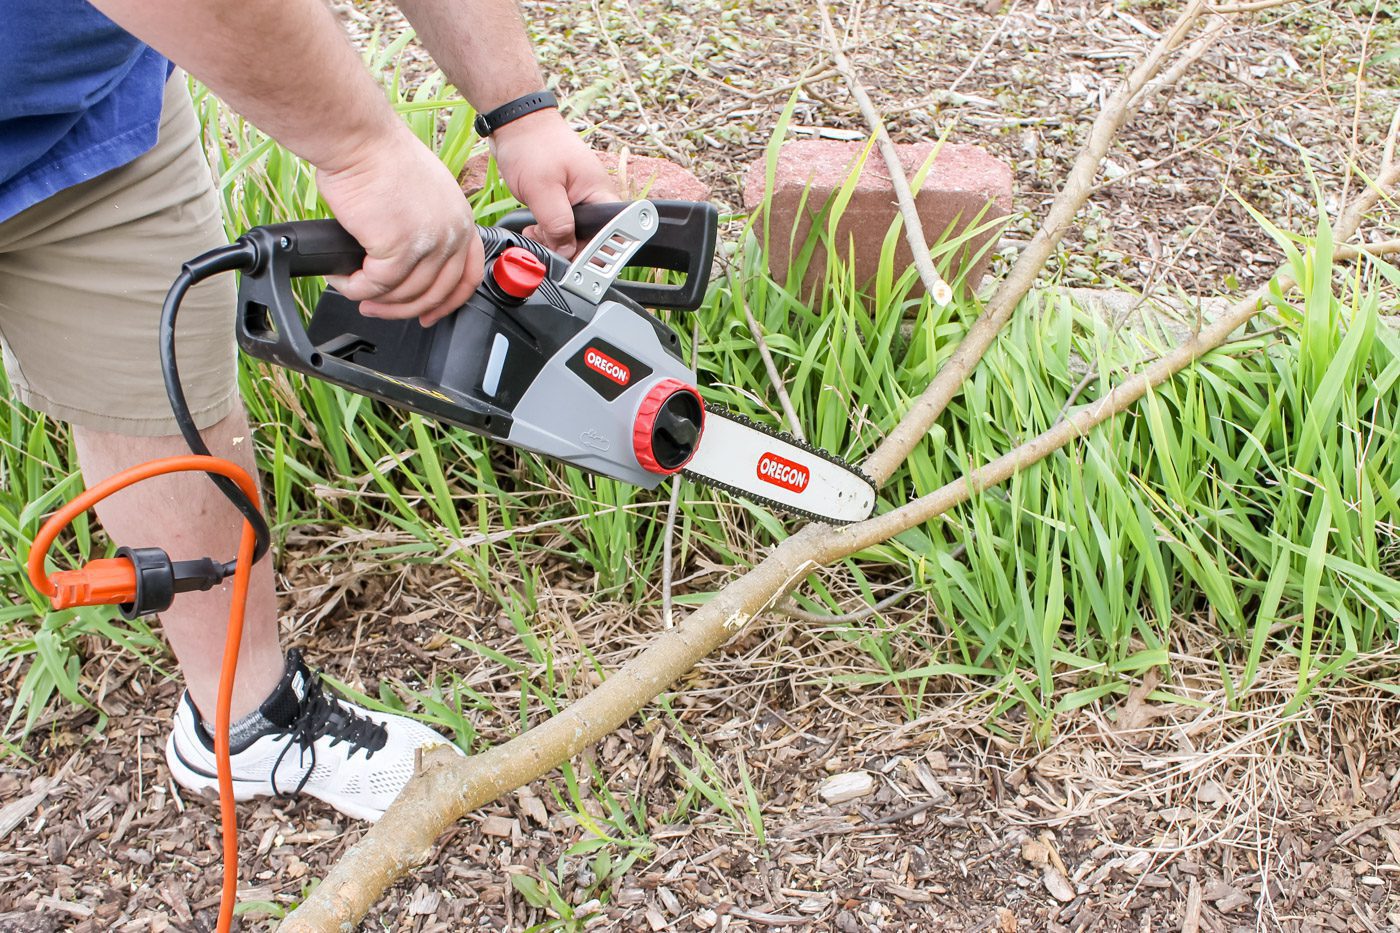
To build your own teepee trellis, all you need is a metal T post, a few wooden branches, wire and twine. We cut down a few tree limbs from our property to use for the trellis but if you don’t have access to any branches, you can use scrap wood, lumber from a hardware shop, wooden rods or even metal pipes. Once you have your chosen wood, you will need to cut them down to size and arrange them around the T post. Secure everything together with several rounds of wire. Adding multiple layers of twine around the branches provides the vining plants with more places to climb.
Best Vegetables to Trellis
Trellises are a great way to help support a plant in a vegetable garden. Some of the best plants to trellis are:
- Pole beans such as Kentucky Wonder, Blue Lake Stringless Bean, Rattlesnack
- Cucumbers
- Luffa
- Peas
- Hops
- Some types of small melons and squash
- Vining flowers

Vertical Gardening Idea
Free up planting space with this teepee trellis. Easy to build using simple materials and provides over 7 feet of above-ground growing space to sow your favorite vining veggies, herbs or flowers.
Supplies to Build a Teepee Trellis
2 8 foot T posts
4 90” posts (such as branches, lumber, wooden rods or emt conduits)
Wire
Thin roping (such as twine, string or nylon braided twine)
DIY Garden Trellis
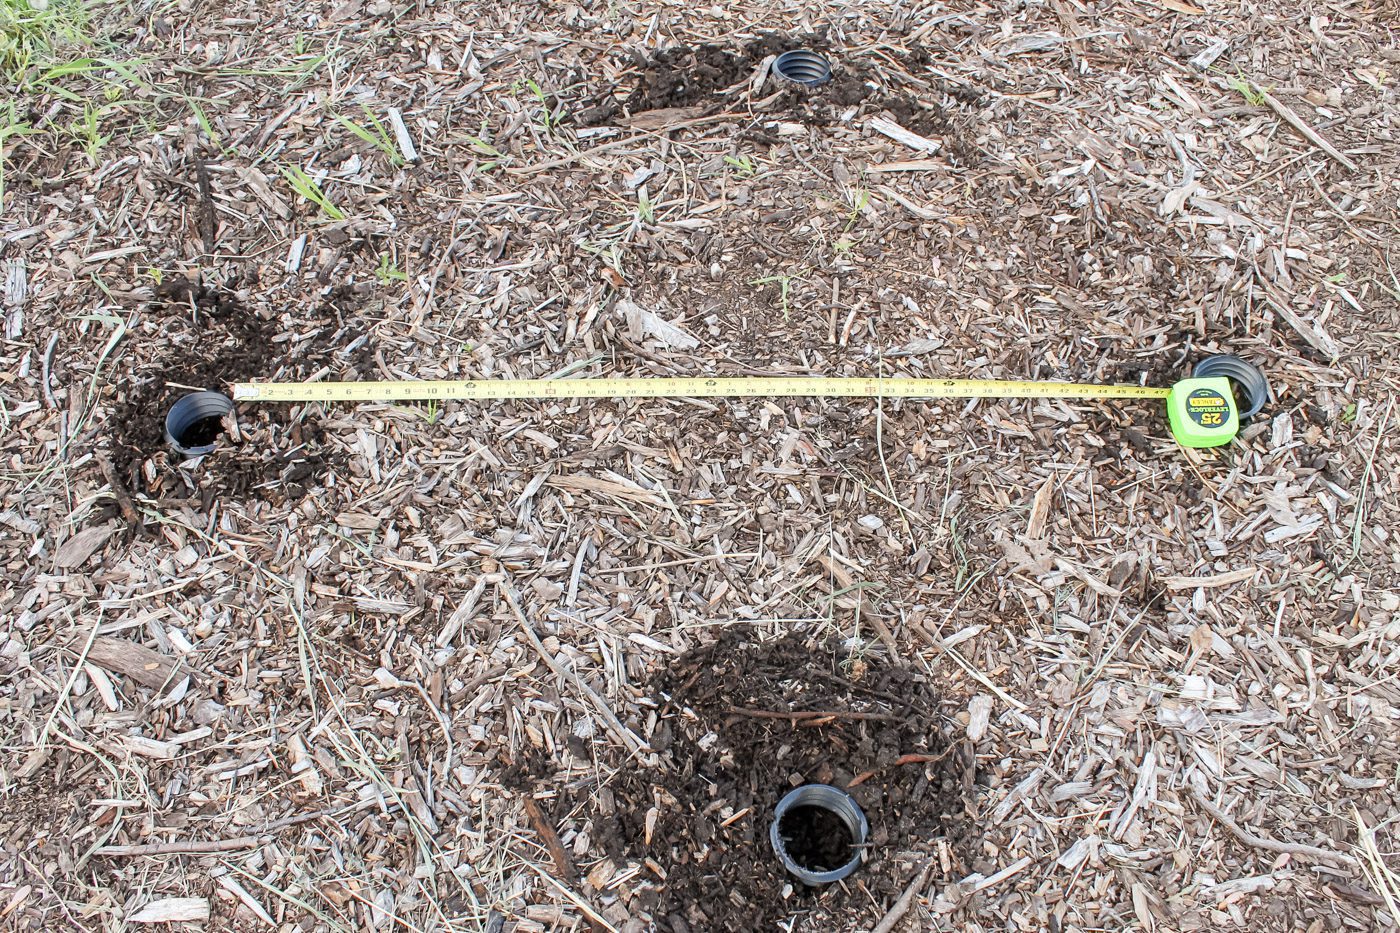
To build the teepee trellis, start by measuring out a 4’ x 4’ circle on the ground. You can add placeholders for where your posts will go, if you desire.
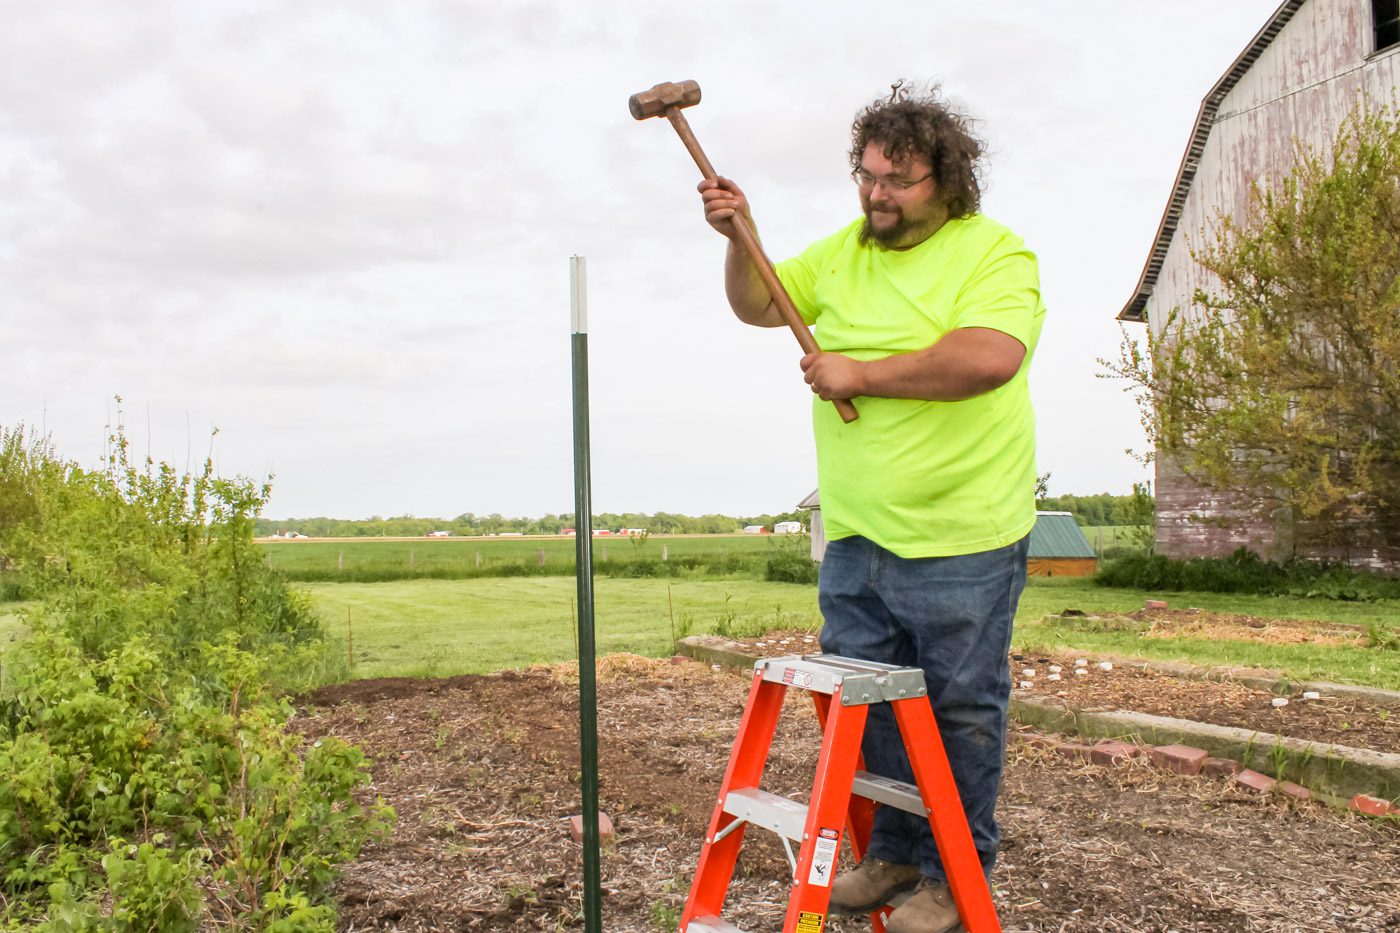
In the center of the circle, place your T post. Use a sledgehammer or fence post driver to pound the post into the ground.
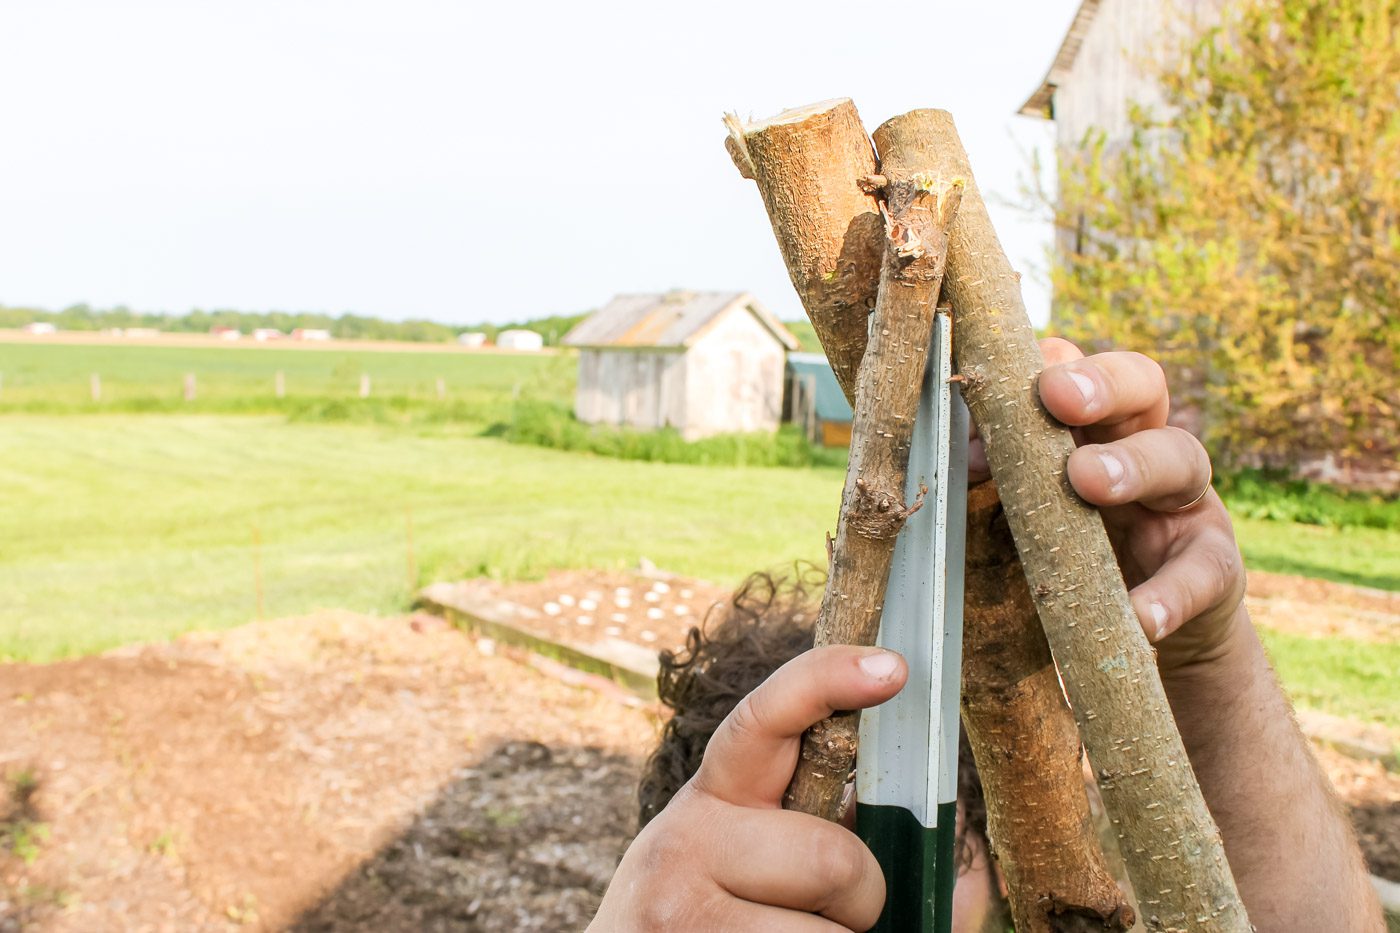
Adding one branch (or your desired post type) at a time, arrange the branches into the shape of a teepee around the center of the T post. When finished, the posts should overlap at the top and be equally spaced from each other on the ground. Optionally, if you plan to walk into the teepee, you can offset the front two branches to create a wider opening.
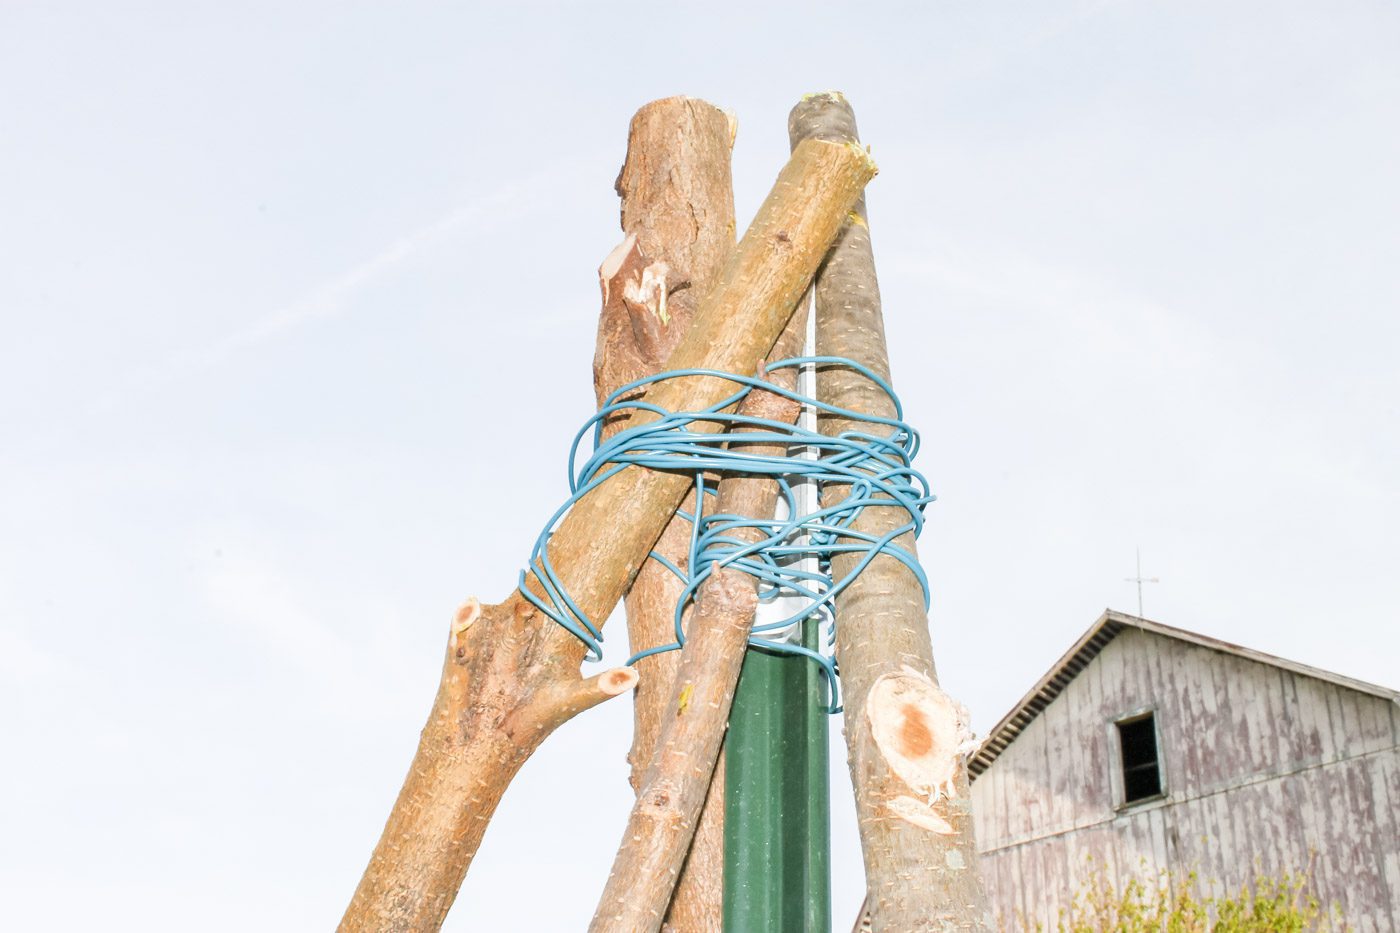
Wrap metal wire or coated garden wire around the center T post a couple of times, then move to the first branch and secure to the center T post. Repeat for the remaining branches. To finish, wrap the wire around the outside to tie all branches all together. This helps to make sure the unit becomes one and does not tilt or tip over from strong winds or storms.
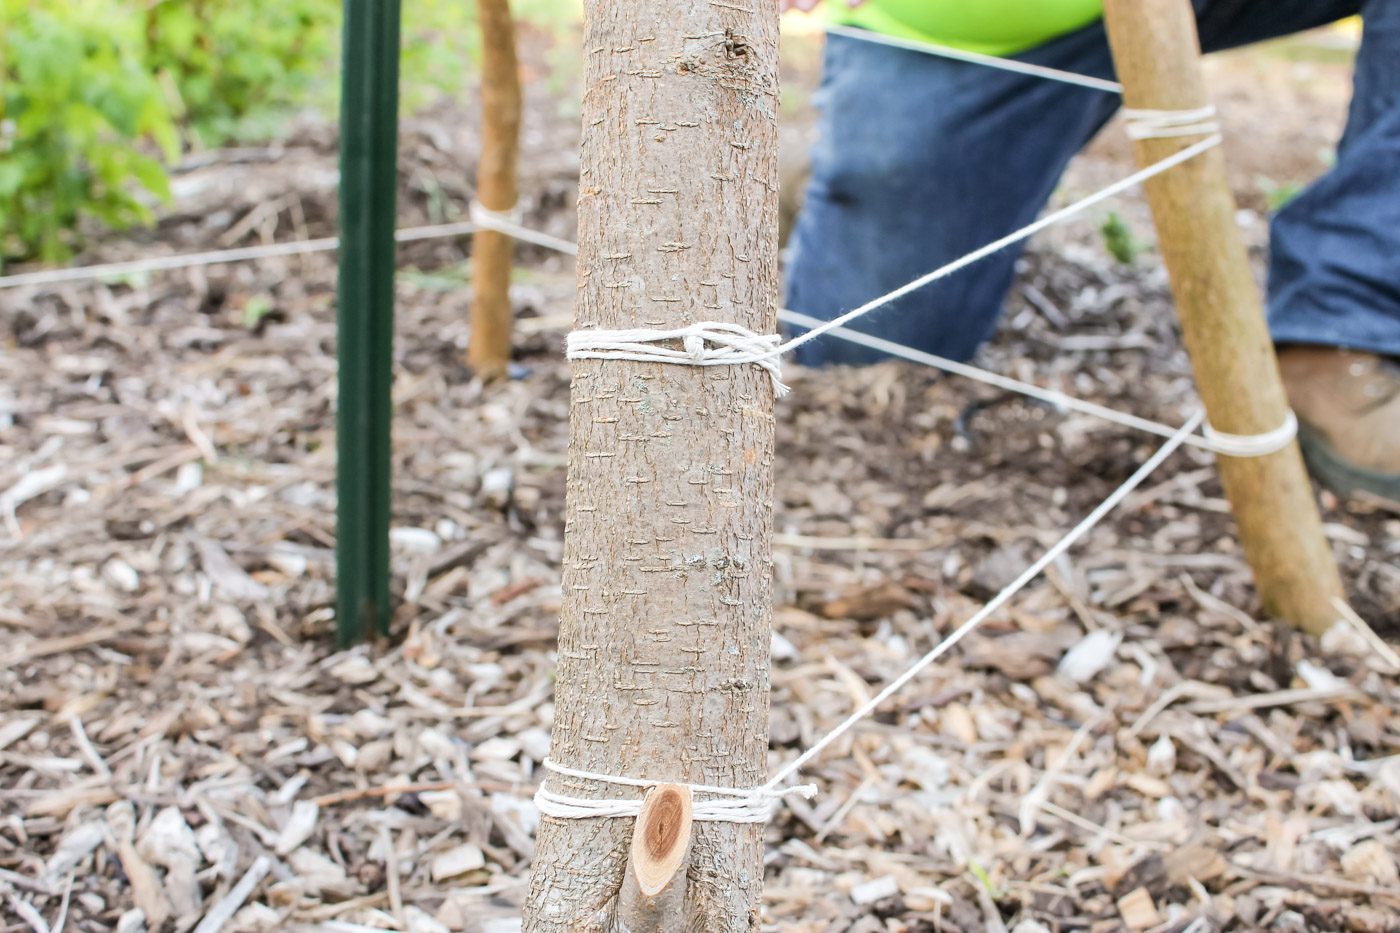
Starting in the front of the trellis, tie some twine around the first branch. The first line should start about 6-8 inches from the ground. Without cutting the twine, string it to the next branch. Loop the twine around the second branch a couple of times then move to the third branch. Loop again and proceed to the fourth branch. Finish off the first line by tying a knot on the last branch. Repeat the process, leaving about 6-10 inches between each line until you reach the top of the teepee trellis.
Place your plants at the base of the trellis, either beside a branch or in between branches just under the first line of twine. This will encourage the plants to vine up your trellis. When the plant grows tall enough to begin vining, you may need to teach it where to go. I have found some plants require a little more persuasion than others.
How to Build a Teepee Trellis
Simple, sturdy and long-lasting, this teepee trellis is a great way to grow vertically and save space in your garden. Learn how we built this DIY garden trellis with just a few supplies and old tree branches from our property.
Materials
- 2 8 foot T posts
- 4 90” posts (such as branches, lumber, wooden rods or emt conduits)
- Wire
- Thin roping (such as twine, string or nylon braided twine)
Instructions
- To build the teepee trellis, start by measuring out a 4’ x 4’ circle on the ground. You can add placeholders for where your posts will go, if you desire.
- In the center of the circle, place your T post. Use a sledgehammer or fence post driver to pound the post into the ground.
- Adding one branch (or your desired post type) at a time, arrange the branches into the shape of a teepee around the center of the T post. When finished, the posts should overlap at the top and be equally spaced from each other on the ground. Optionally, if you plan to walk into the teepee, you can offset the front two branches to create a wider opening.
- Wrap metal wire or coated garden wire around the center T post a couple of times, then move to the first branch and secure to the center T post. Repeat for the remaining branches. To finish, wrap the wire around the outside to tie all branches all together. This helps to make sure the unit becomes one and does not tilt or tip over from strong winds or storms.
- Starting in the front of the trellis, tie some twine around the first branch. The first line should start about 6-8 inches from the ground. Without cutting the twine, string it to the next branch. Loop the twine around the second branch a couple of times then move to the third branch. Loop again and proceed to the fourth branch. Finish off the first line by tying a knot on the last branch. Repeat the process, leaving about 6-10 inches between each line until you reach the top of the teepee trellis.
- Place your plants at the base of the trellis, either beside a branch or in between branches just under the first line of twine. This will encourage the plants to vine up your trellis. When the plant grows tall enough to begin vining, you may need to teach it where to go. I have found some plants require a little more persuasion than others.
Pin for Later


Trackbacks/Pingbacks