Preserve your herb harvest to use all year long by learning how to properly dry and store your homegrown herbs.
This post contains affiliate links, which means I make a small commission at no extra cost to you. In any case, I only link to products we actually use on our homestead and that I believe can truly benefit to you. See my full disclosure here.
Drying herbs is such a rewarding experience. In the spring, you plant the herb and water and nurture it until it grows big and strong. When it comes time to harvest, you gently pick off the appropriate pieces, tie them with twine and hang them up to dry. You get the privilege to be a part of every step of the process. And once complete, you can use that herb however you need – in cooking, soap making, medicinally or even in a homemade cleaning product.
I find joy in herbalism, learning the beneficial properties in each herb. When it comes time to dry the herbs, I often struggle during the peak of the gardening season to find enough space to dry each herb I grew. If you had entered our home this past summer, you would have found herbs drying on a coat rack inside the entryway, cayenne drying on a screen in the office, stacks of plastic crates drying everything from yarrow to chamomile and even hangers holding bunches of lavender and echinacea.
Unusual is what I believe many of our friends think when they see the dried plants strung up around our home.
But when they figure out how amazing these little herbs are – such as having the ability to heal headaches, tame tummy troubles or soothe burns – they are intrigued and want to know more.
How to Preserve Your Herbs
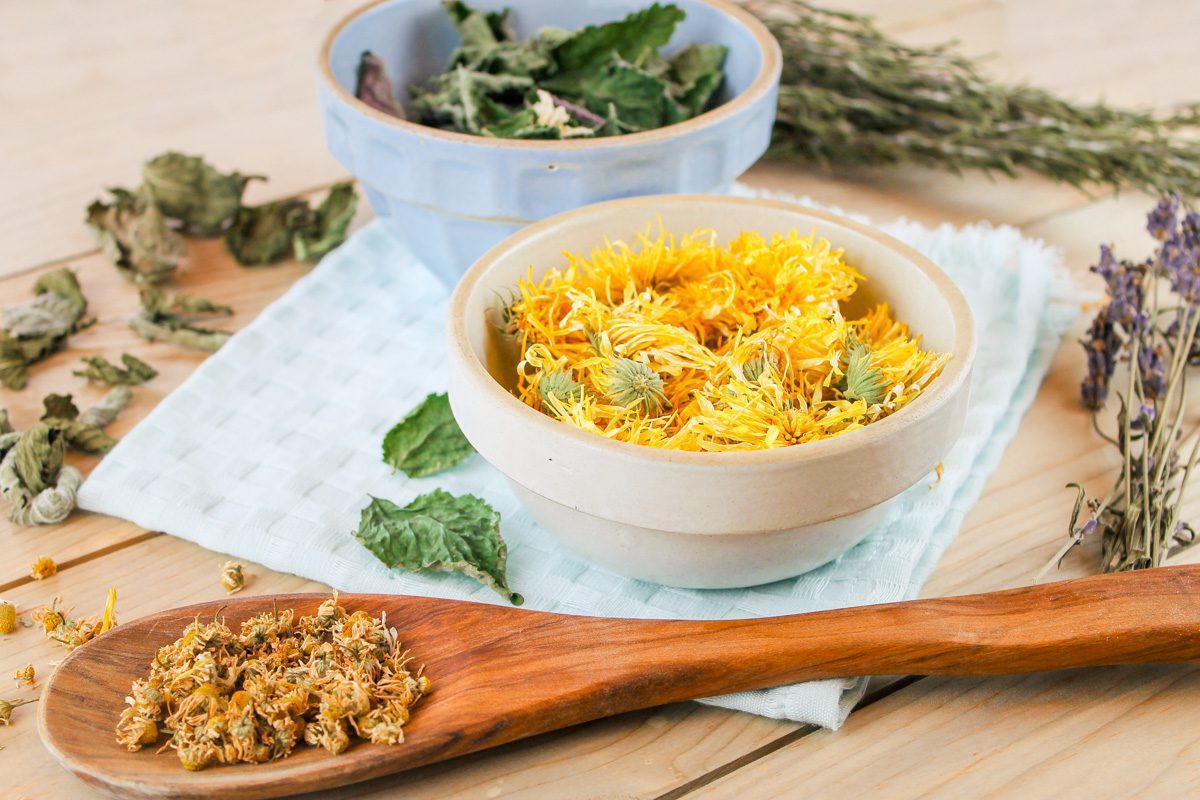
Fresh herbs come in an abundance when it’s warm and sunny out. It’s easy to pick some sage to add to your dinner. Or clip the flower of a calendula plant to bring down inflammation in your foot because you dropped a brick on it … not that I would ever do such a silly thing.
But what do you do in the winter when fresh herbs are not available?
Preserve! When there is a bounty of herbs during the spring and summer months, harvest and dry them so that you can have a plethora to use throughout the winter season. There are plenty of easy ways to dry herbs. Here are a few favorites.
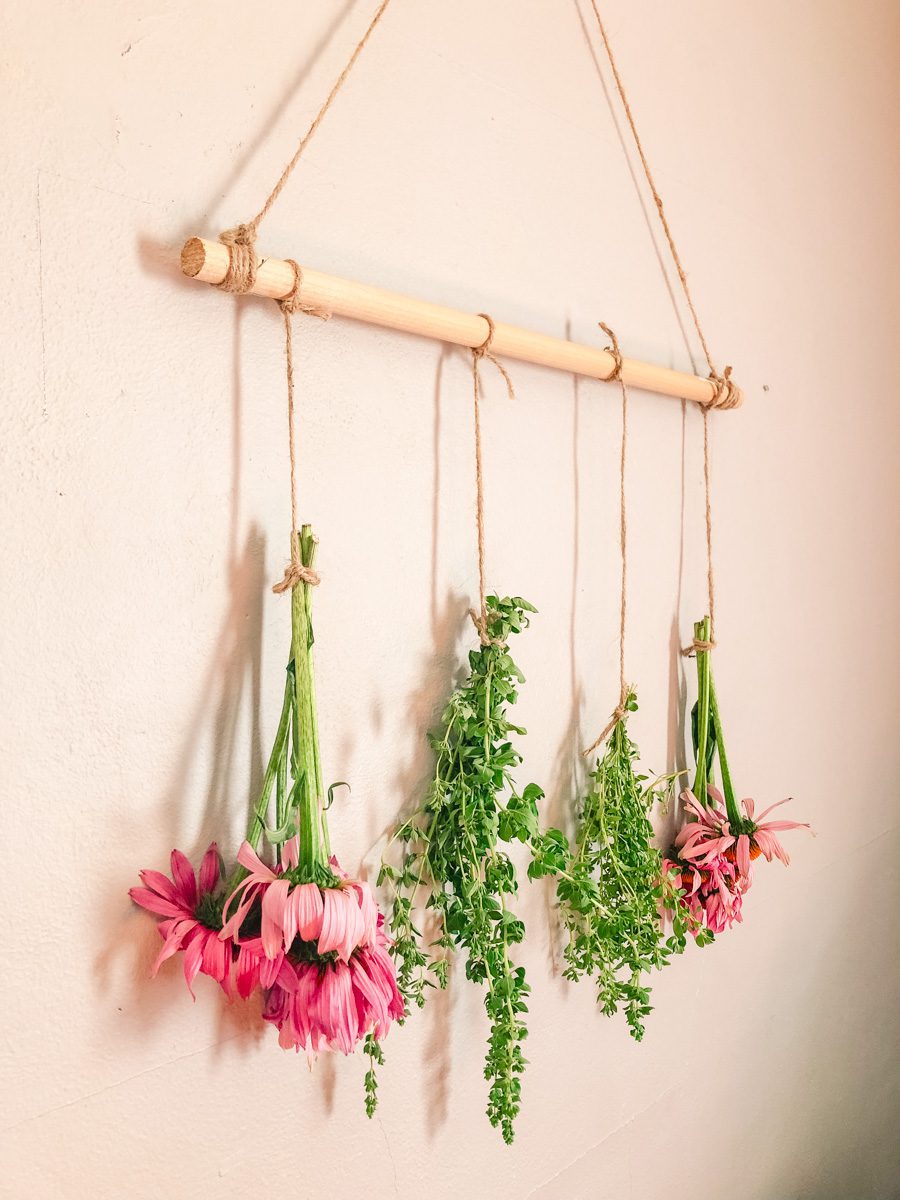
Drying Herbs By Hanging
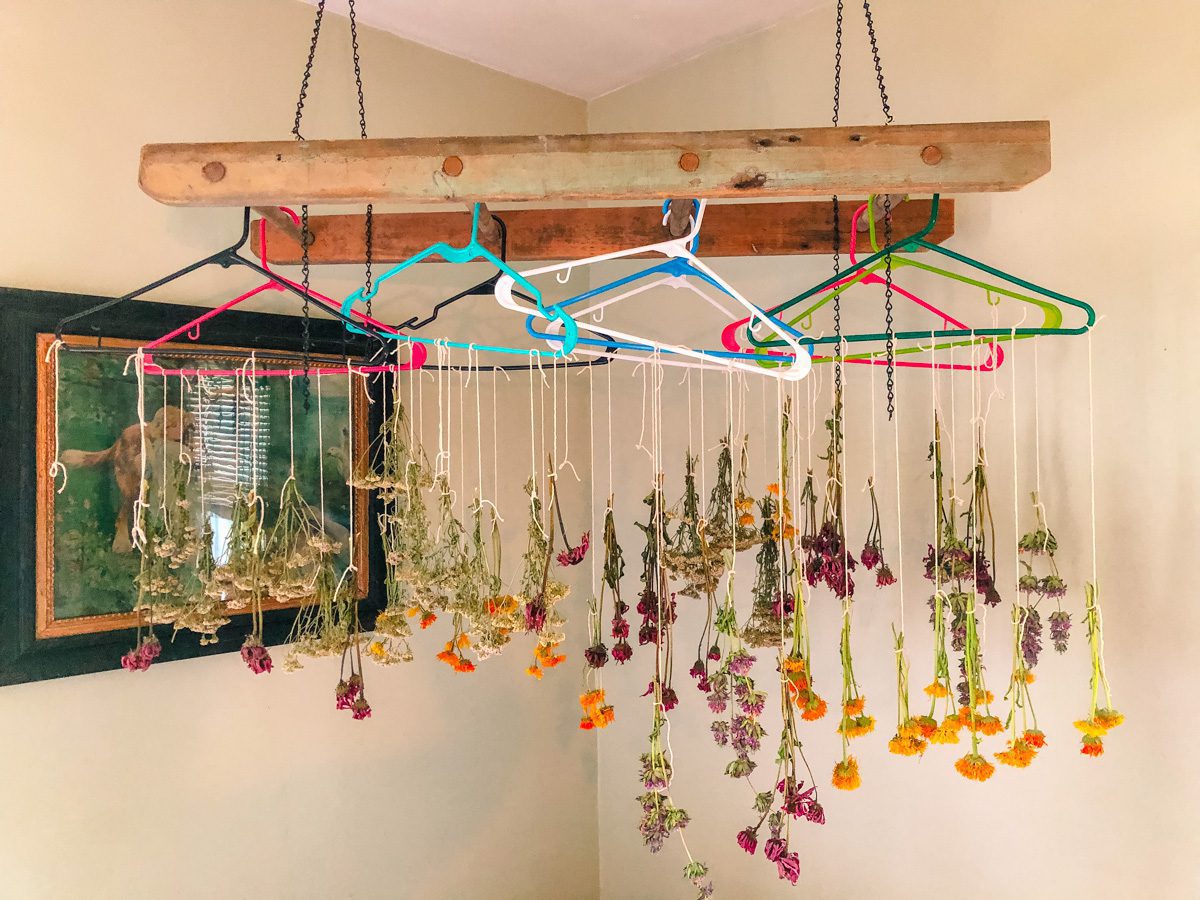
A great space saving way to dry herbs is to hang them up. Gather them in small bunches, tie with twine and hang in an area with ample airflow. This technique works well with herbs that have long stems such as lavender, yarrow, thyme and bee balm.
Get creative! You don’t need special equipment or a fancy shelf to hang the herbs from. I have used coat racks and even a dowel rod from a previous project with twine attached to it and hung from a nail on the wall. Here are a few places you can hang your herbs from:
- Coat rack
- Pot rack
- Ladder
- Hanger
- Shelf
- Wooden clothes drying rack
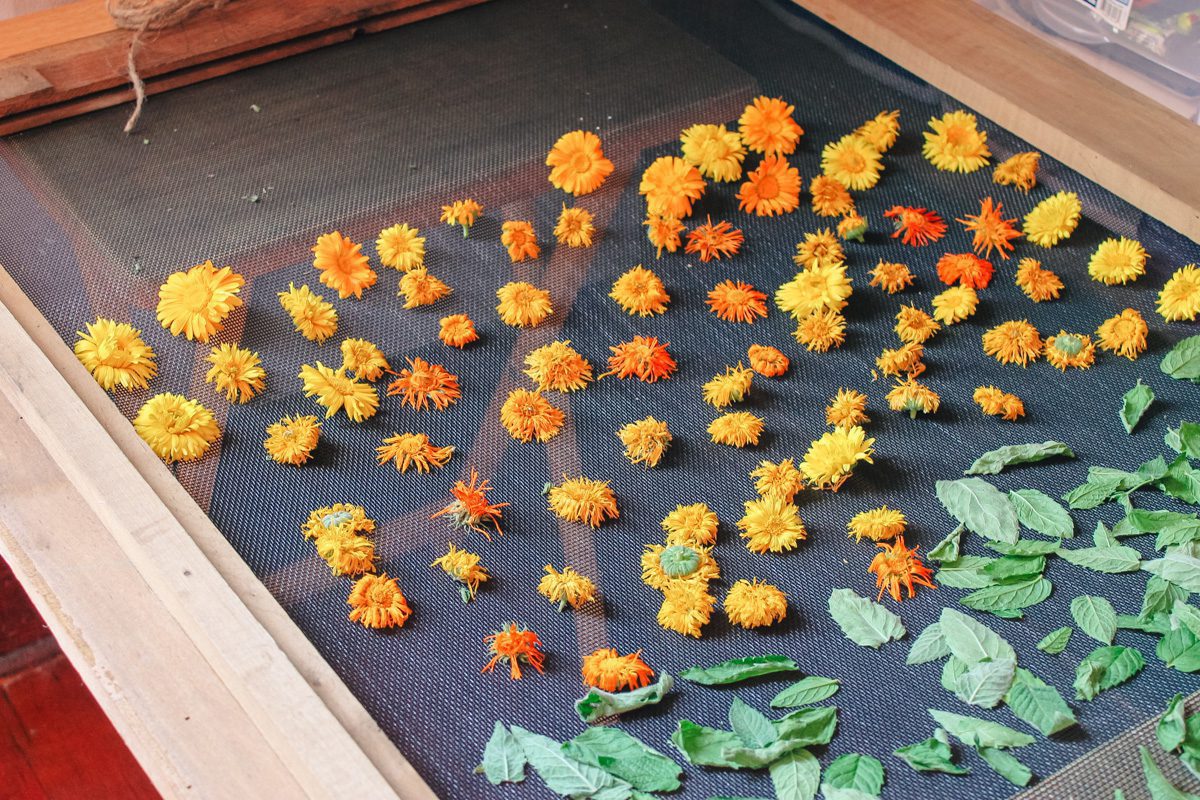
Drying Herbs Using Drying Racks
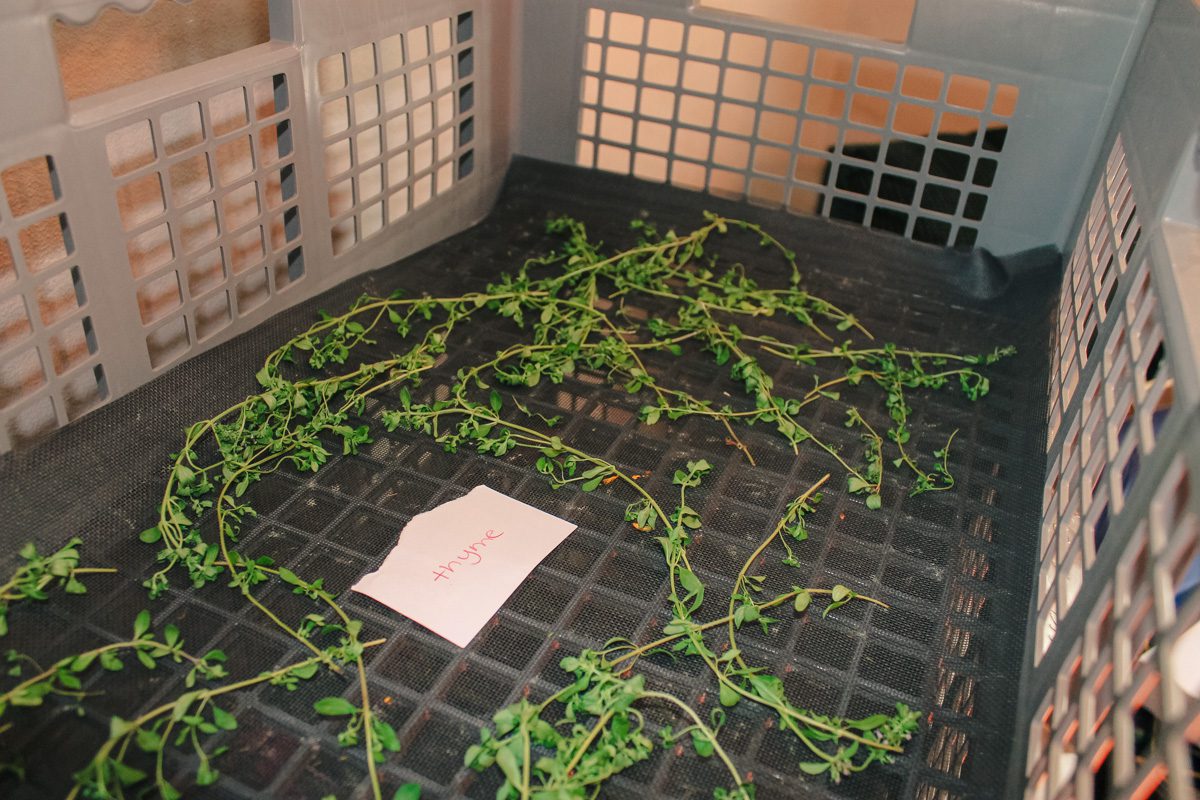
Another great option for drying herbs is to place them on a drying rack. There are racks that you can purchase online but they easiest and cheapest way is to create them yourself. Simply take a wire shelf and lay some window screen material over it. It’s really that simple!
I found some used plastic crates at a garage sale last summer. I placed window screen material in each crate, stacked them up on top of each other and dried my herbs.
Drying racks are great for many herbs such as mint, sage, lemon balm and chamomile. To dry herbs more evenly, cut into small pieces with scissors. Doc Jones from the Homegrown Herbalist prefers to use a paper cutter to chop the herbs into uniform parts.
Other great DIY drying rack options are:
- Mesh hanging organizer
- Picture frame with the center removed and window screen stapled to the edge
- Metal shelf
- Wire shoe rack
- Wire baking rack
Drying Herbs in a Paper Bag
A simple brown paper bag can be an effective way to dry herbs. Grab a paper bag from a grocery store or a lunch bag. Place your herbs inside, leave open and give it a shake once a day. The paper will wick away the moisture from the herbs until they are dry and crumbly.
Drying Herbs in a Dehydrator
Using your dehydrator can be a convenient way to dry herbs. I personally do not prefer this way but for those that are in a hurry or have limited space, a dehydrator is a good choice. Place the herbs in a single layer on the drying sheet. Dehydrate on the lowest temperature setting possible. Remember heat kills the medicinal properties of an herb. So don’t leave them in the dehydrator for too long.
Watch Video Tutorial
Helpful Tips to Successfully Dry Herbs
- Drying times varying. It can take a few days to several weeks depending on your environment and how thick the piece is that you are trying to dry. You will know when the herb has finished drying when it is no longer soft or wet. It should crumble in your hands and easily come off of the stem when plucked.
- When drying your herbs by hanging, do not make the bunches too big or the herbs will mold.
- Never dry your herbs in the sun.
- Never dry herbs in your oven if you plan to use them medicinally. The heat will kill any medicinal properties of the herb.
- Herbs typically have a shelf life of 2 years.
How to Store Your Dried Herbs
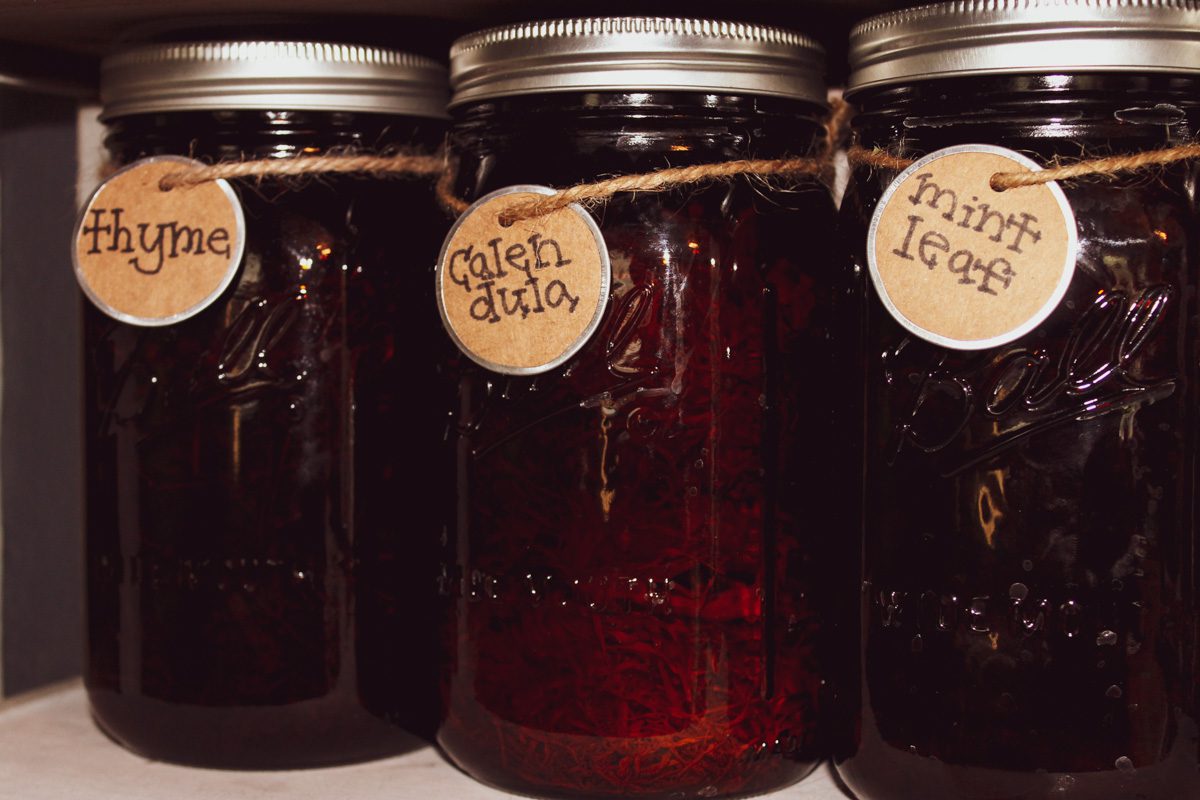
Now that your herbs are dry, they are ready to be stored away. You can store them whole or grind them into a powder. Spice grinders or blenders are great options to create herbal powders.
Store your herbs in an airtight container such as a mason jar. I use all sorts of containers to store my herbs but my favorite are the Ball amber glass jars. To label your jar, you can use a permanent marker or a removable label. For a fancier look, try these stickers on Etsy.
Place your storage container in a cool, dark place. Sunlight can be harmful to herbs. In our home, I store some of our herbs in the basement and some of them in our kitchen. I think they are beautiful when they are on display for all to see.
Pin for Later


Such a helpful blog for those of us who are starting to dry herbs too!
Herbs are so pretty so I love the idea of hanging them in an artistic way!
Who knew God created such wonderful plants for our healing, many that are already growing right around us!