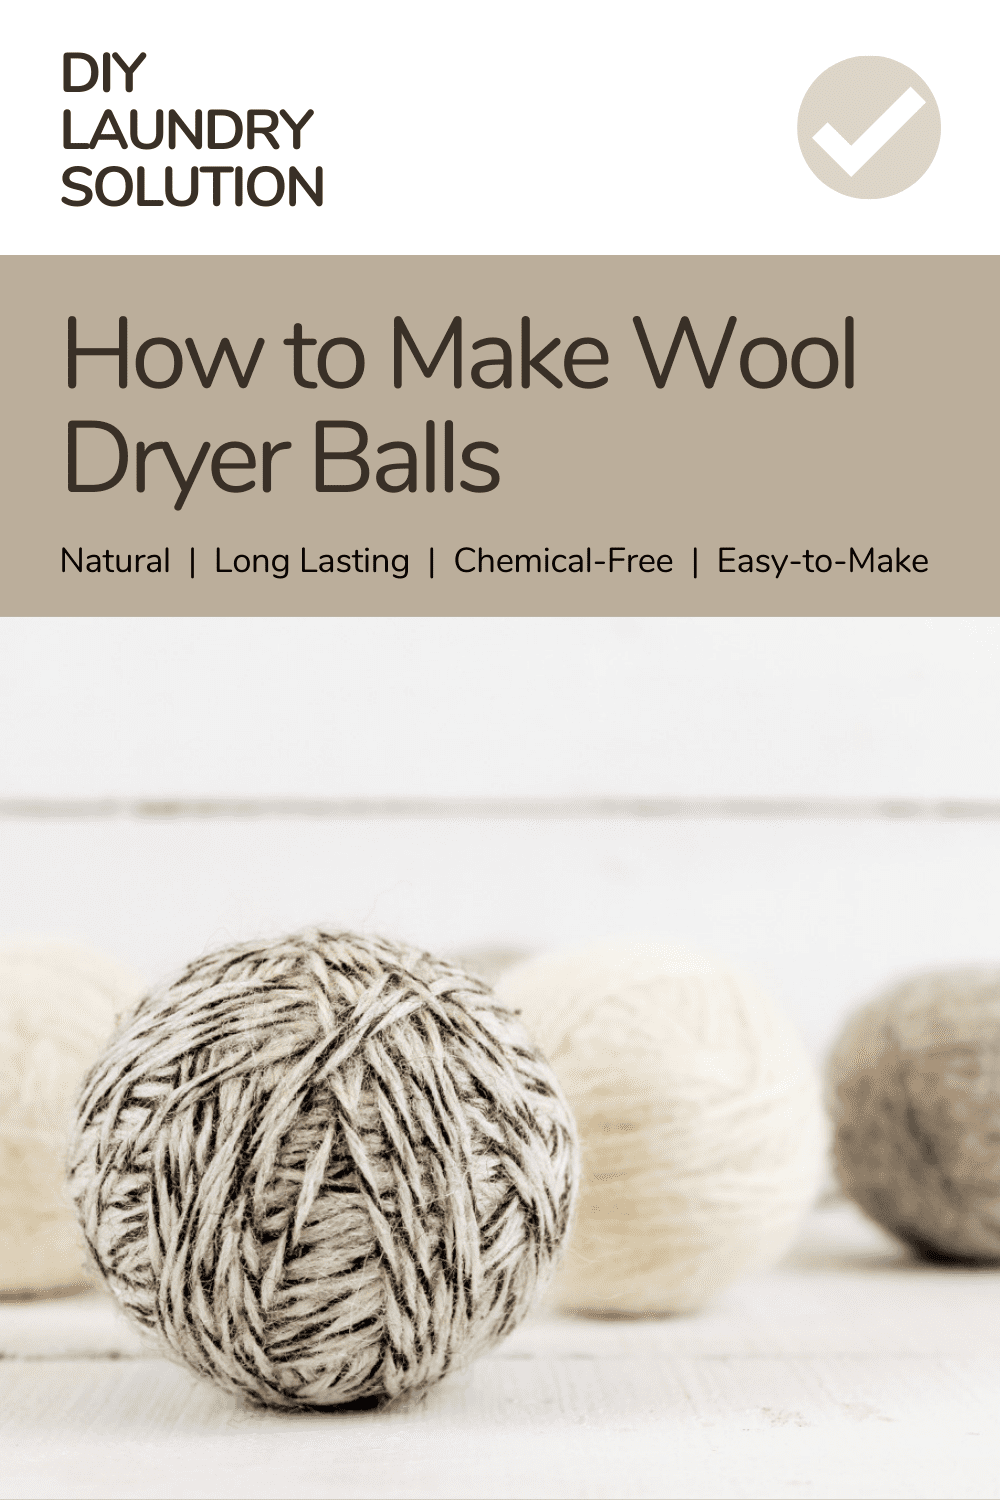
Skip the chemical laden dryer sheets. Instead, learn how to make a set of long lasting, natural wool dryer balls to soften your laundry and reduce drying time.
DIY Dryer Balls
Money-saving. All-natural. Those are two phrases I like to abide by on our homestead.
This past spring our home went through a huge detox. We tossed out almost our entire cabinet of commercial cleaners and swapped our body products for homemade ones. We also changed up our diet by adding in more herbs, fermented foods, nutrient-rich bone broth and freshly ground flour.
In addition to removing toxics from our home, we changed up the way we did laundry. Instead of using liquid fabric softeners or dryer sheets, we opted for a more natural, budget-friendly option. DIY dryer balls.
Although the scent of store bought dryer sheets and fabric softeners were quite pleasant, I did not want the chemicals in them effecting our bodies adversely. Plus, with all the shortages in the grocery stores happening, having reusable dryer balls saved us hassle and money.
Sure, you can buy dryer balls online. But why not make them yourself? They are simple and inexpensive to create. All you need is 100% wool yarn, a needle and some pantyhose or knee highs. I find they are easiest to make after dinner while watching a good movie.
So grab a skein of yarn, pop in your favorite flick and start making some dryer balls for your family! You’ll love having static free, fragrant clothing without those pesky chemicals.
How Do Dryer Balls Work?
The wool balls bounce around in the dryer, separating the layers and drawing in moisture from the laundry. Water from the balls is then released into the air creating a humid environment which helps with static cling and reduces drying time.
What Kind of Yarn Do You Use for Dryer Balls?
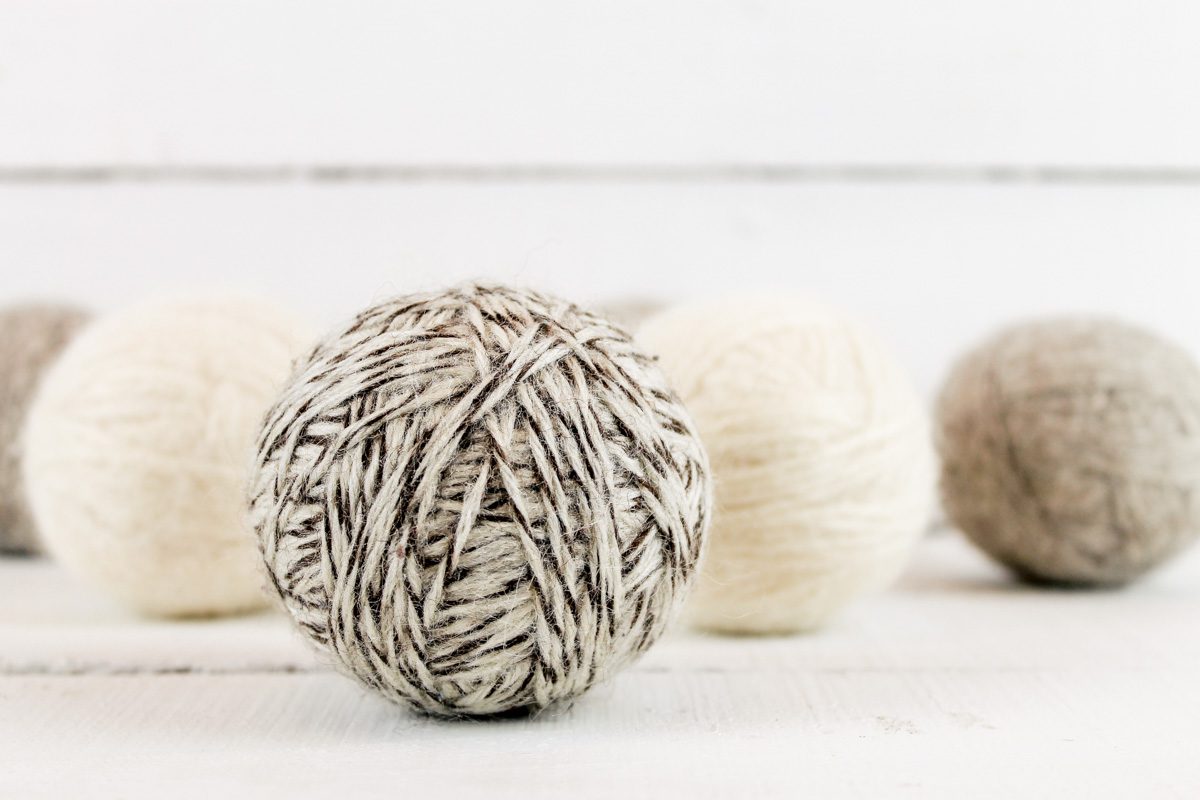
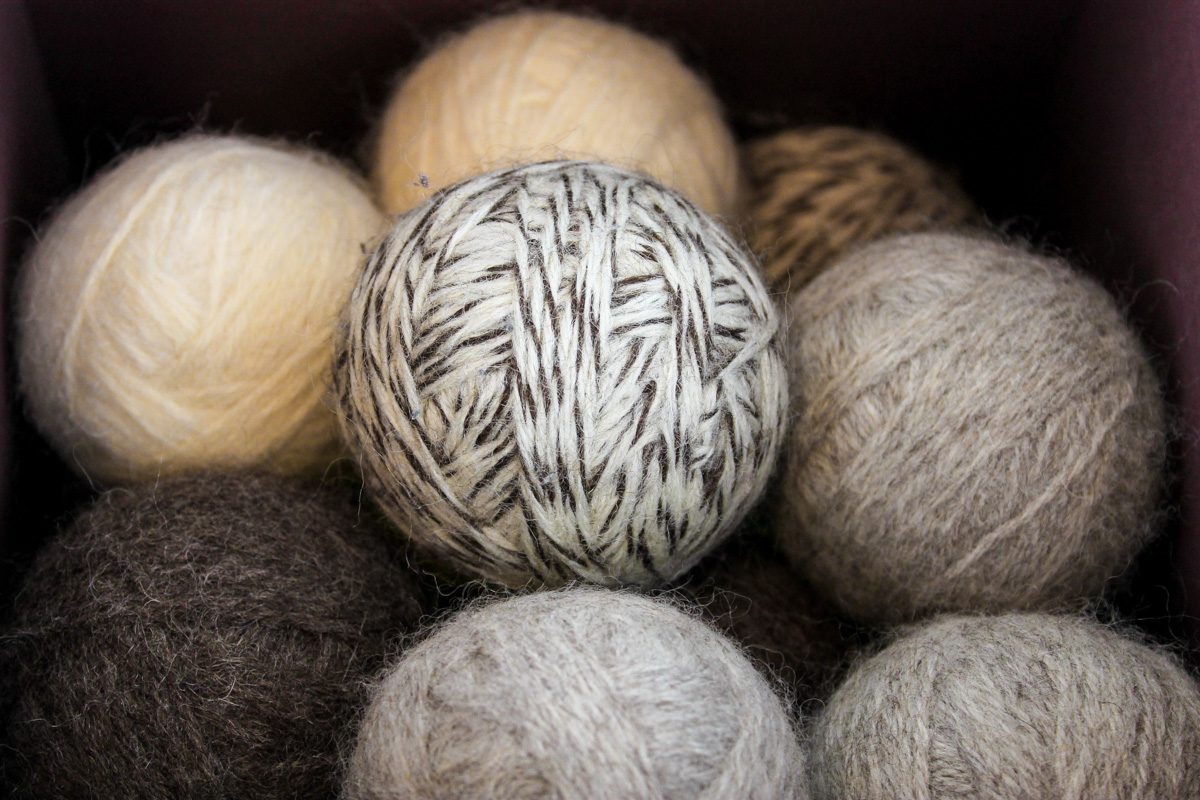
100% pure wool is best for making dryer balls from yarn. I like to purchase my wool yarn from Hobby Lobby but there are many other great options available online and sometimes locally. A skein of yarn from “I Love This Wool” brand is 220 yards and makes a total of three dryer balls.
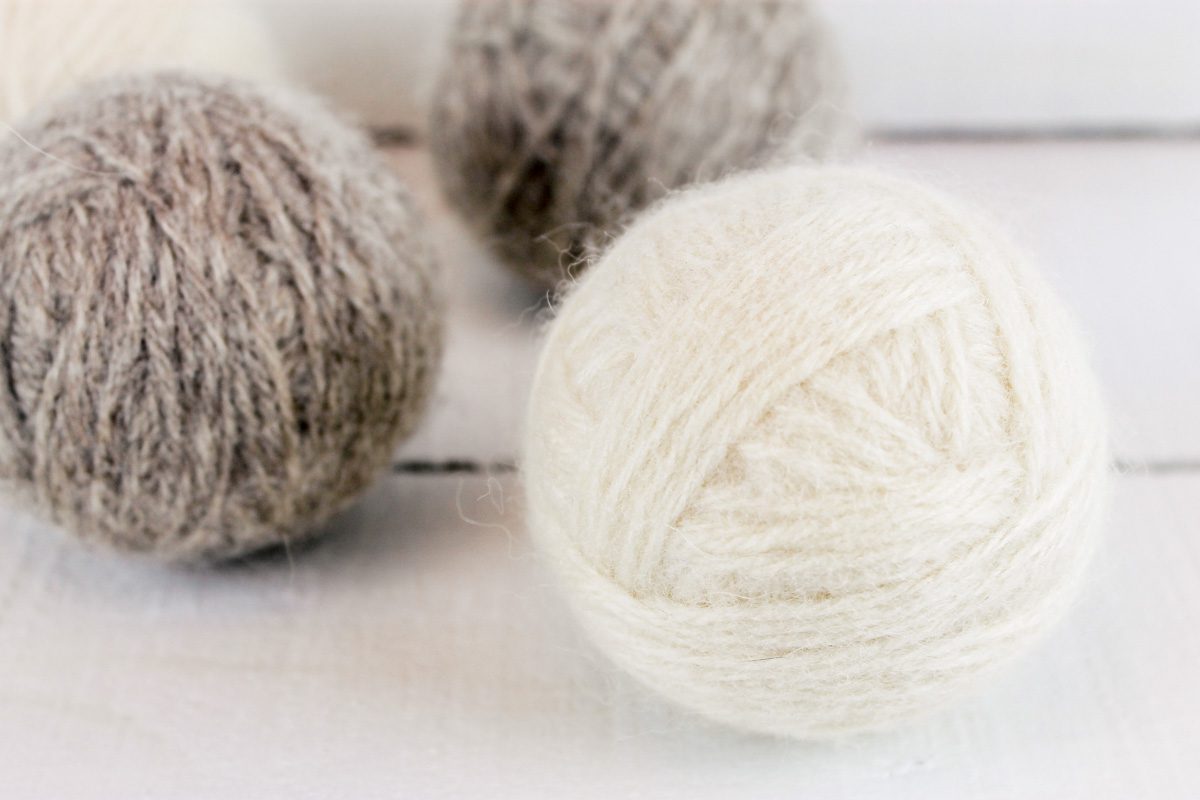
How to Make Dryer Balls From Wool
Stop using conventional dryer sheets in every load of laundry! Save money by using a great dryer sheet alternative such as wool dryer balls. Learn how to make homemade dryer balls in the step by step tutorial below.
Makes: Approximately 3 dryer balls
Materials to Make DIY Dryer Balls
One skein 100% wool yarn (I used “I Love This Wool” brand)
Box of pantyhose
Plastic yarn needle or large eye steel sewing needle
Directions
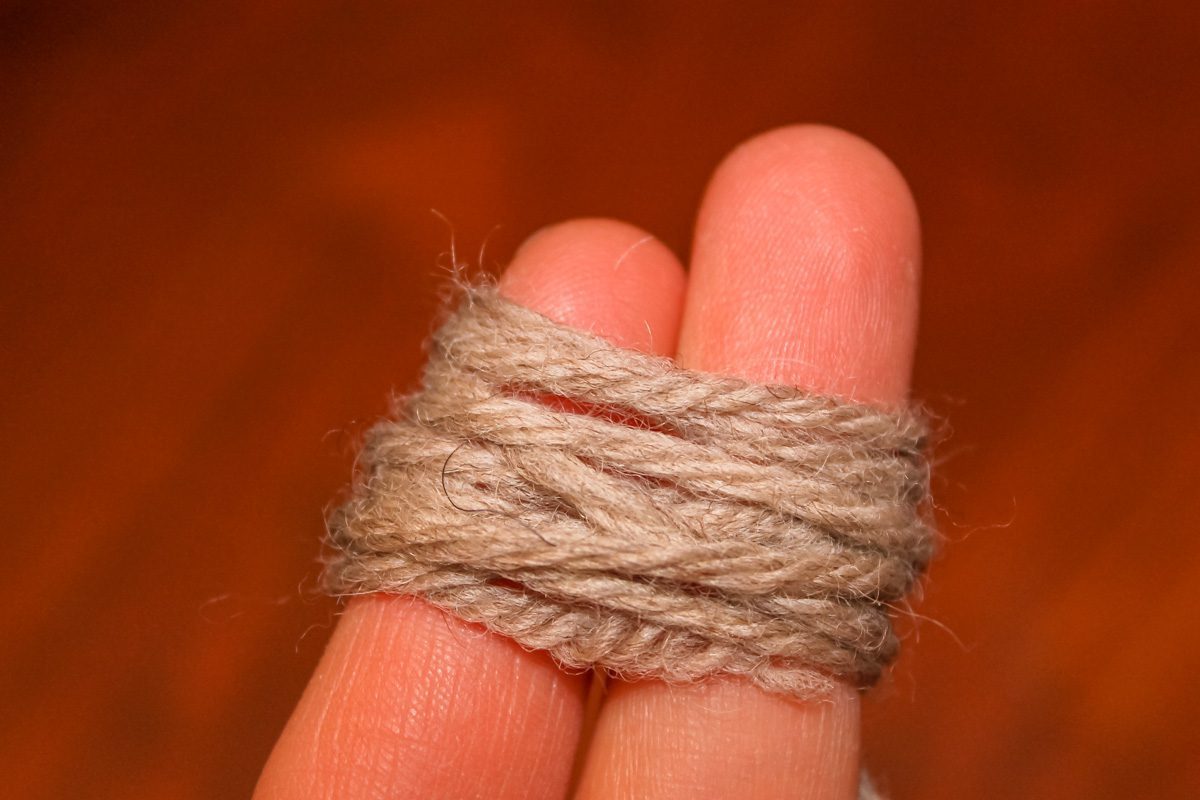
To begin creating the wool dryer ball, wrap the yarn about ten times around two or three of your fingers.
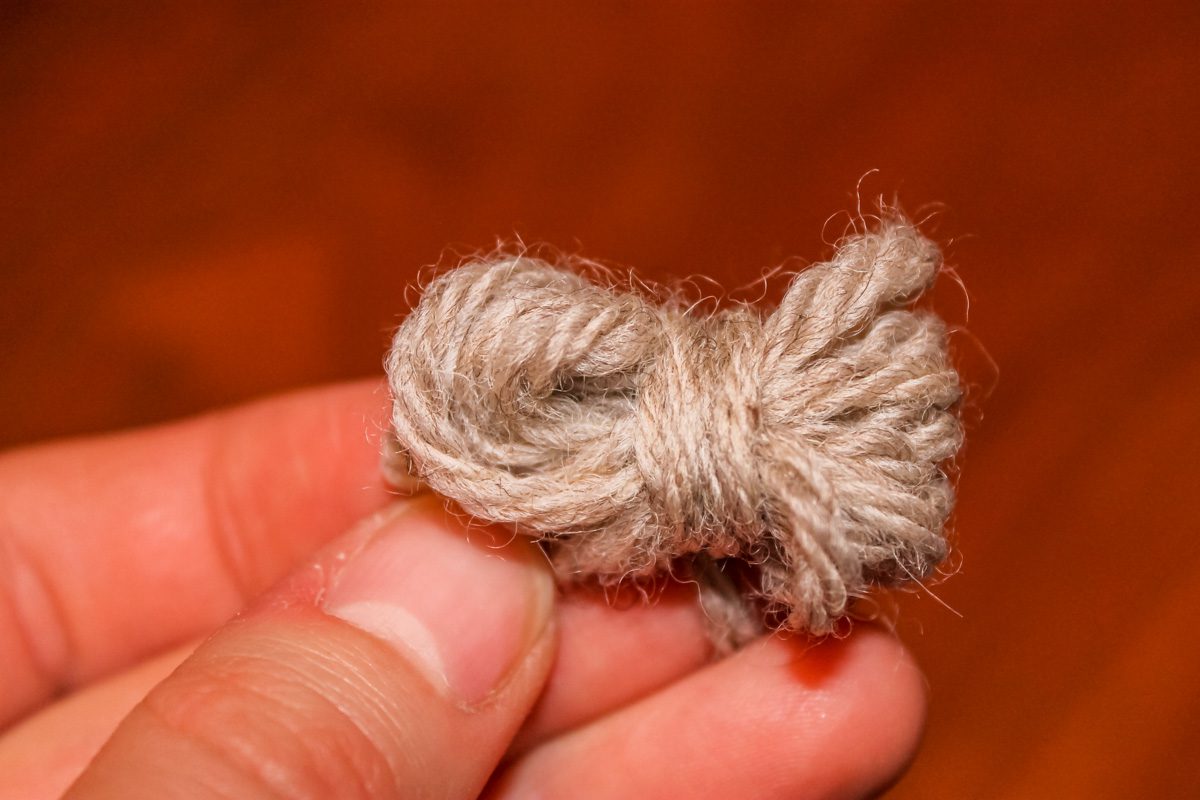
Gently pull it off of your fingers and wrap the yarn around the center, approximately ten times to create a bow-like shape. Now change directions. Keep wrapping the yarn, in every direction until you have created a ball about the size of a tennis ball.
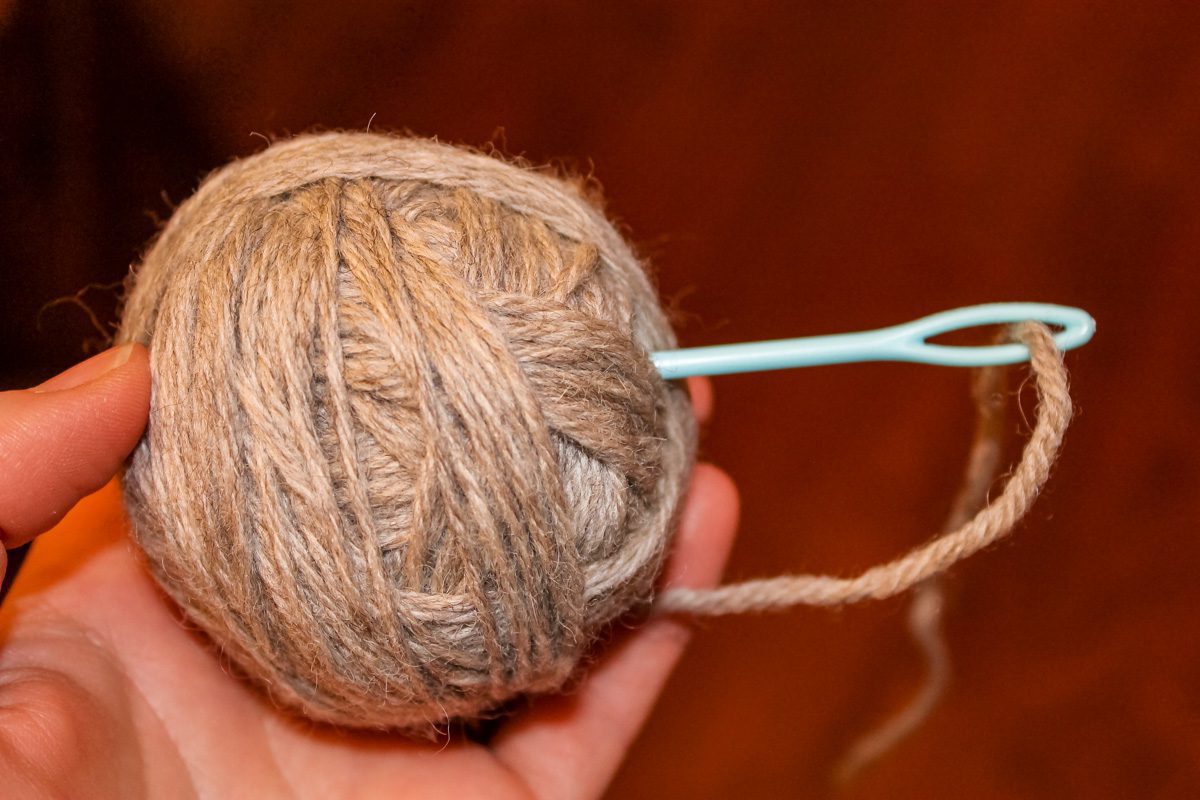
Snip the yarn, leaving a few inches on the end to push into the center of the dryer ball. Using a needle, pull the end through the center of the wool ball. Repeat steps 1-4 until you use up the entire skein of yarn.
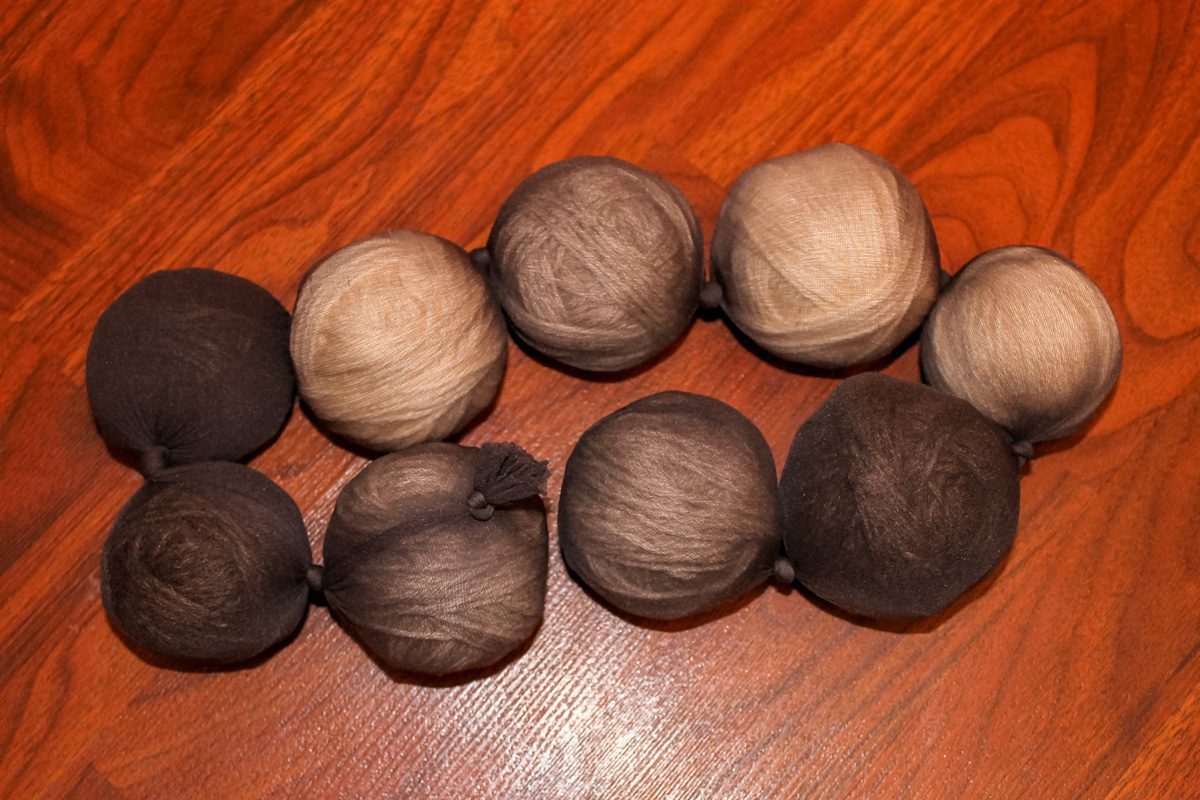
Place the dryer ball inside the leg of a pair of panty hose. Tie a knot in the hose and place another ball. Repeat with the rest of the balls.
Wash the dryer balls with two or three loads of laundry. Warm to hot water is best so that the wool adheres together. Once the wool balls have been washed a few times, remove balls from panty hose and toss them into the dryer with one load of laundry.
How to Use Wool Dryer Balls
Add three to five dryers ball per load of laundry to help quickly dry your clothing and towels. That is it! Super simple!
How to Make Dryer Balls Smell Good
To add a bit of fragrance to your clothing, you can place several drops of essential oil on your DIY wool dryer ball to scent your freshly laundered items. Lavender, lemon and bergamot are all great options.
When Do Dryer Balls Need to Be Replaced?
Dryer balls tend to last about two years, making them a great, inexpensive way to reduce static cling and dry your clothes quickly without the use of artificial fragrances or ingredients.
More Natural Living Tutorials
How to Make Dryer Balls

Skip the chemical laden dryer sheets. Instead, learn how to make a set of long lasting, natural wool dryer balls to soften your laundry and reduce drying time.
Materials
- One skein 100% wool yarn
- Box of pantyhose
- Plastic yarn needle or large eye steel sewing needle
Instructions
- To begin creating the wool dryer ball, wrap the yarn about ten times around two or three of your fingers.
- Gently pull it off of your fingers and wrap the yarn around the center, approximately ten times to create a bow-like shape.
- Now change directions. Keep wrapping the yarn, in every direction until you have created a ball about the size of a tennis ball.
- Snip the yarn, leaving a few inches on the end to push into the center of the dryer ball. Using a needle, pull the end through the center of the wool ball. Repeat steps 1-4 until you use up the entire skein of yarn.
- Place the dryer ball inside the leg of a pair of panty hose. Tie a knot in the hose and place another ball. Repeat with the rest of the balls.
- Wash the dryer balls with two or three loads of laundry. Warm to hot water is best so that the wool adheres together. Once the wool balls have been washed a few times, remove balls from panty hose and toss them into the dryer with one load of laundry.
- Add three to five dryers ball per load of laundry to help quickly dry your clothing and towels.
Pin for Later