Learn how to make a beautiful tote bag using vintage flour sack material or your favorite cotton or linen fabric. Perfect for shopping at the grocery store or traveling to the park.
Sewing is one of those old fashioned skills that is no longer taught in schools or passed down to the next generation. These days many don’t know how to sew a blanket, hem a pair of pants or fix a loose button on a flannel shirt. Sewing has become a lost art over the years and has been replaced by the modern conveniences of buying your clothing, sheets and curtains in store.
Truth be told, I find it much easier to jump online or into a car to drive to the nearest shop to purchase a new summer dress instead of making one at home. But I can’t help but dream of a nostalgic time when people made their own attire or the ladies of the community got together and sewed a quilt. Watching tv shows like Dr. Quinn or When Calls the Heart only encourages my love for those eras.
My grandmother grew up in an era where sewing was still a popular pursuit. If she could make it, she would sew it — quilts, blankets, furniture covers, home decor, rags, dollies — but my very favorite thing she ever made was a wardrobe full of clothes for my doll. One year she and grandpa gifted me a life size Barbie for Christmas. Did you have one those dolls? She designed and created dresses, pants, vests, gowns and even a set of pajamas for my new doll. What talent she had!
How to Make a Reusable Shopping Bag
Well here we are living in the 21st century, where there are few that sew their family’s outfits. But that doesn’t mean that sewing isn’t a valuable skill to have. Nor does it mean that sewing needs to be complicated.
I’m all about simple! The simpler the better. And the more fun it is!
You’ll find that is exactly what this diy bag tutorial is! Simple and so much fun!
How often do you go shopping and need a tote bag to haul your groceries in? Especially at shops like Aldi and Costco where they do not offer paper of plastic bags. Why not make your own tote bag? It’s easy and can be created within just a couple of hours.
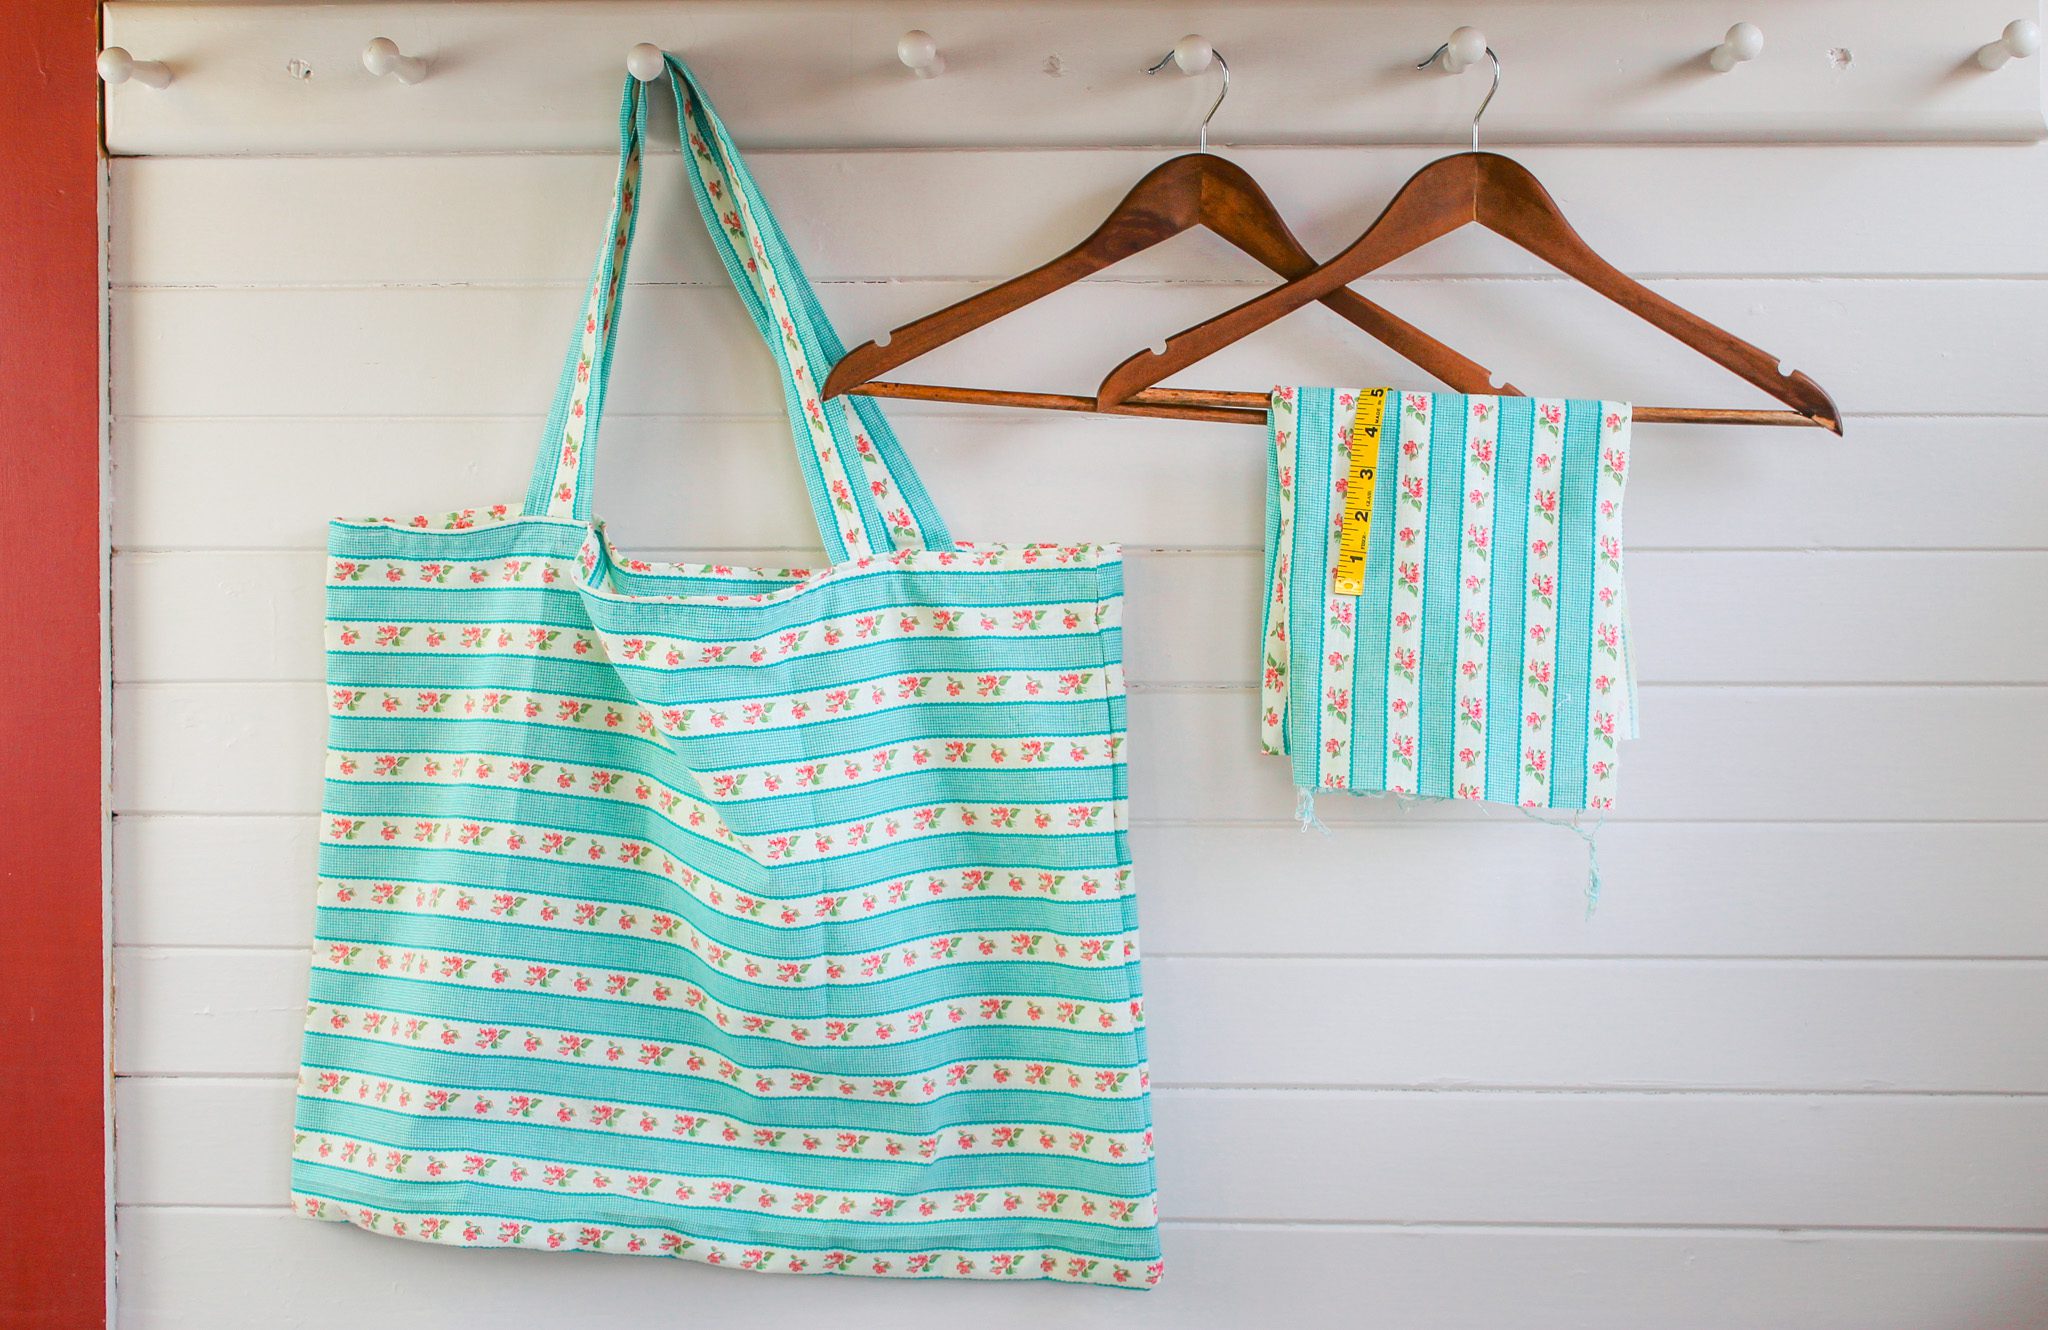
For this project, you can use any material you want. Cotton, linen or a linen blend works well to make a diy tote bag. Last year, I picked up some vintage flour sack material from a local antique shop and saved it specifically to create this handmade grocery bag. The fabric bag turned out so nice, I might just have to display it on our coat rack in our entryway.
DIY Tote Bag Using Vintage Flour Sack Material
This craft is a perfect beginner sewing tutorial but is equally as fun for advanced seamstresses who want to make an easy handmade bag. Use this simple tote bag to haul groceries, library books, pack up some snacks to take the kids to the park, carry swim gear to the pool or gather personal belongings for a road trip.
Materials
1.5 yards of fabric (cotton, linen flour sack, grain sack material)
Coordinating thread
Straight pins
Safety pin
Scissors
Sewing machine
Iron
Fabric Dimensions
Cut two pieces for the straps – 4 inches by 28 inches
Cut two pieces for the main bag piece – 24 inches by 20 inches
Instructions
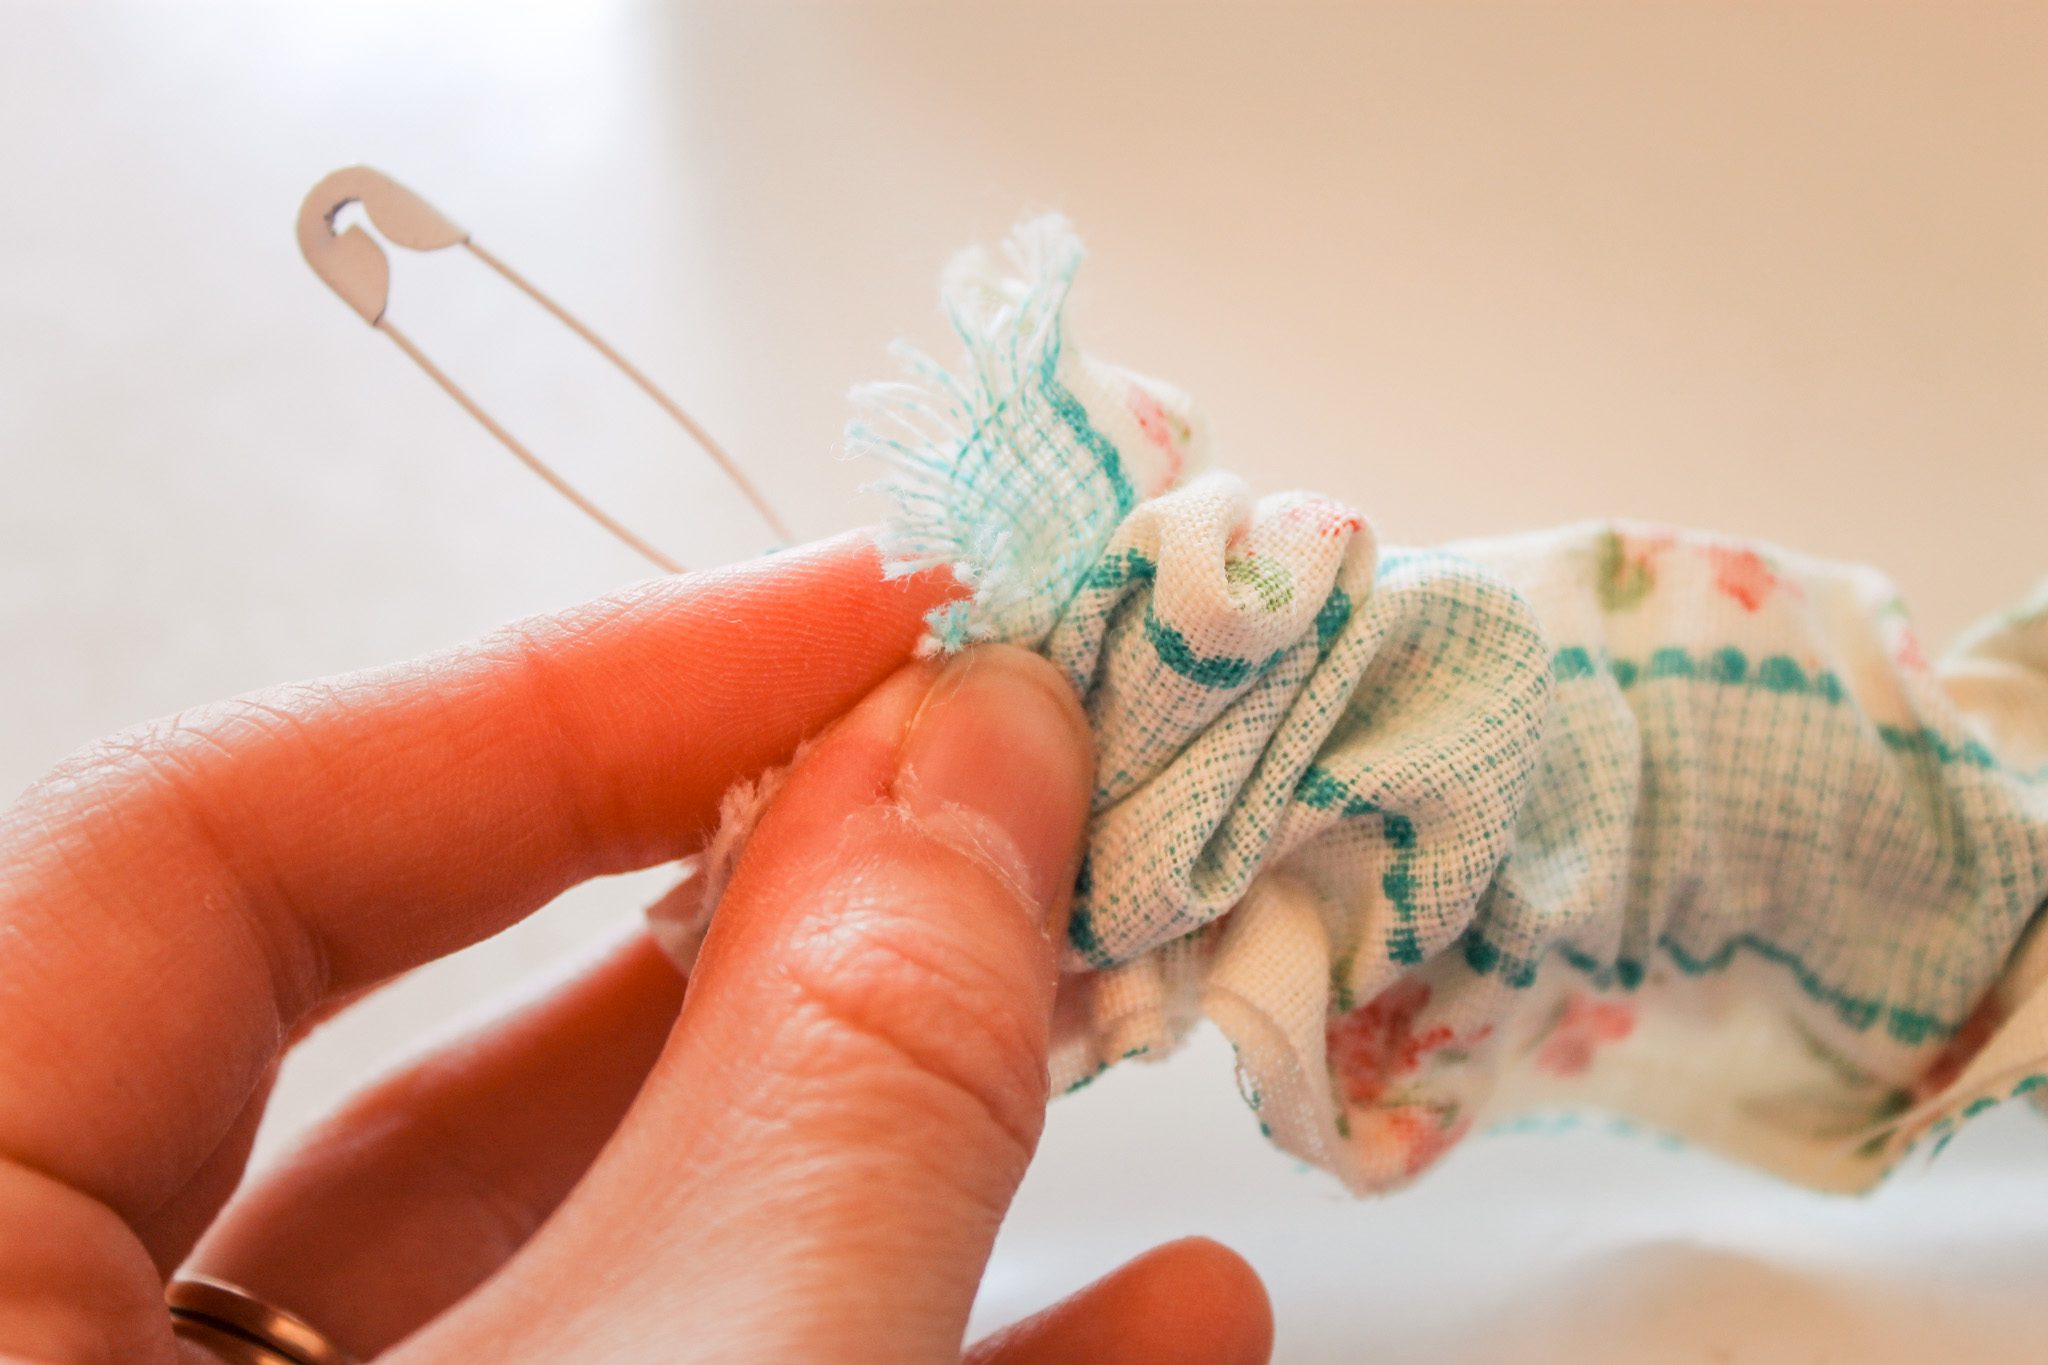
Select one strap piece (4” x 28”) and fold in half down the long side, with right sides of the material together. Pin in place. Sew a 1/4-inch seam leaving both ends of the folded piece open. Attach a safety pin to the top corner of one end of the strap and fish through inside to turn the strap right side out.
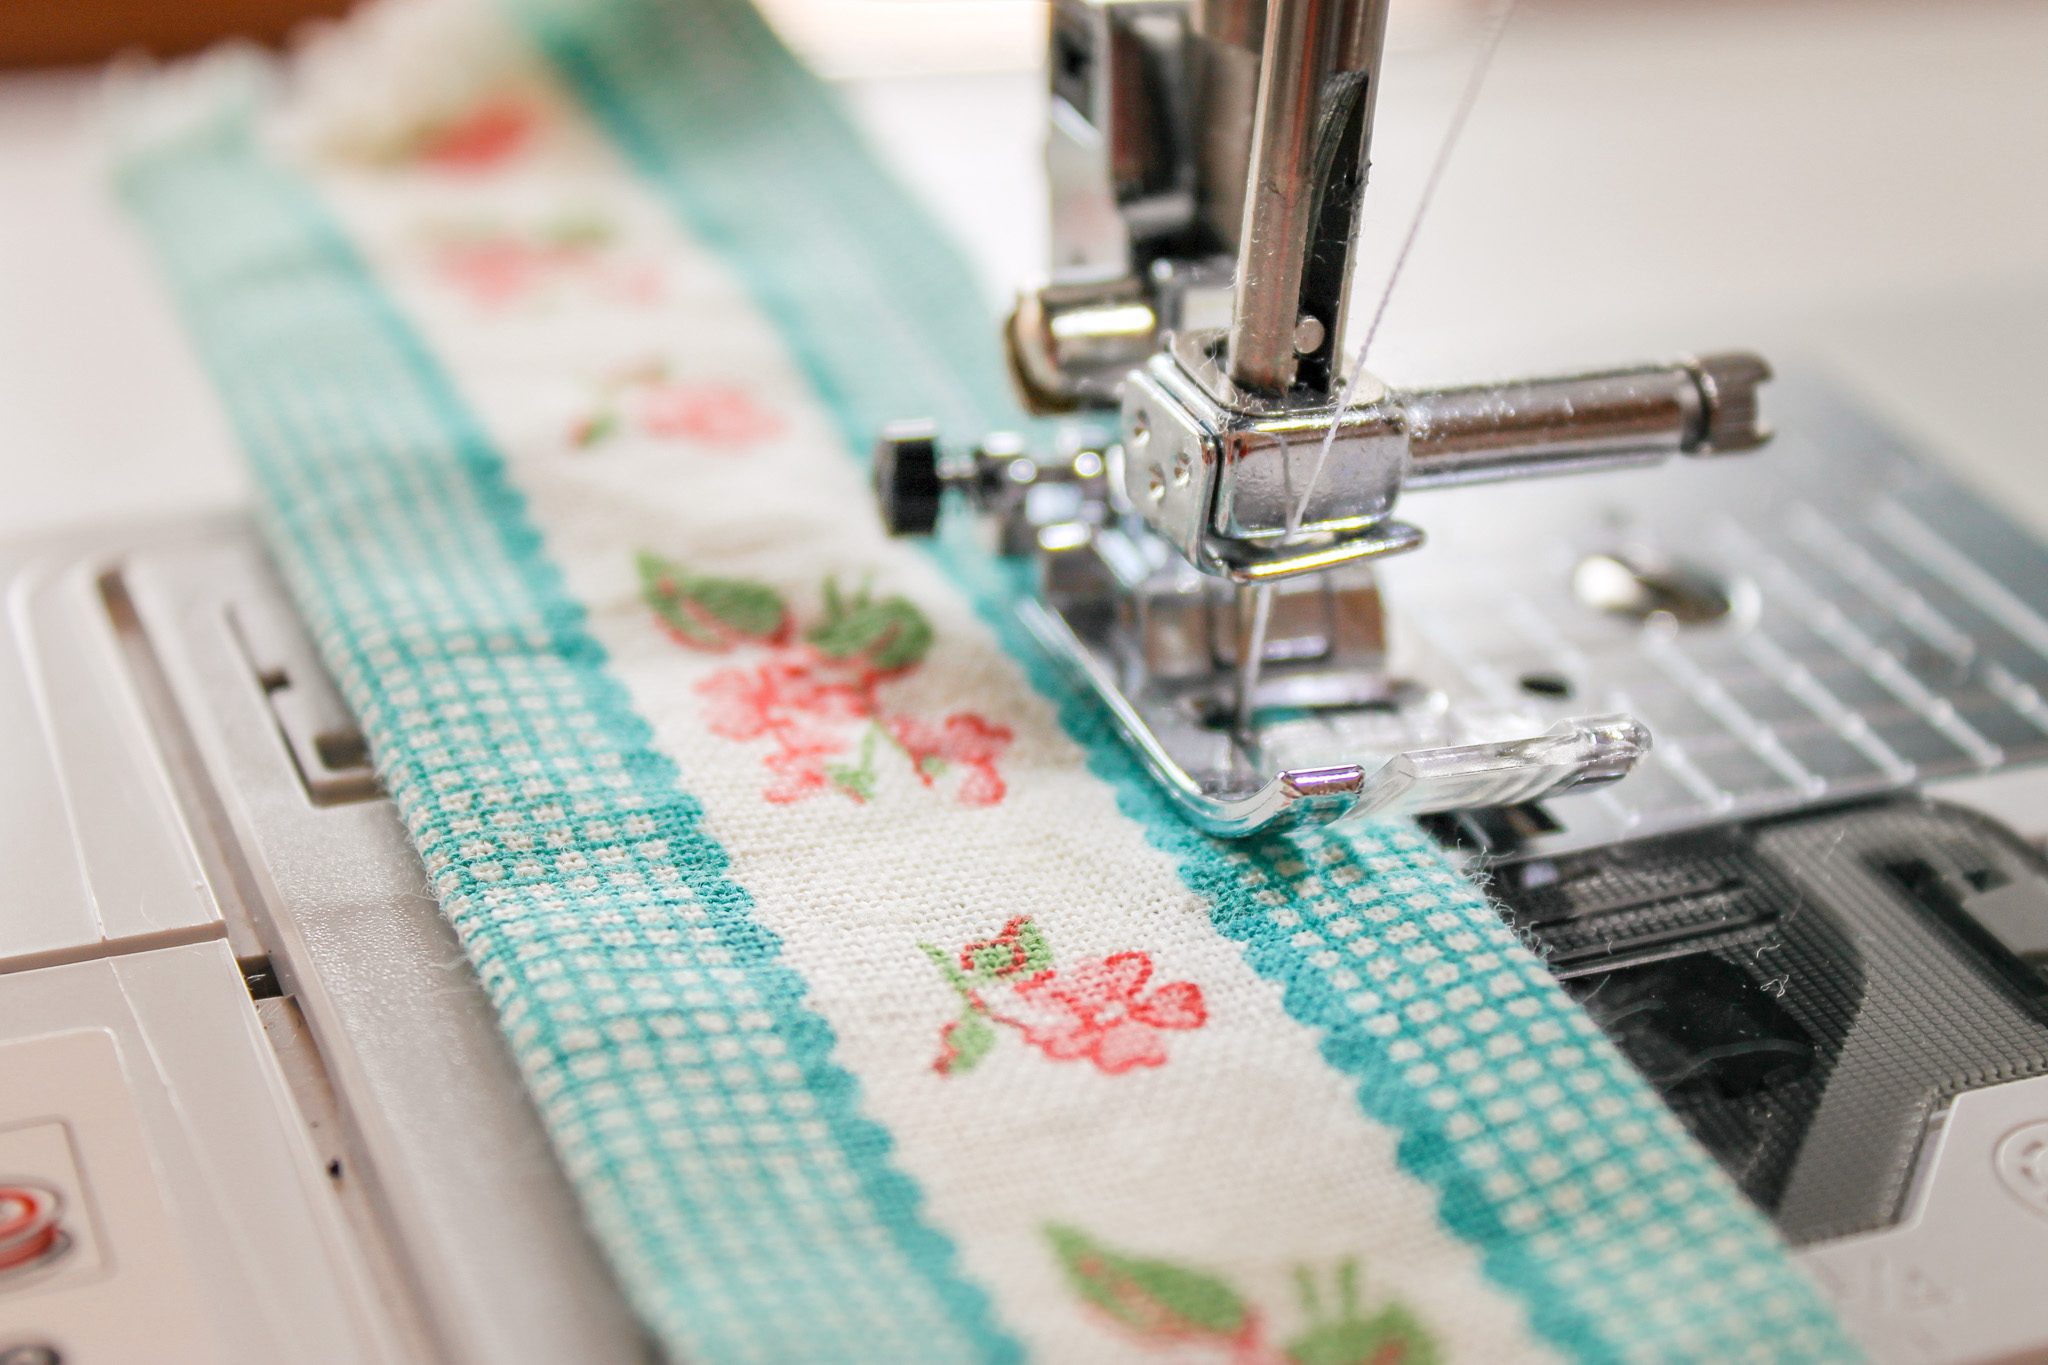
Using an iron, press the seam flat. Add a topstitch to both long sides with an 1/8 to 1/4-inch seam. Repeat step one and step two with the second strap piece.
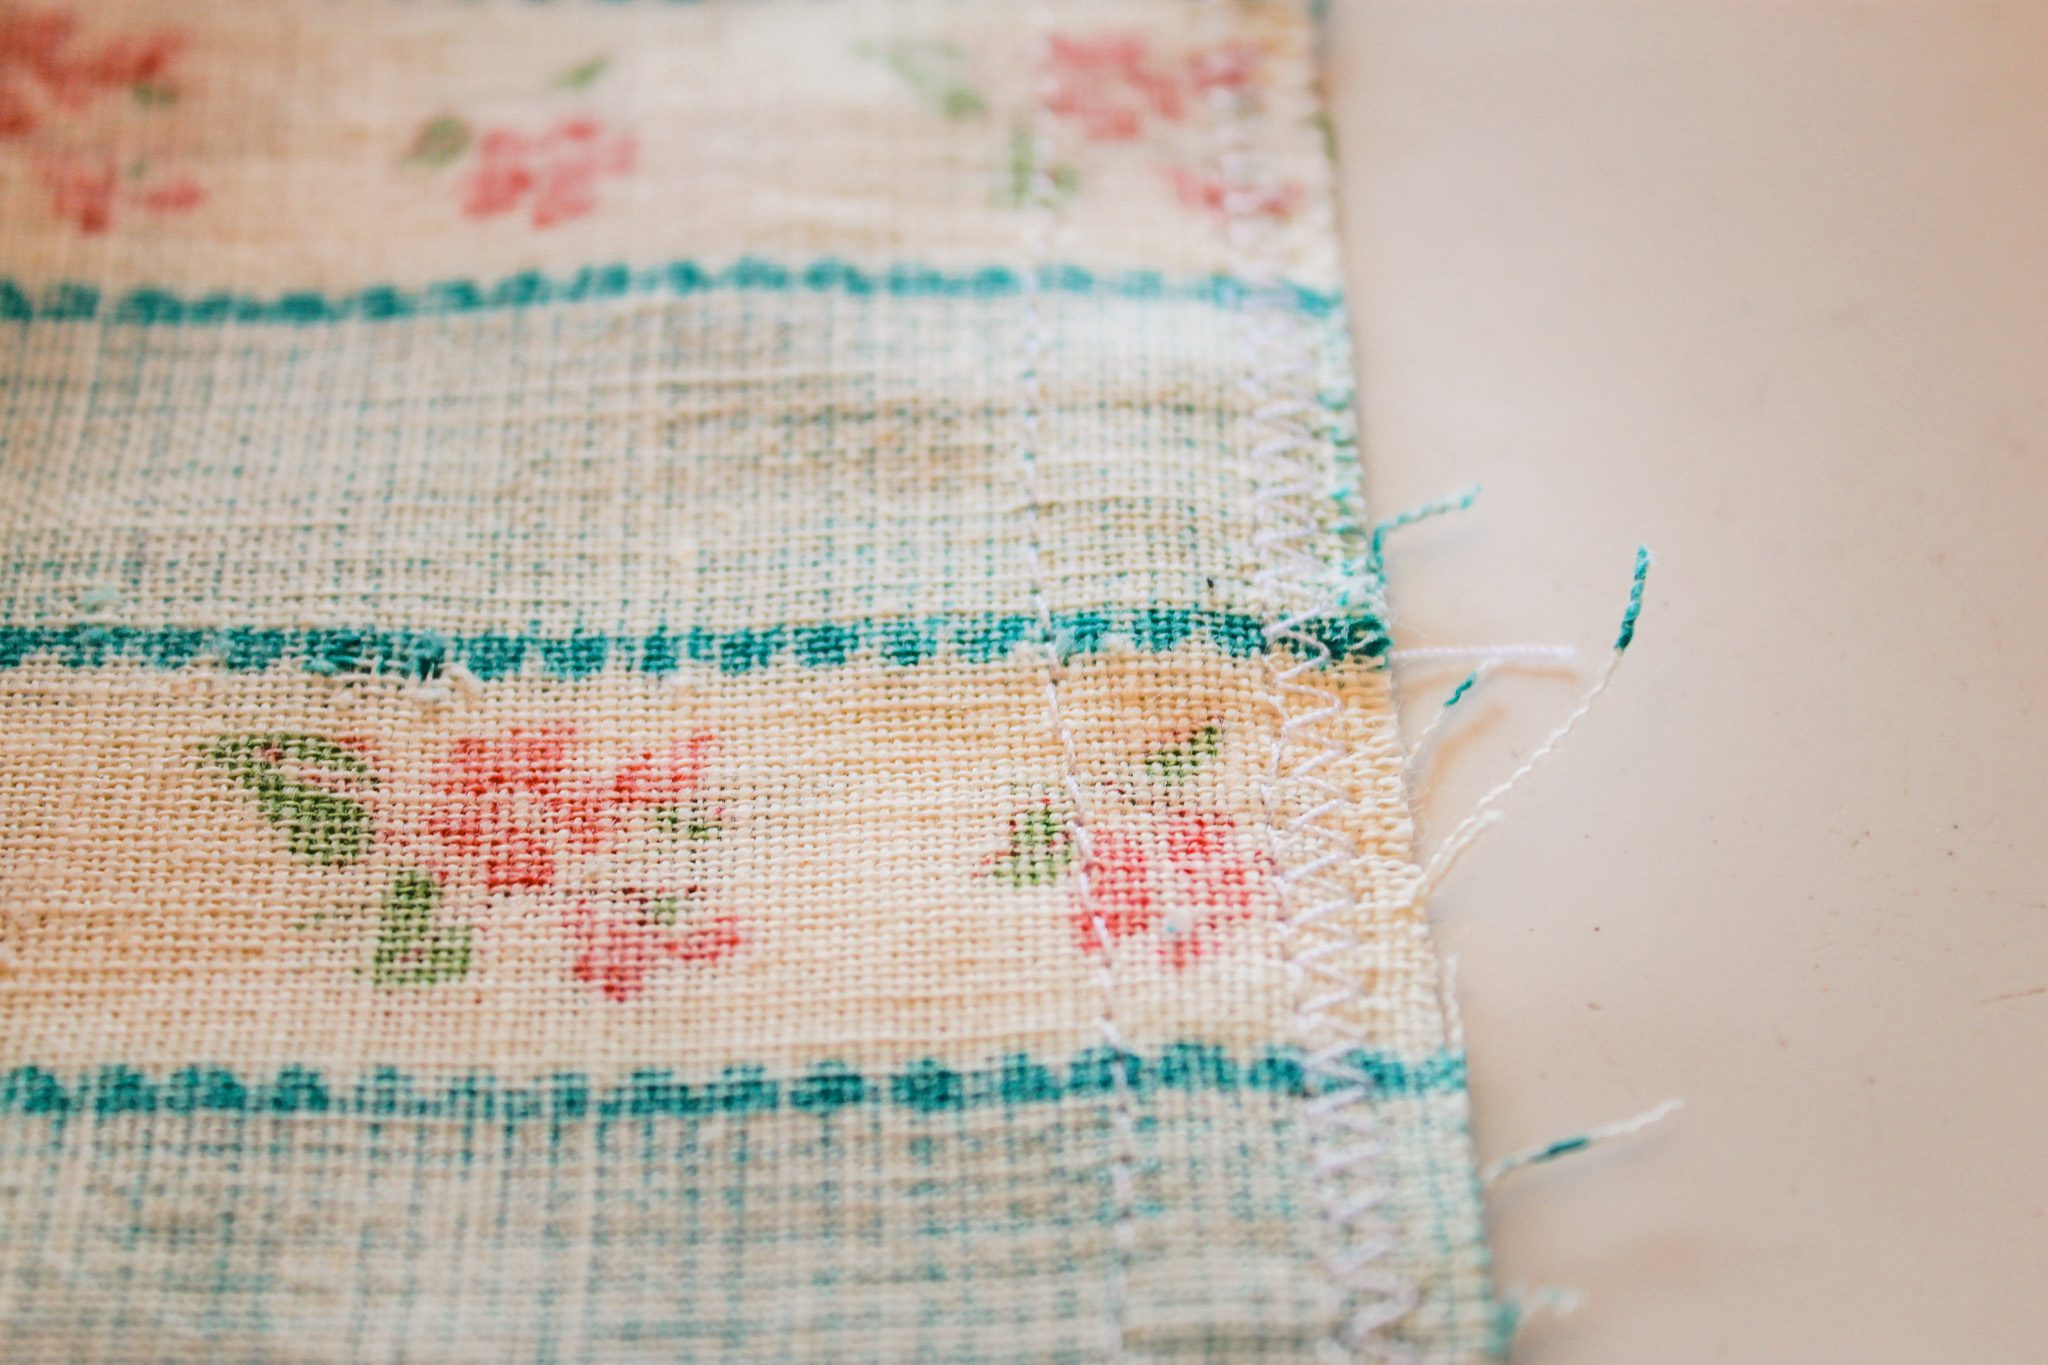
Place the right sides of the two 24” x 20” main pieces together. Sew a 3/4-inch seam around all three sides, leaving the top open. Optional: To add extra support to the bag, repeat the step above by sewing a 1/2-inch seam around the three sides again. Use a zigzag stitch (or serger if you have one) to finish the raw seams. Turn the bag right side out.
Fold the top edge of the bag down 1-inch towards the inside of the tote. Use an iron to press in place. Repeat the process again by folding the bag down 1-inch and pressing in place. Use some straight pins to secure in place.
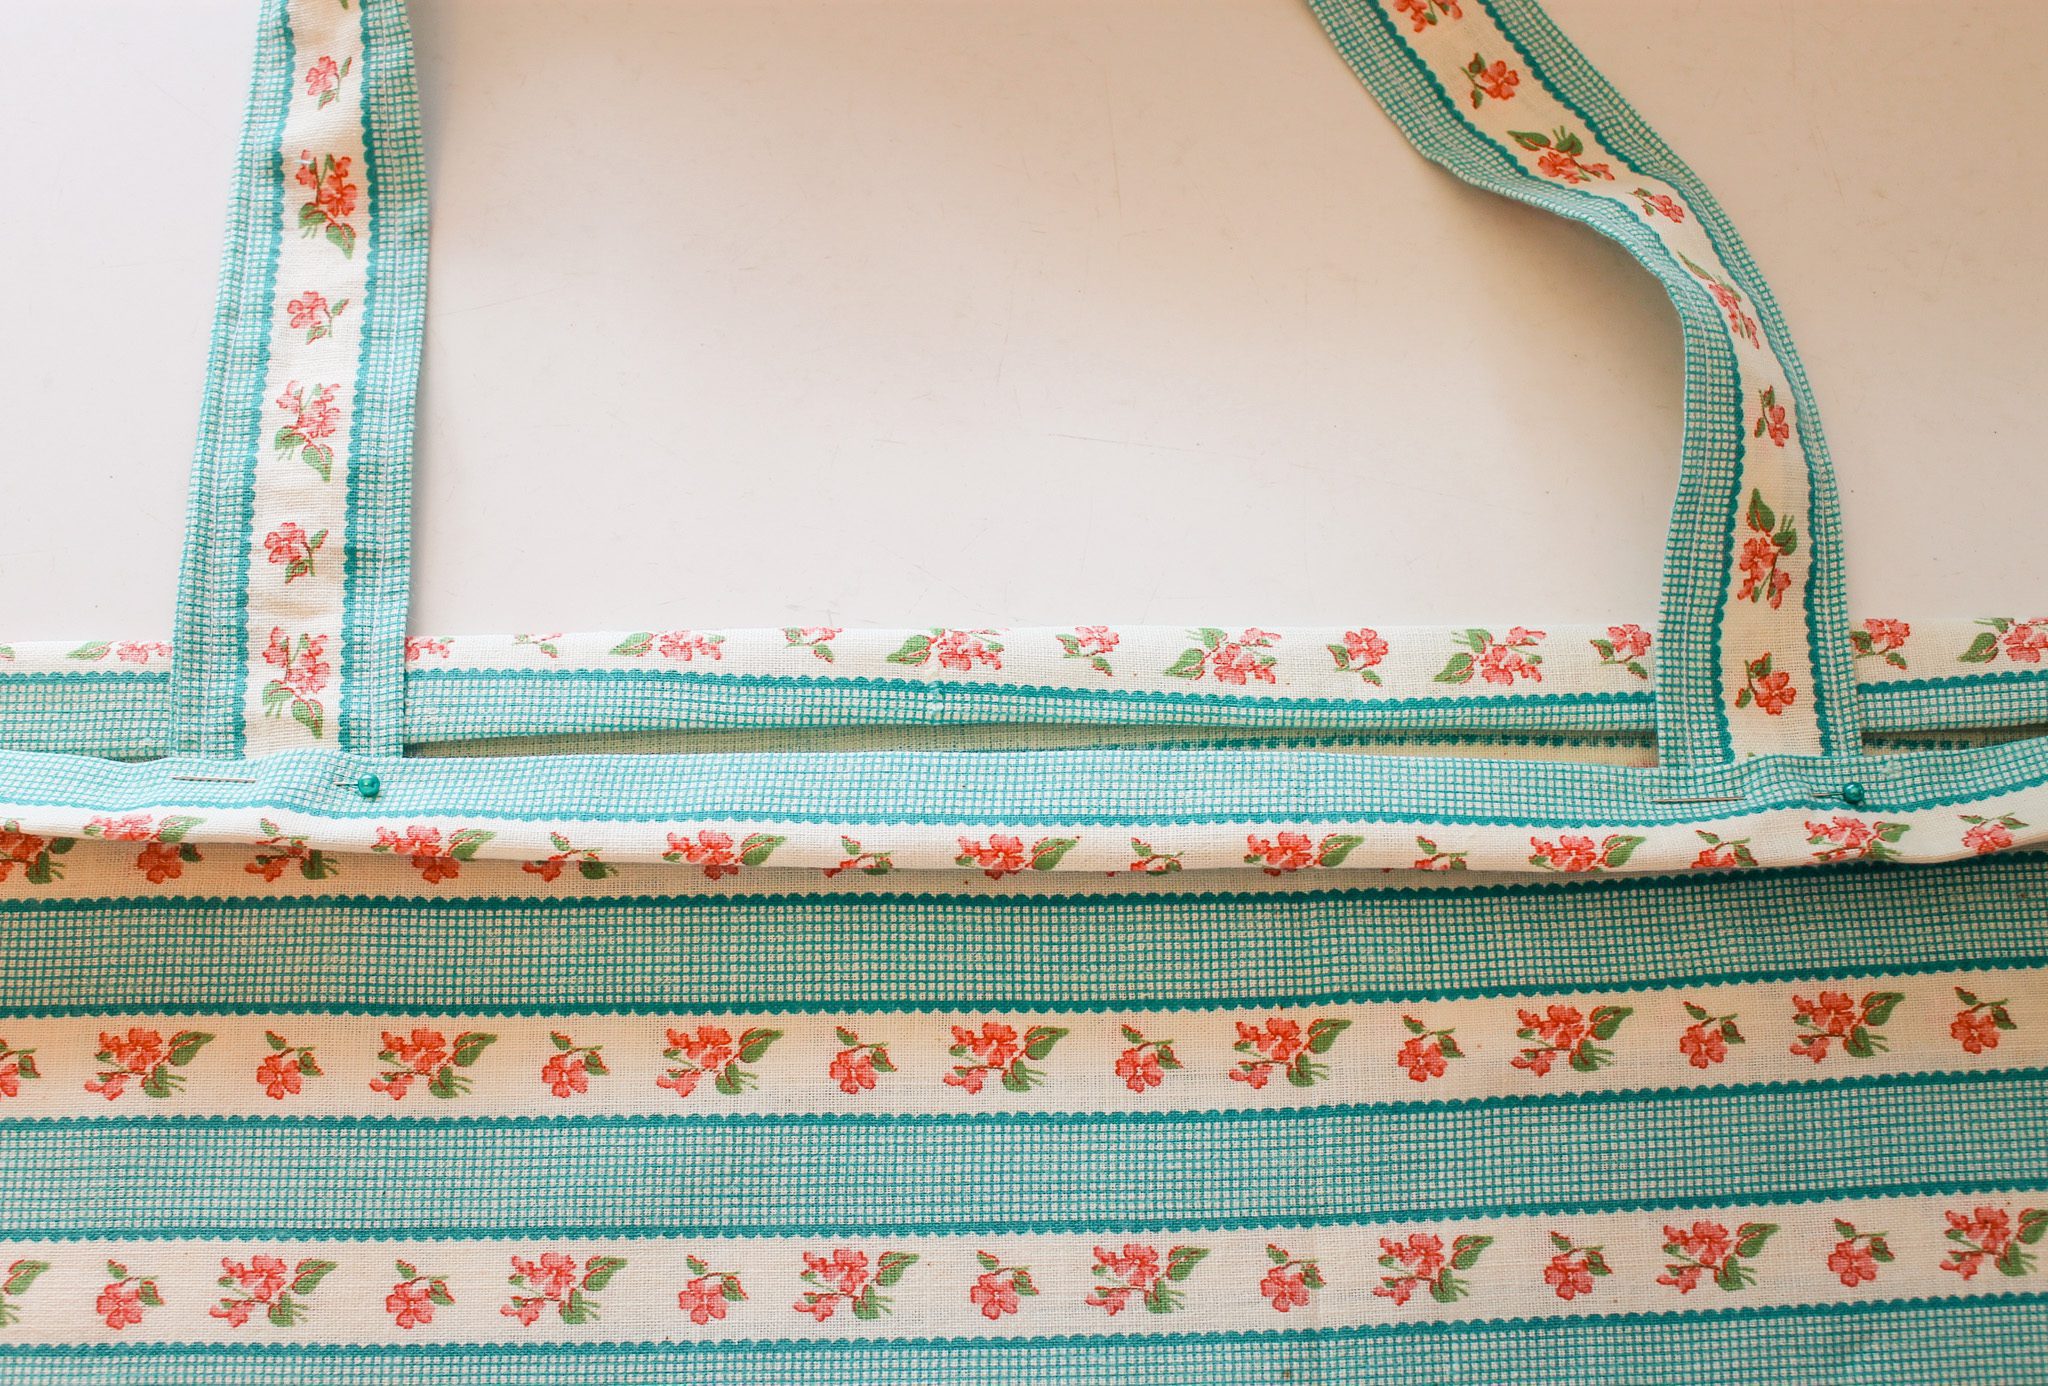
Use one strap piece and place the ends under the pressed fold at the top of the tote bag. Each end of the strap piece should be 5 inches away from the side seam. Pin the straps in place. Repeat with the second strap piece on the backside of the bag.
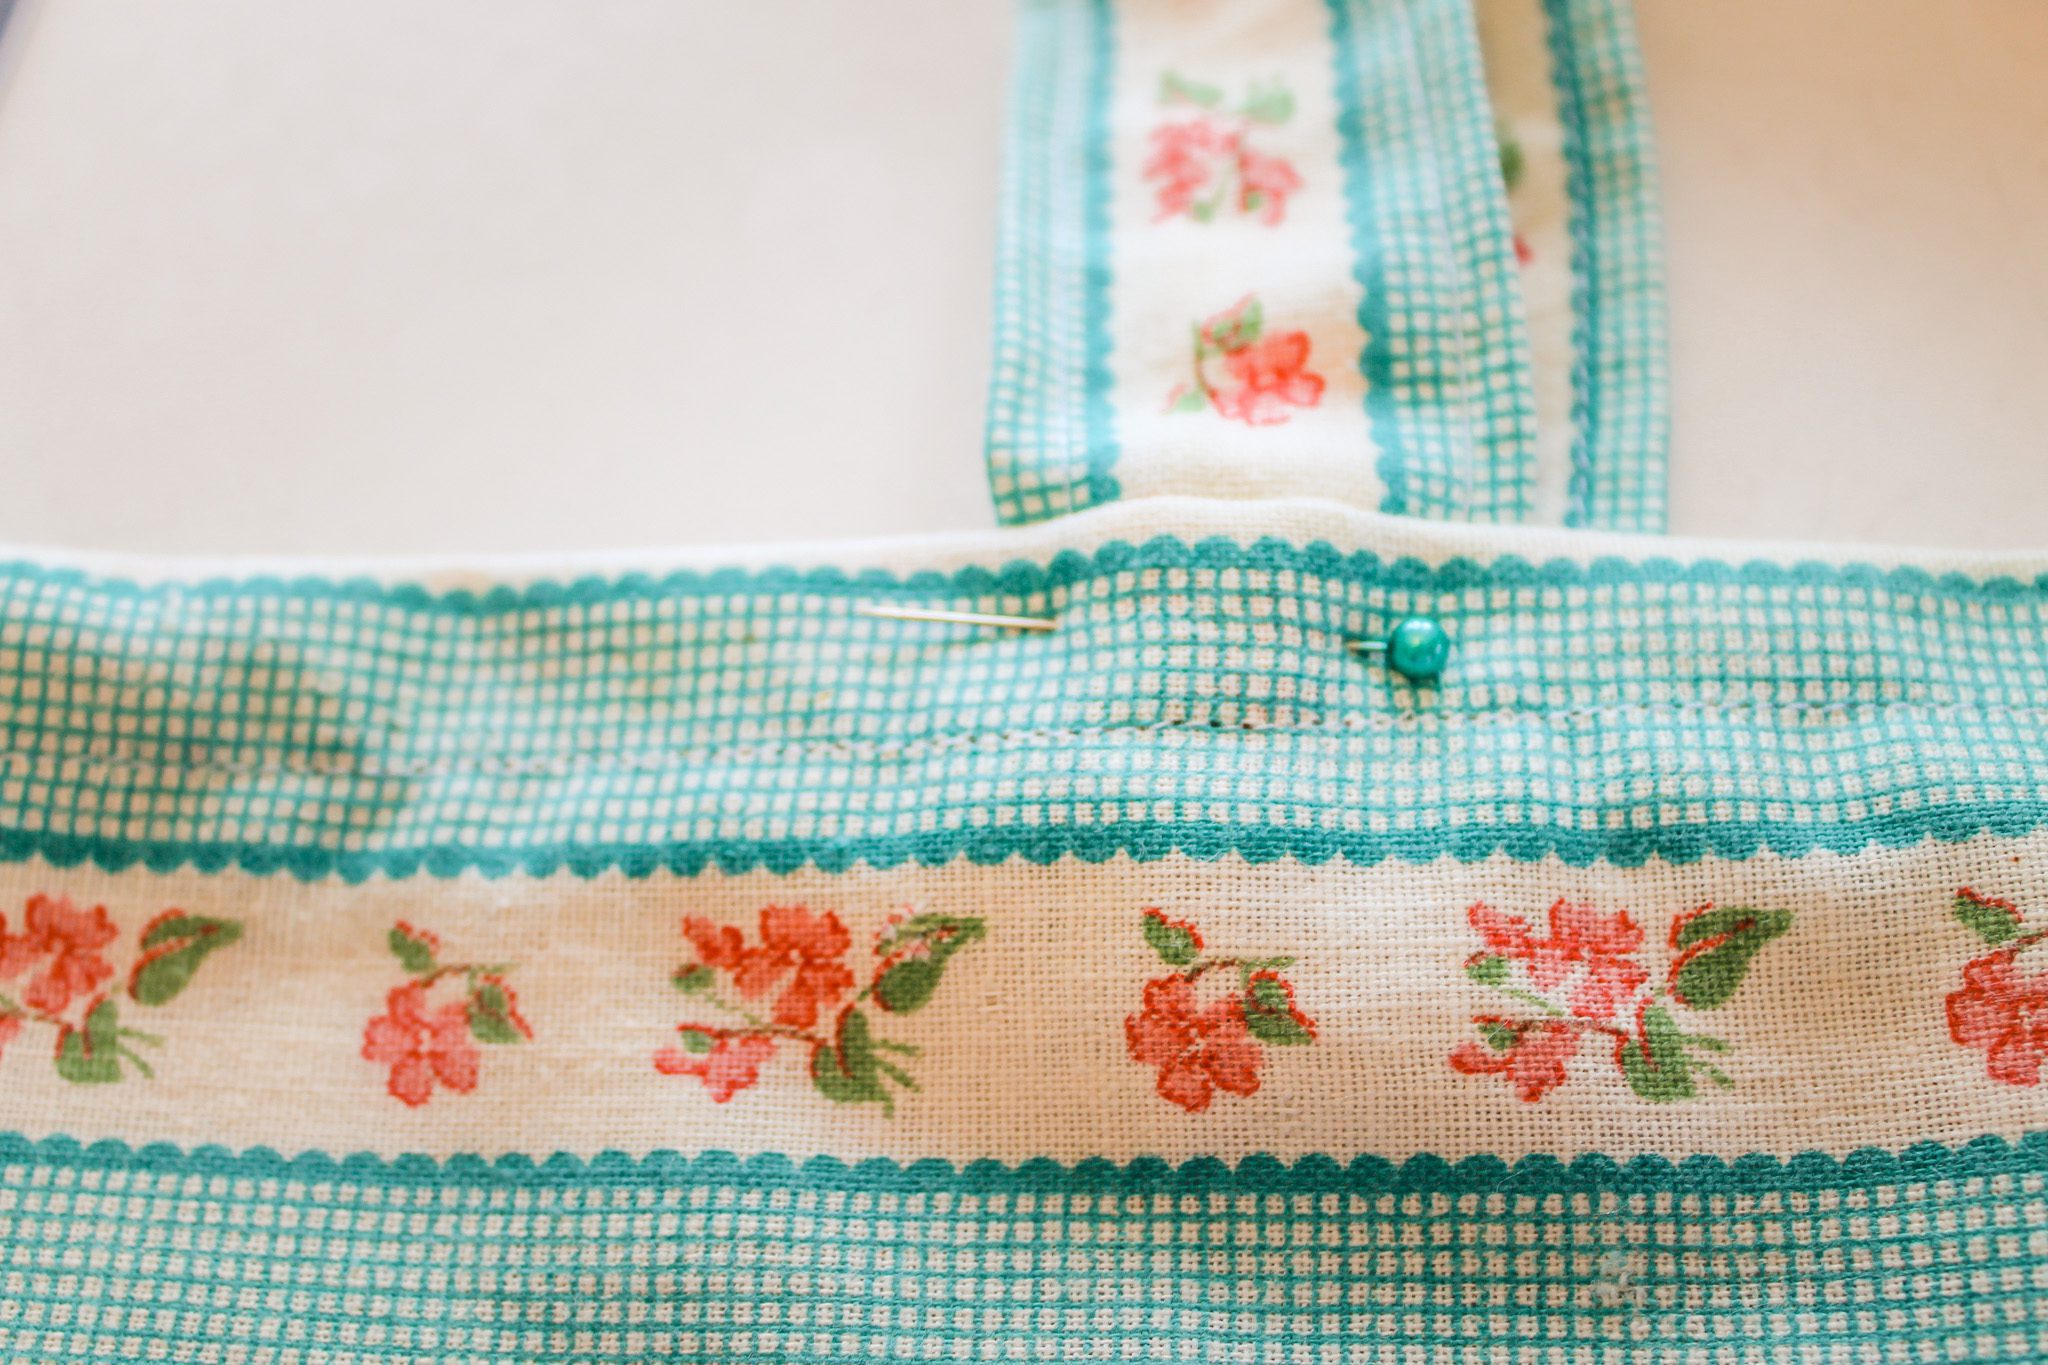
Sew around the entire top of the bag, about 1/2-inch seam, making sure you catch the straps. At this point the straps will want to pull away from the bag when you hold it up. To secure them in place, pull the straps up against the top inside of the bag and add a 1/4-inch topstitch all the way around.
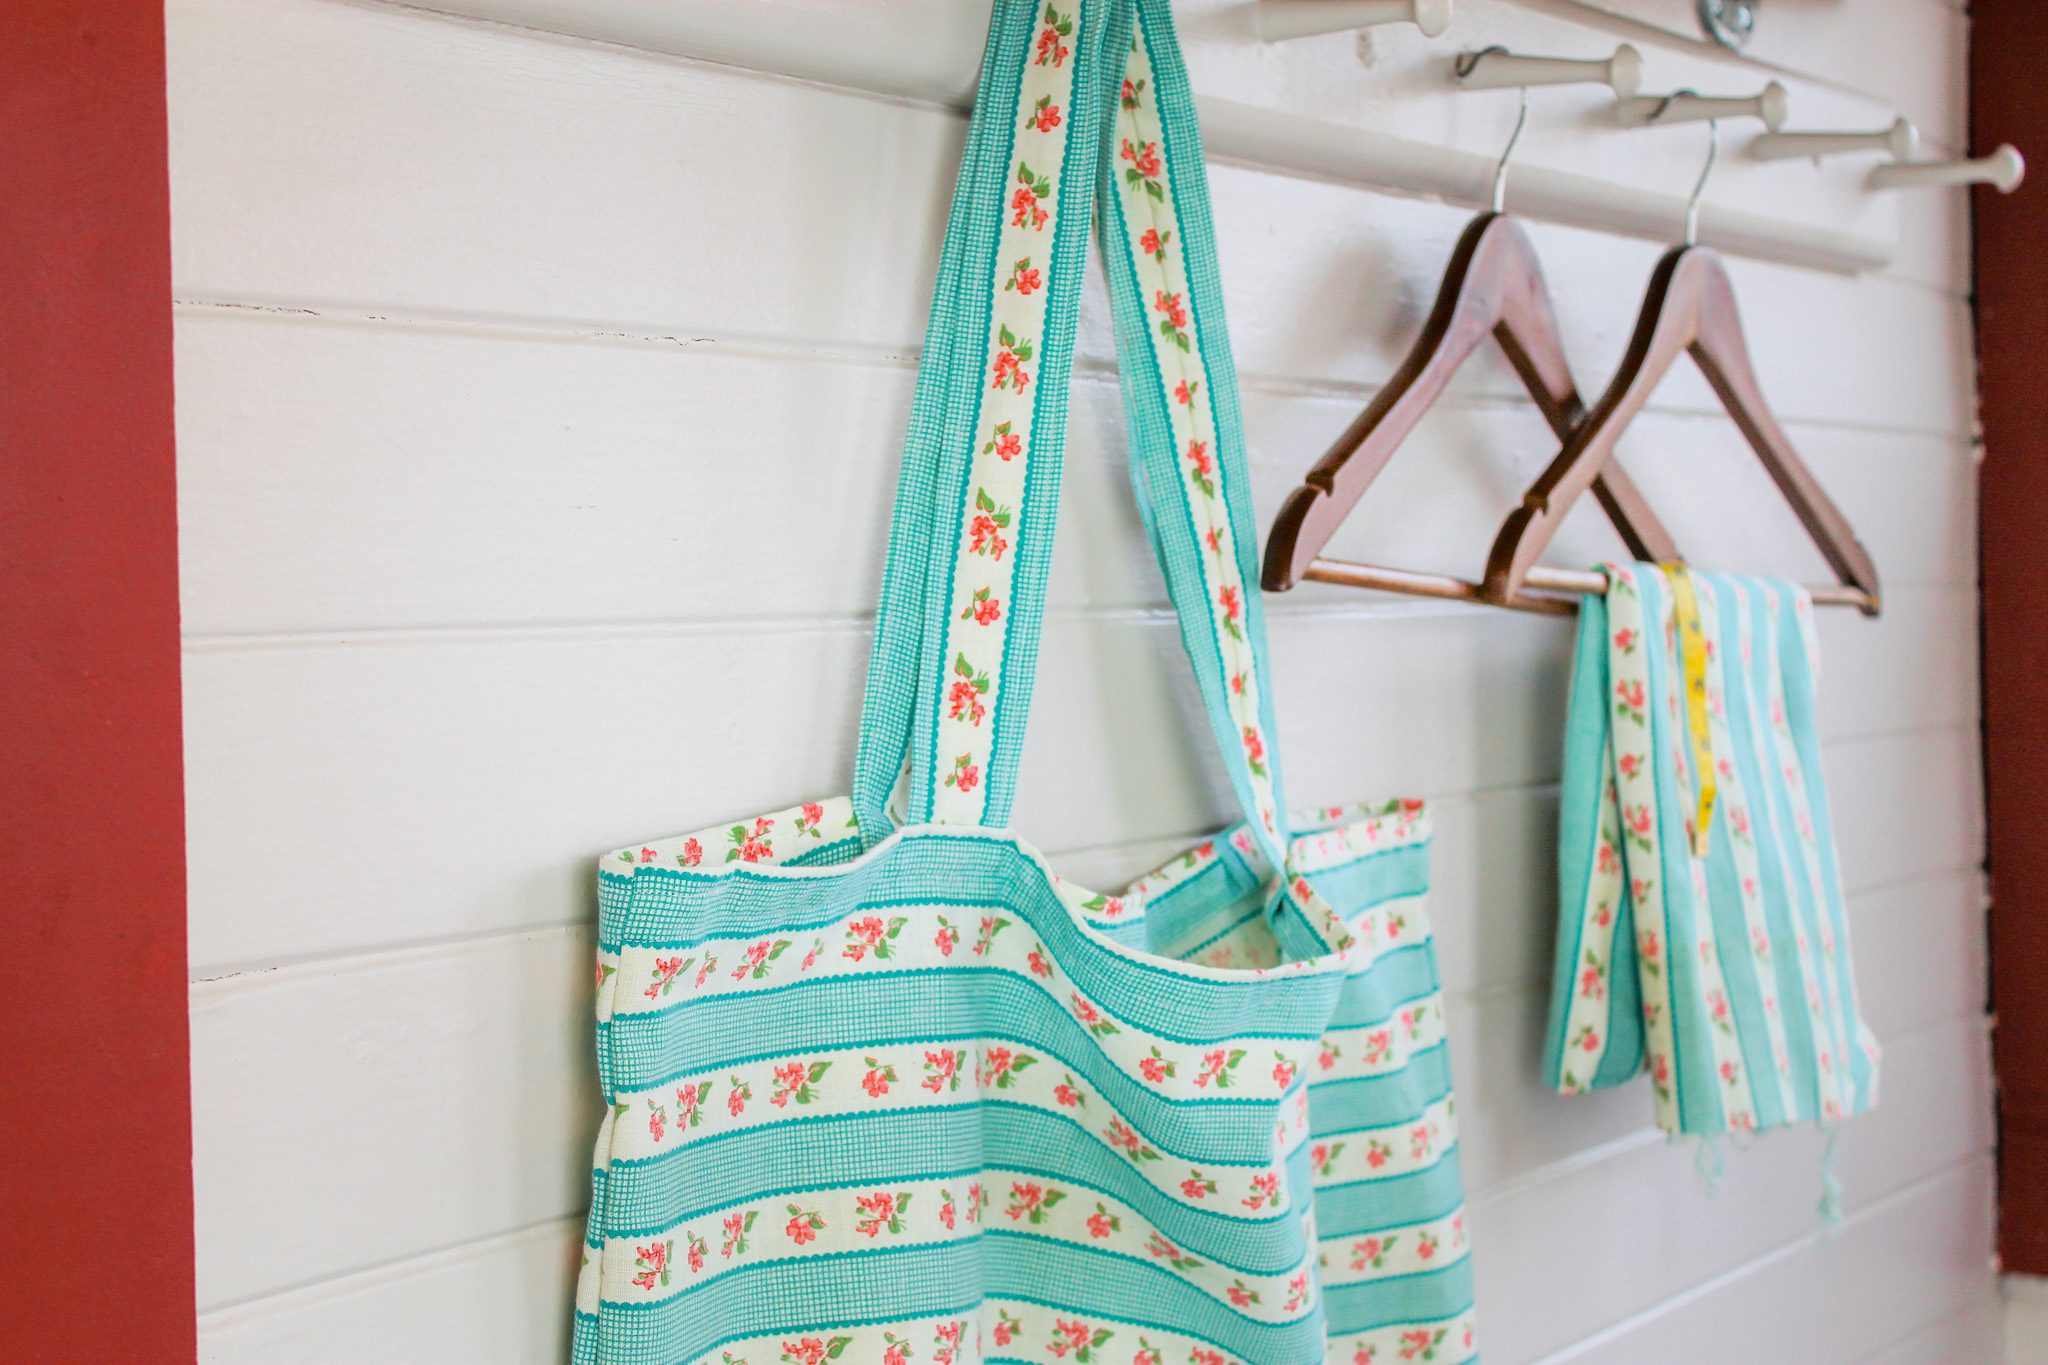
Your bag is complete! Use it to haul kids stuff, groceries, fresh veggies from your garden, books, or simply hang it up in your house as a beautiful piece of home decor.
Sewing Tips
This post contains affiliate links, which means I make a small commission at no extra cost to you. In any case, I only link to products we actually use on our homestead and that I believe can truly benefit to you. See my full disclosure here.
If you are using brand new material, be sure you wash and dry it before you being to sew a diy tote bag.
To make your bag more sturdy, add a layer of interfacing to the inside of the bag.
Enjoy making crafts? Learn how to turn an old shirt into a flannel stocking here or create a simple tea towel to hang in your farmhouse kitchen.
How to Make Your Own Tote Bag

Learn how to make a beautiful tote bag using vintage flour sack material or your favorite cotton or linen fabric. Perfect for shopping at the grocery store or traveling to the park.
Materials
- 1.5 yards of fabric (cotton, linen flour sack, grain sack material)
- Coordinating thread
- Straight pins
- Safety pin
- Scissors
- Sewing machine
- Iron
- Fabric Dimensions
- Cut two pieces for the straps - 4 inches by 28 inches
- Cut two pieces for the main bag piece - 24 inches by 20 inches
Instructions
- Select one strap piece (4” x 28”) and fold in half down the long side, with right sides of the material together. Pin in place. Sew a 1/4-inch seam leaving both ends of the folded piece open. Attach a safety pin to the top corner of one end of the strap and fish through inside to turn the strap right side out.
- Using an iron, press the seam flat. Add a topstitch to both long sides with an 1/8 to 1/4-inch seam. Repeat step one and step two with the second strap piece.
- Place the right sides of the two 24” x 20” main pieces together. Sew a 3/4-inch seam around all three sides, leaving the top open. Optional: To add extra support to the bag, repeat the step above by sewing a 1/2-inch seam around the three sides again. Use a zigzag stitch (or serger if you have one) to finish the raw seams. Turn the bag right side out.
- Fold the top edge of the bag down 1-inch towards the inside of the tote. Use an iron to press in place. Repeat the process again by folding the bag down 1-inch and pressing in place. Use some straight pins to secure in place.
- Use one strap piece and place the ends under the pressed fold at the top of the tote bag. Each end of the strap piece should be 5 inches away from the side seam. Pin the straps in place. Repeat with the second strap piece on the backside of the bag.
- Sew around the entire top of the bag, about 1/2-inch seam, making sure you catch the straps. At this point the straps will want to pull away from the bag when you hold it up. To secure them in place, pull the straps up against the top inside of the bag and add a 1/4-inch topstitch all the way around.
- Your bag is complete! Use it to haul kids stuff, groceries, fresh veggies from your garden, books, or simply hang it up in your house as a beautiful piece of home decor.

Pin for Later


