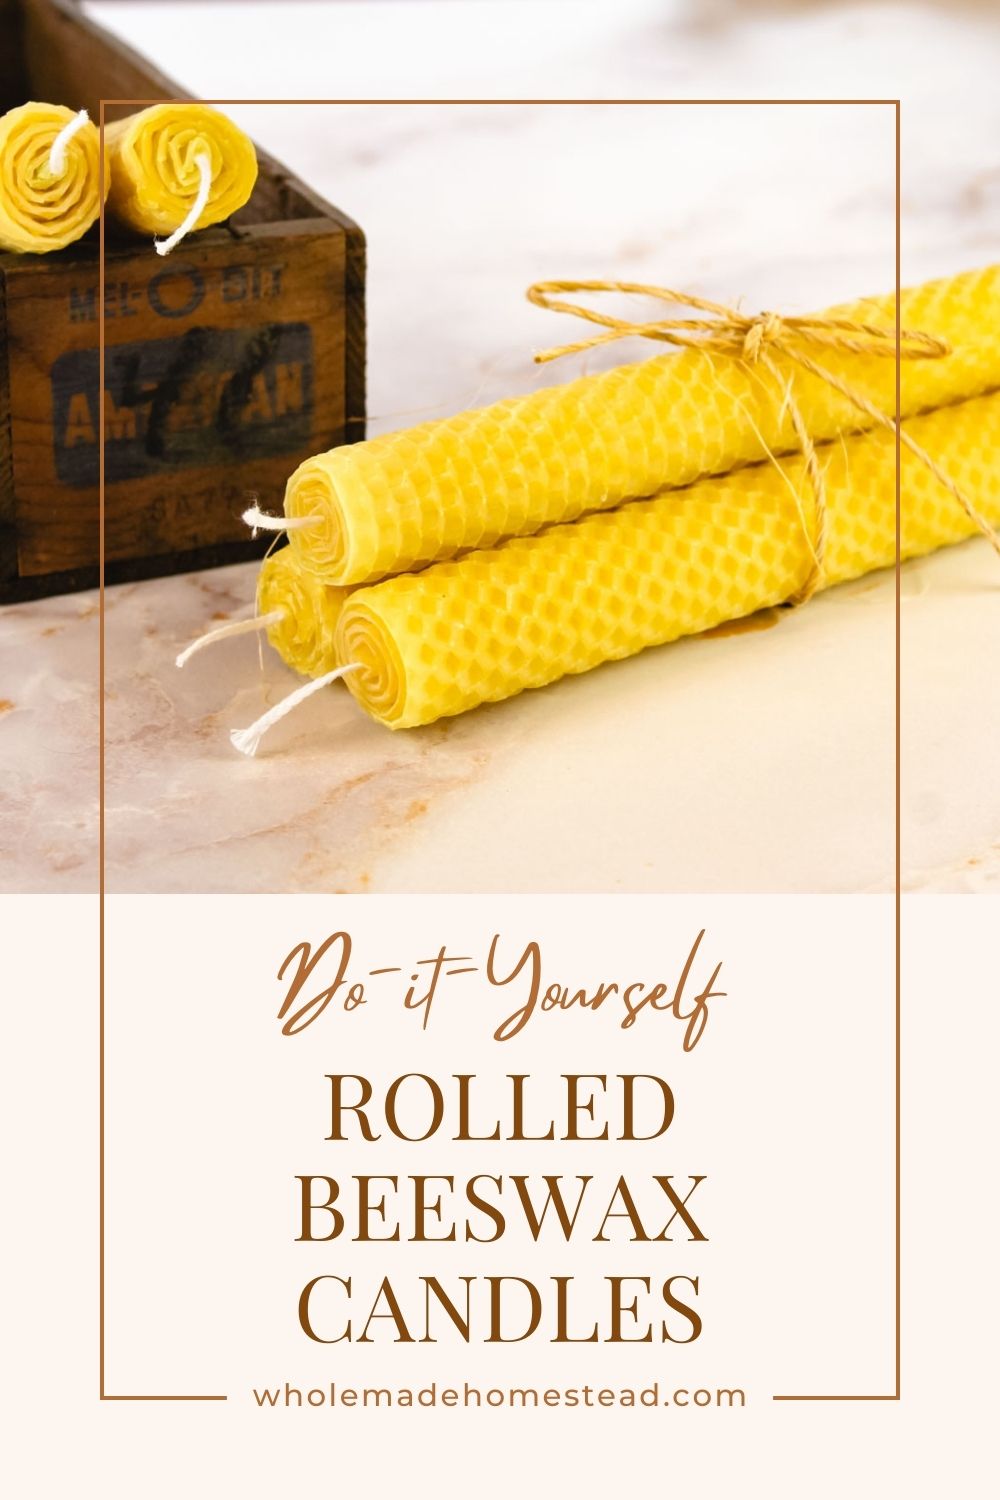
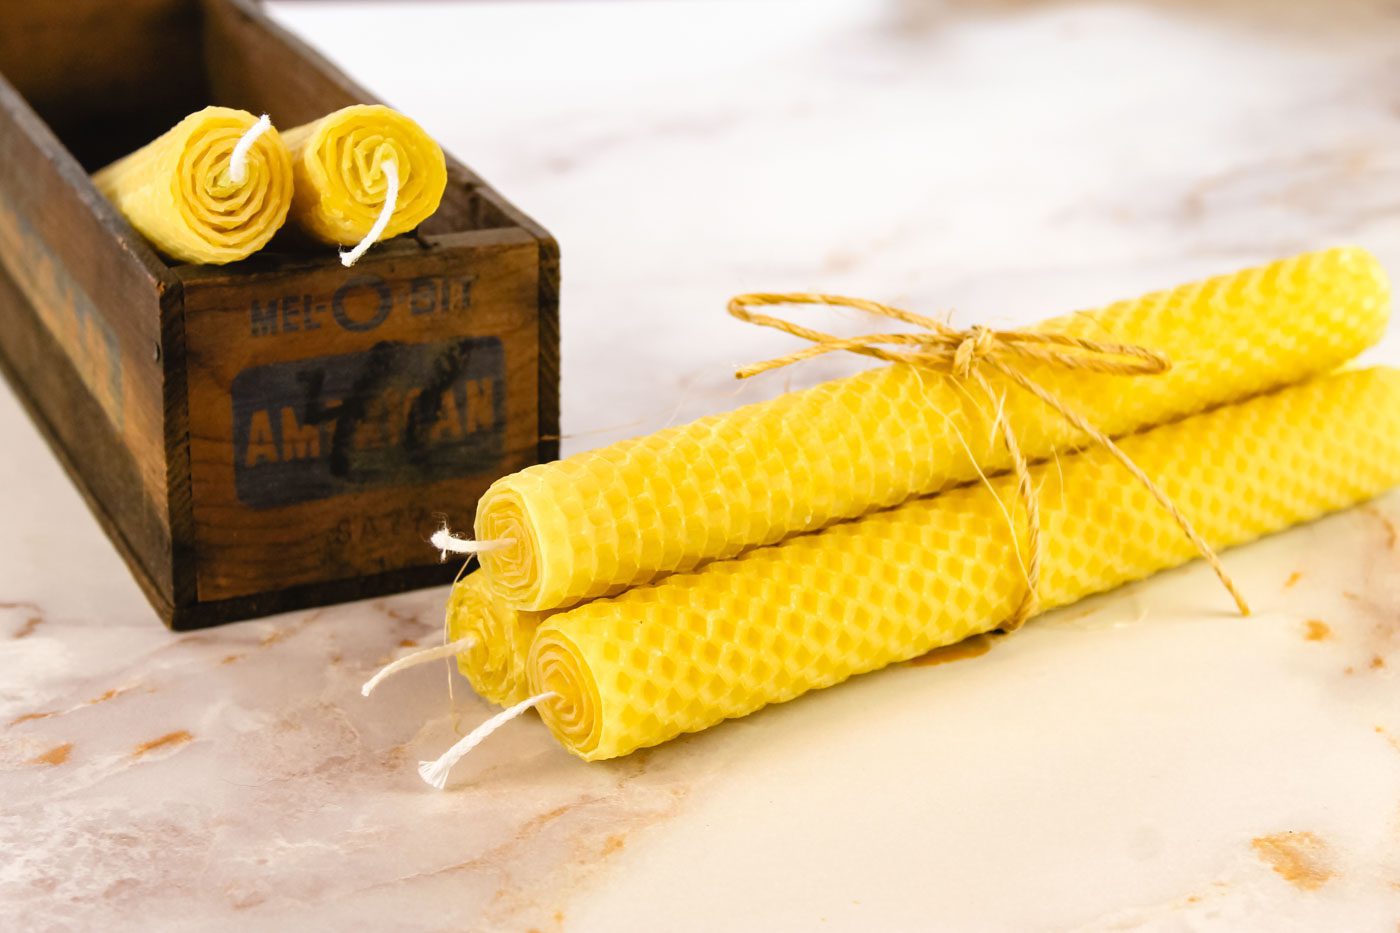
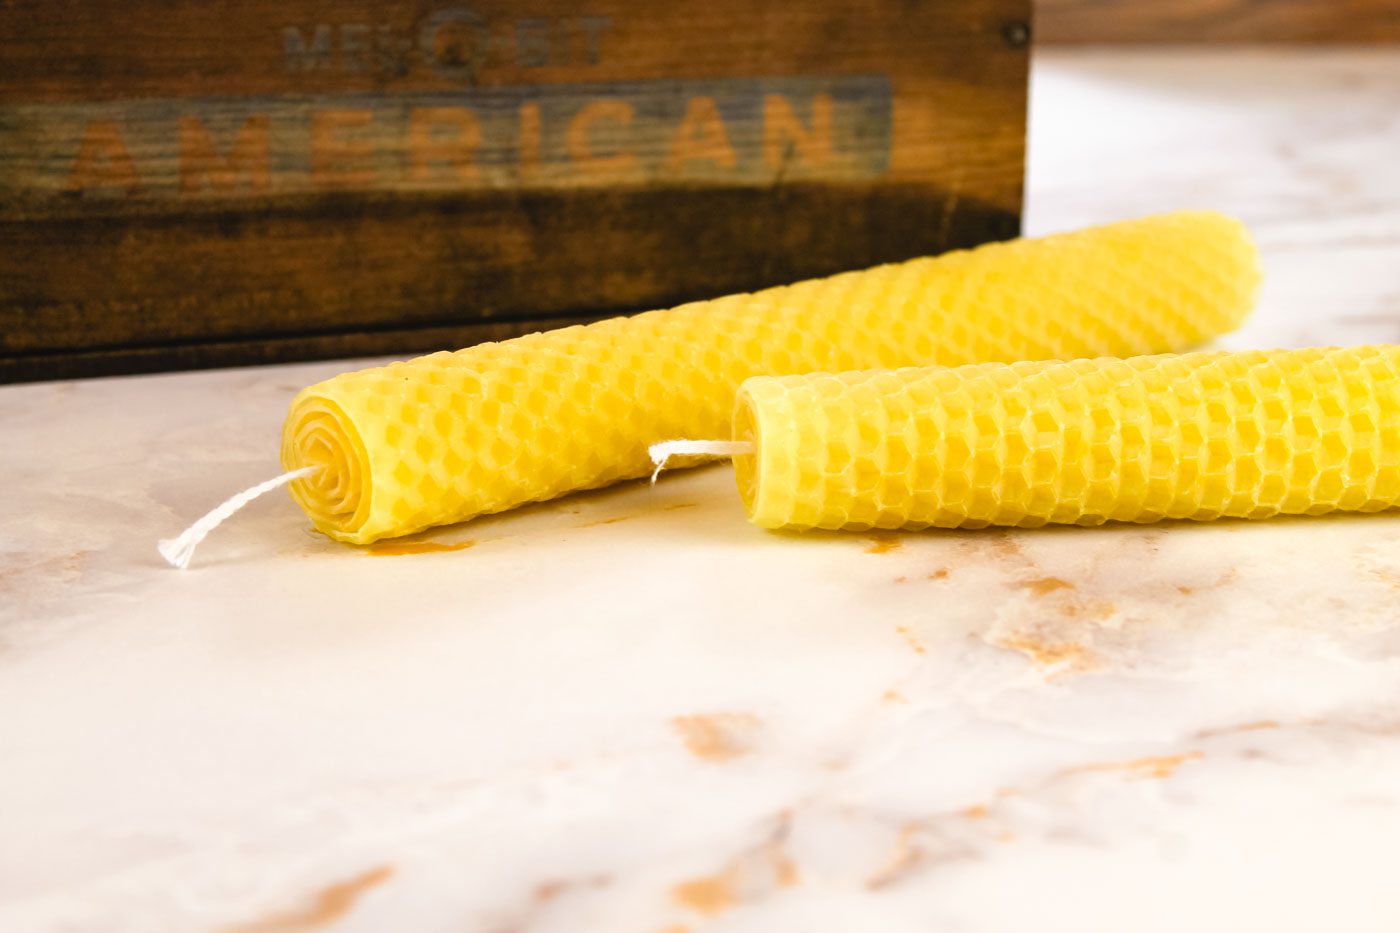
Light up your home with a beautiful, all-natural rolled beeswax candle. Incredibly easy to make, with very little supplies, these DIY candles are fun for both adults and kids to create. Learn how to make a pair of rolled beeswax taper candles in the tutorial below.
My love for beeswax started when I delved into herbalism. Using the herbs I grew in our backyard, I created soaps, salves and cosmetics. Many recipes called for a handful of beeswax to create a stable, textured product.
From there I expanded my use of beeswax by making candles and even reusable beeswax wraps to store leftovers in.
Presently beeswax is used in all sorts of commercial and do-it-yourself items including beard and mustache creams, lip balms, ornaments, furniture polish and even as a conditioner for wooden spoons and cutting boards.
Today I’d like to share with you another way to use beeswax in the home — by creating rolled beeswax candles. They couldn’t be more simple to make. Plus they require next to no supplies and there is no heating involved which makes it perfect activity for kids to help out with.
Using a candle holder, you can burn these candles to add a soft glow to your home. I prefer to use most of my rolled beeswax candles as a rustic decorations displayed throughout my home but they also make great gifts for friends and family!
Why You’ll Love This Craft Idea
- Beginner-friendly! Making hand rolled beeswax candles is a great activity for those new to candle making. It is also a fun craft to create with children.
- Quick and easy craft project.
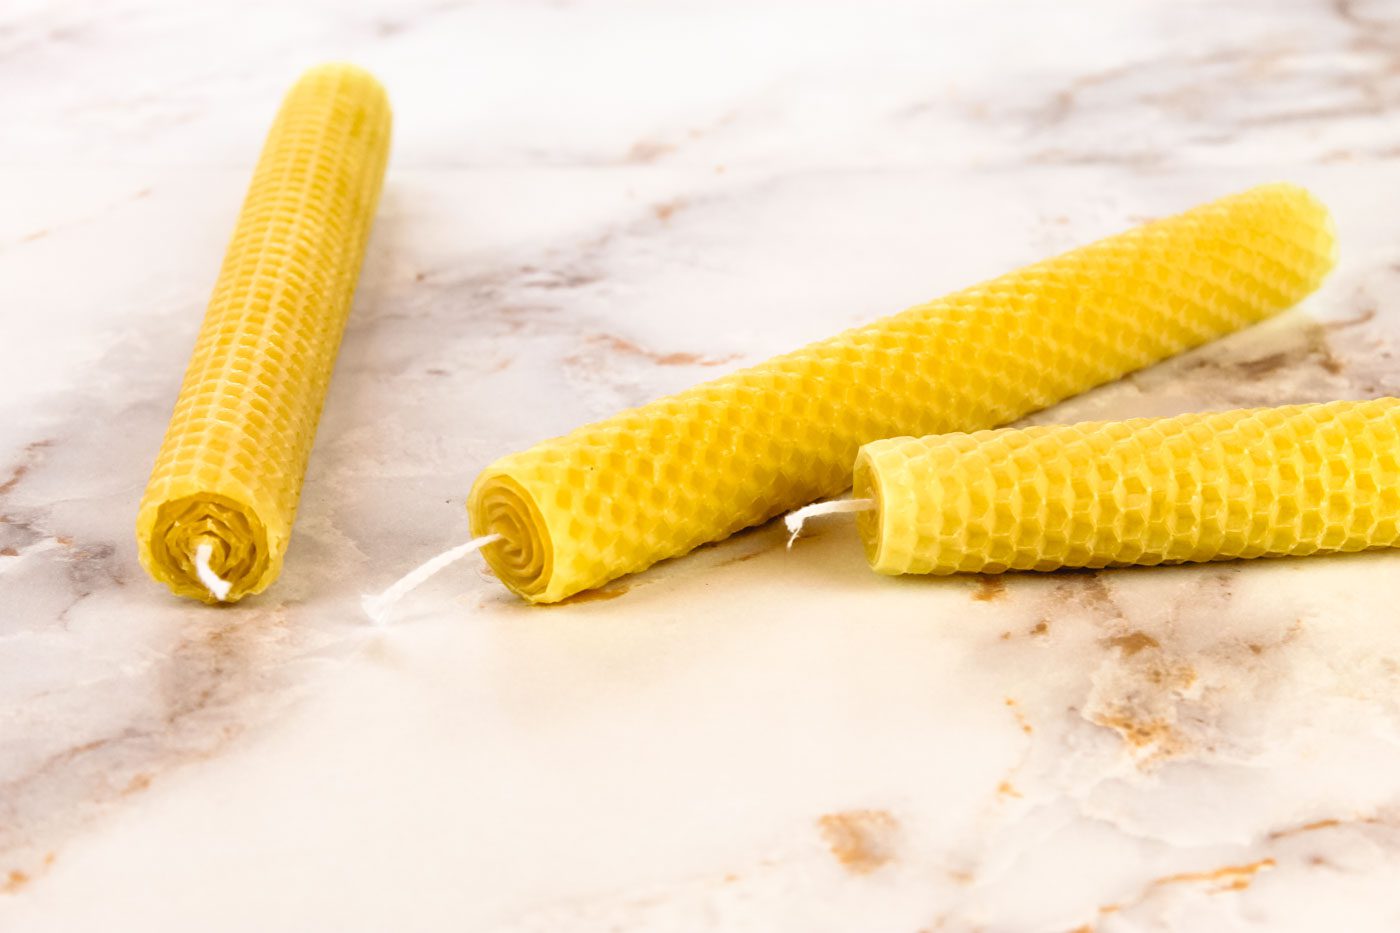
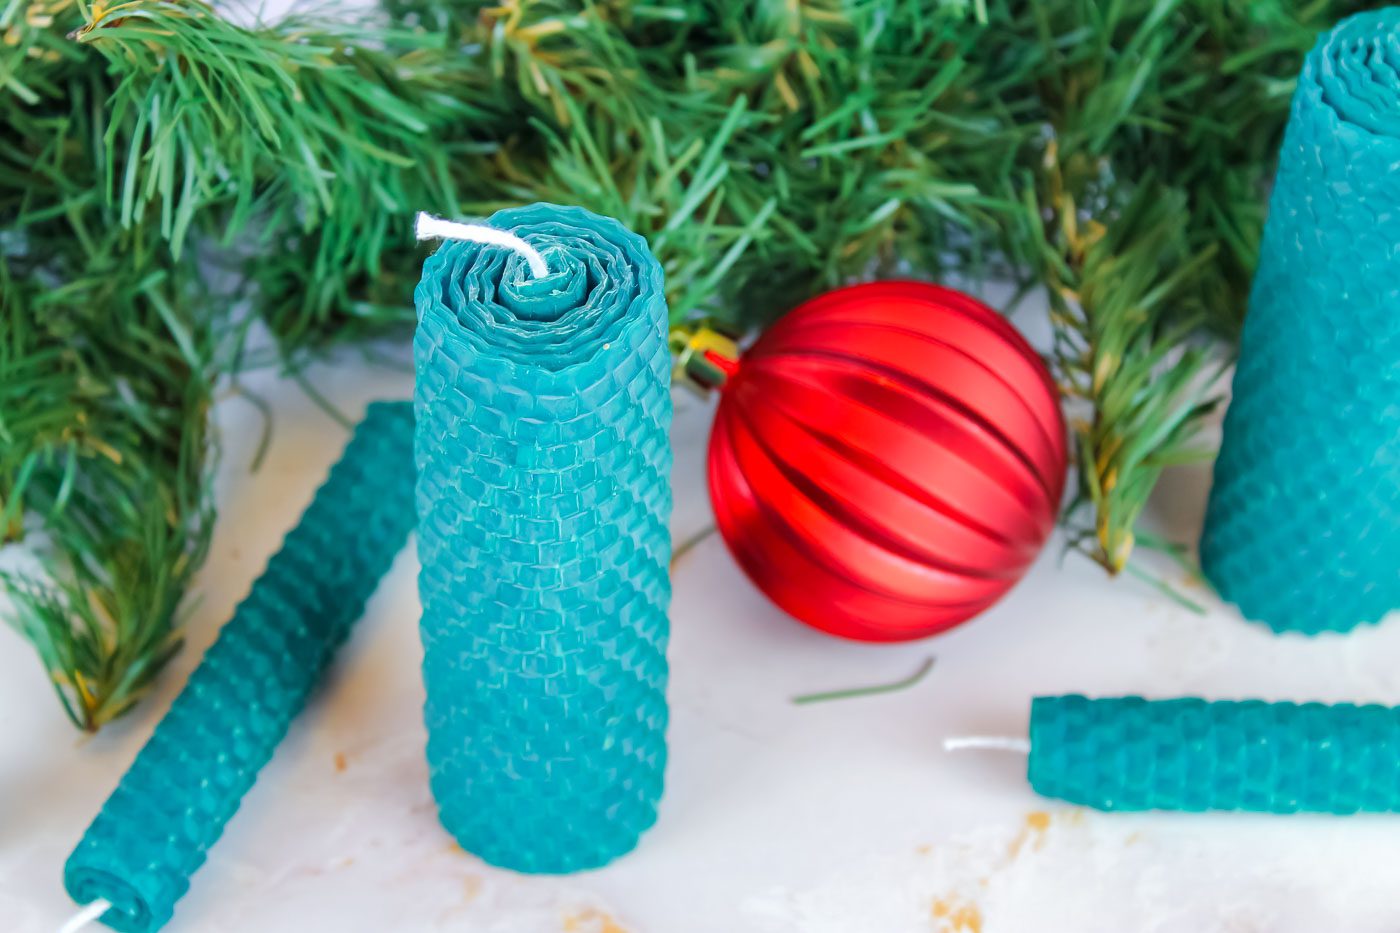
- Ability to cut beeswax sheets into different lengths to make a variety of different candle sizes.
- Candles use only all-natural wax.
- When the beeswax candle is burned, it has a sweet, earthy aroma.
- Beeswax has a long burn time.
Tips for Making Rolled Beeswax Candles
- Before you begin, make sure you lay your beeswax sheets out at room temperature or in a warm spot. This will help to prevent any cracking when you roll the candles.
- When rolling the wax, keep it tight around the wick so that the candle burns well when lit.
- If you find the beeswax sheets are stiff, use a hair dryer to slightly warm the wax to make it more pliable.
- To make clean up easy (so the wax doesn’t stick to your table) roll the honeycomb sheets on a parchment or wax paper lined surface. You can also use a cookie sheet.
What Do I Need to Make Candles?
Rolled beeswax candle making requires very little tools and materials. All you need is a sheet of beeswax and a candle wick. Your local beekeeper may sell beeswax sheets but if not, there are many retailers online selling beeswax honeycomb sheets in an assortment of sizes and even colors. You can even purchase rolled beeswax candle kits that include everything you need to get started.
What Size Wick for Rolled Beeswax Candles?
There are lots of different wicks for making beeswax candles. Some prefer a square braided wick (2/0 size). Others prefer a flat braided wick (24 ply). I like the 24 ply braided wick spool from EricX Light.
Can You Make Different Sizes of Candles?
Yes! This tutorial shows you how to make two hand rolled beeswax taper candles but you can use the wax sheet to create candles of all different sizes including beeswax birthday candles, rolled pillar candles, jumbo candles and even multicolored beeswax candles.
How to Make Rolled Beeswax Candles
Making rolled beeswax candles is simple and fun! Learn how by printing out the step-by-step beeswax candle making tutorial.
This post contains affiliate links, which means I make a small commission at no extra cost to you. In any case, I only link to products we actually use on our homestead and that I believe can truly benefit to you. See my full disclosure here.
Makes: 2 taper candles
Materials
1 beeswax sheet (8” x 16”)
2 pieces 24 ply braid wicking (cut into two 9” strips)
How to Roll Beeswax Candles
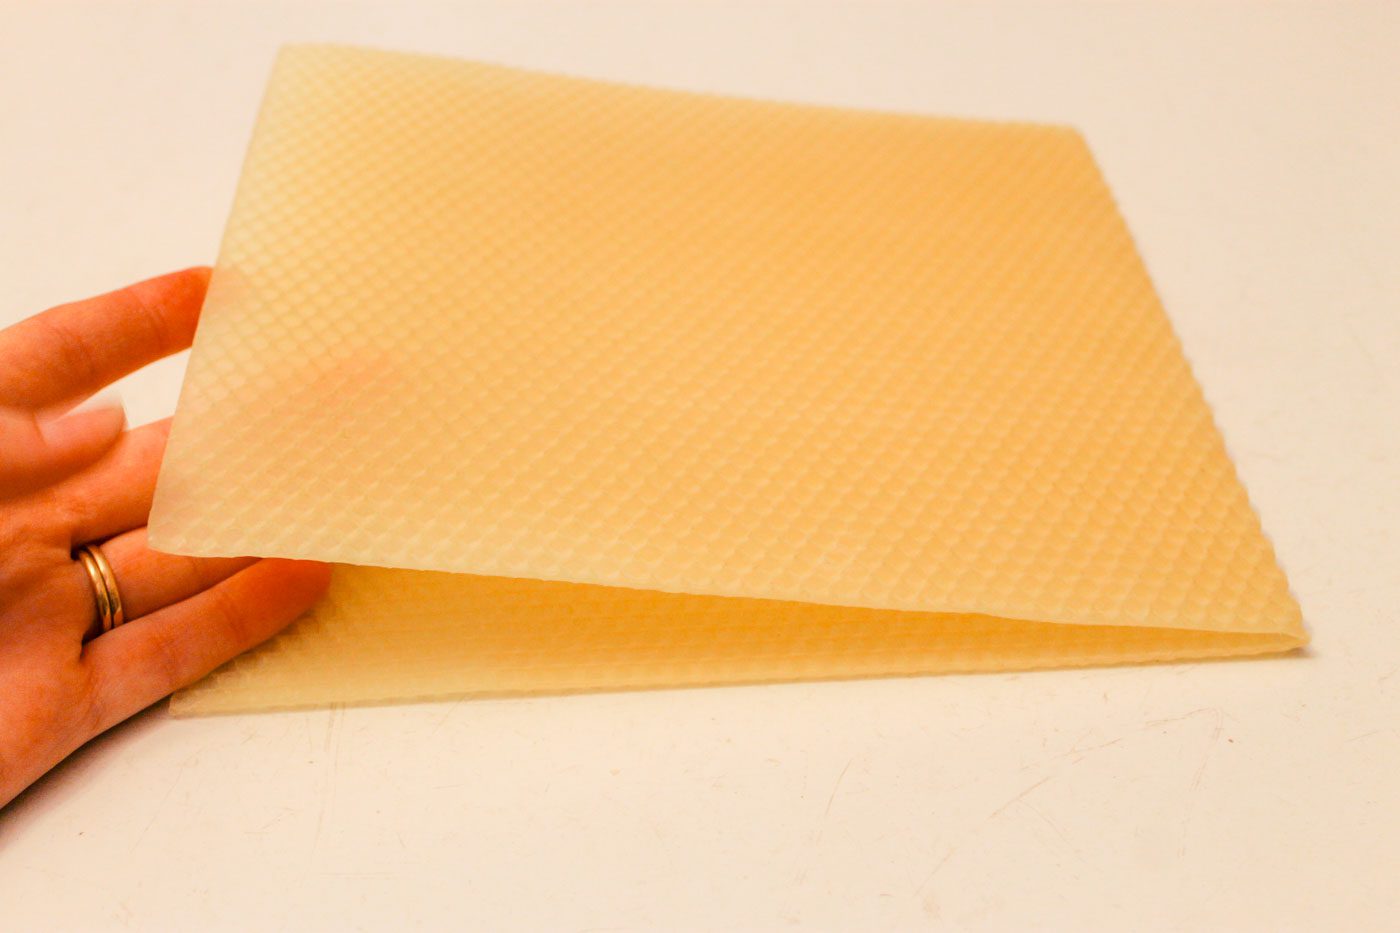
Carefully fold the sheet of beeswax in half, creating a line down the middle. Gently work it back and forth until it breaks into two pieces, approximately 8 inches each. Alternatively, you can use a pair of scissors to cut the sheet in half.
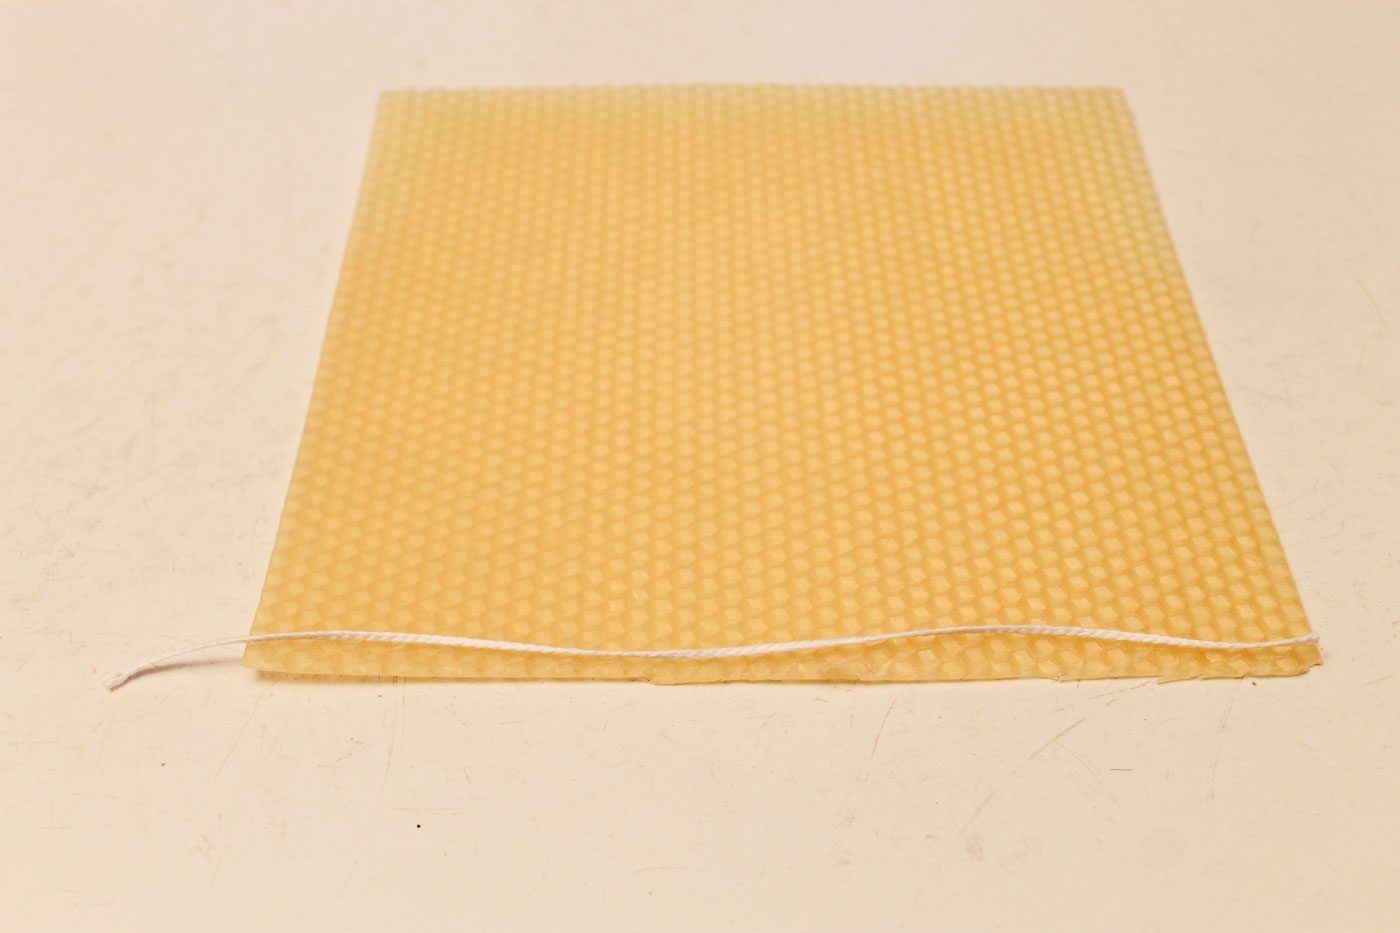
Lay wick (9-inches long) across the raw edge of the wax square, leaving about 1 inch of wick extended out one side.
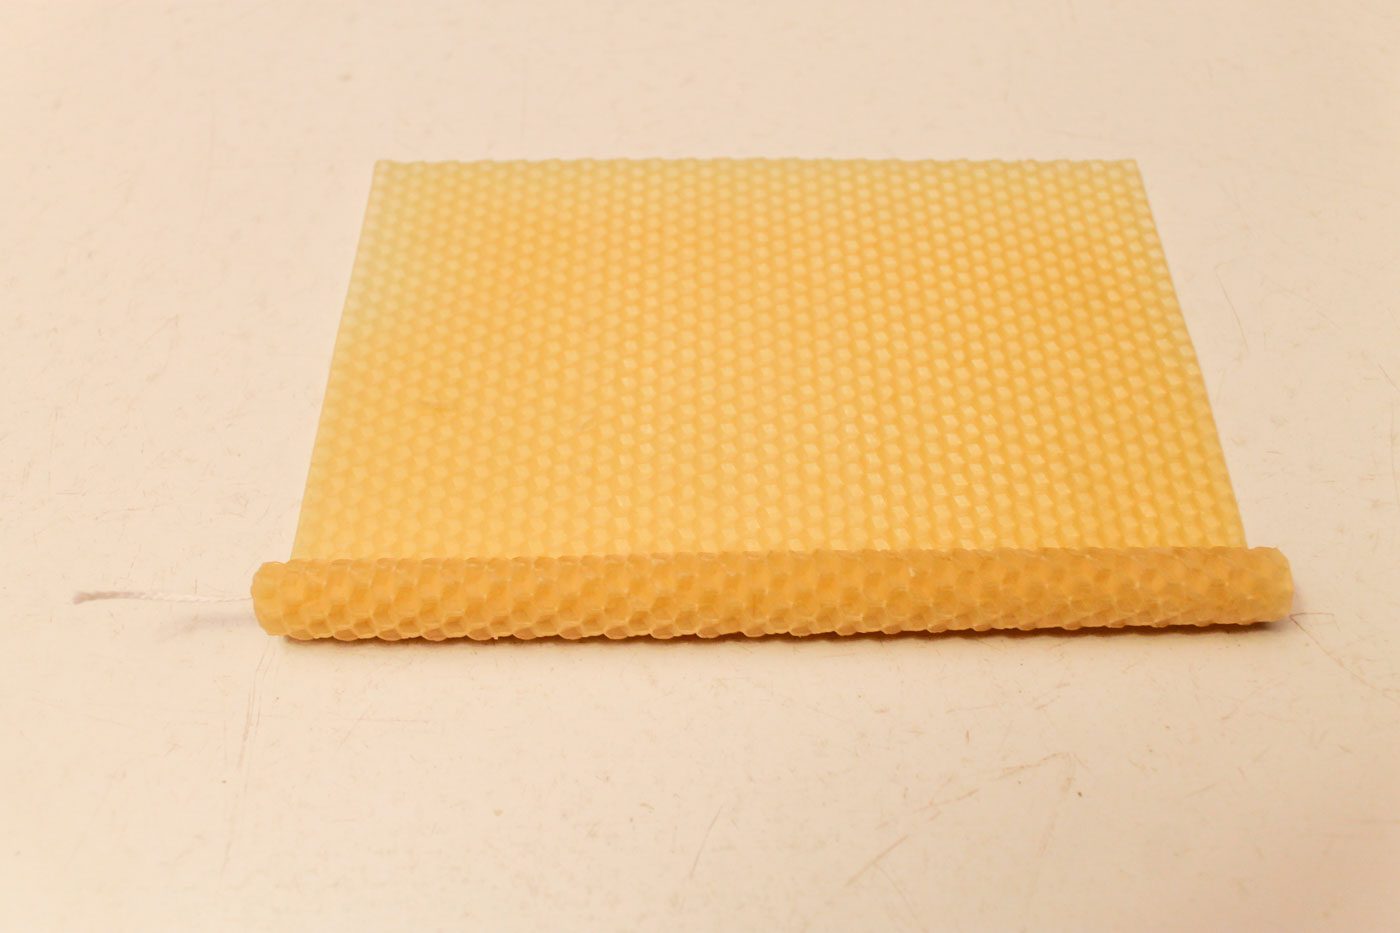
Pinch the wax around the wick so that the wick is covered. Roll the wax tightly around the wick, making sure the top and bottom of the candle are even. Once the candle is rolled, press gently along the end seem to secure the wax in place.

How to Burn Rolled Beeswax Candles
Burning a rolled beeswax candle is no different than burning any other kind of homemade beeswax candle. Trim the wick slightly, light until a flame has formed. I love to place my taper candle in my rustic metal candle holder so that it collects any melted wax.
More Natural Living Tutorials
DIY Rolled Beeswax Candles

Light up your home with a beautiful, all-natural rolled beeswax candle. Incredibly easy to make, with very little supplies, these DIY candles are fun for both adults and kids to create. Learn how to make a pair of rolled beeswax taper candles in the tutorial below.
Materials
- 1 beeswax sheet (8” x 16”)
- 2 pieces 24 ply braid wicking (cut into two 9” strips)
Instructions
- Carefully fold the sheet of beeswax in half, creating a line down the middle. Gently work it back and forth until it breaks into two pieces, approximately 8 inches each. Alternatively, you can use a pair of scissors to cut the sheet in half.
- Lay wick (9-inches long) across the raw edge of the wax square, leaving about 1 inch of wick extended out one side.
- Pinch the wax around the wick so that the wick is covered. Roll the wax tightly around the wick, making sure the top and bottom of the candle are even. Once the candle is rolled, press gently along the end seem to secure the wax in place.
Pin for Later!