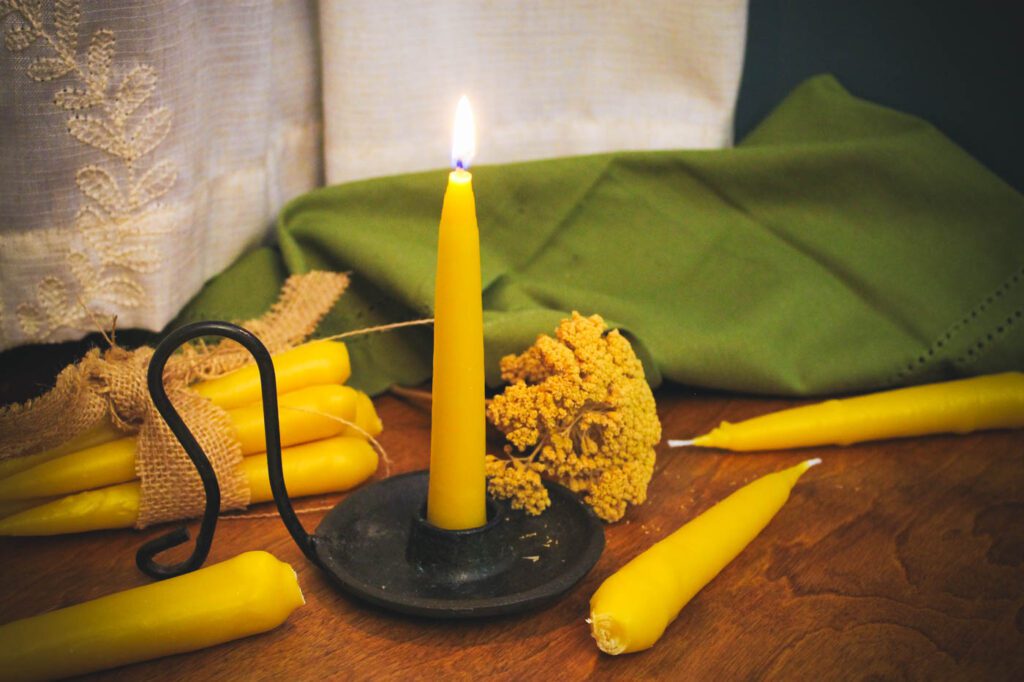
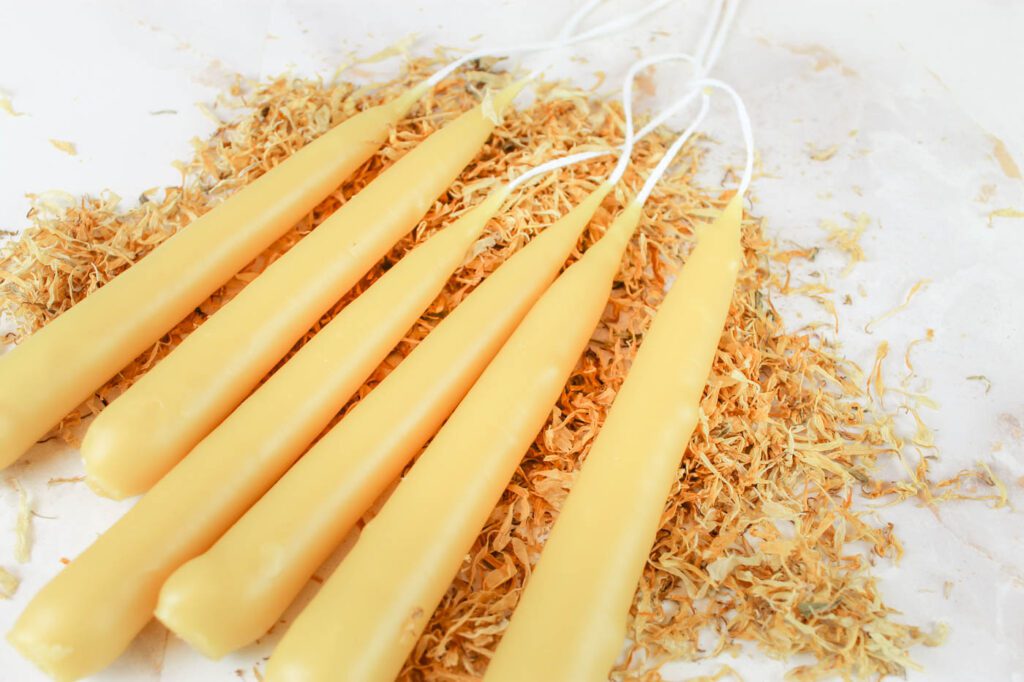
Easily make hand dipped DIY beeswax taper candles at home with just a wick, some wax and a few common supplies. They add warmth and charm to the homestead while also being a beautiful gift for any occasion.
I’ve always loved using beeswax on our homestead. It is a natural ingredient that is easy to find and works well in so many projects. My love for beeswax began when I first delved into herbalism. I made a pain relief salve, lip balm and lotions.
As time went on, I got into candle making using beeswax to make homemade candles and rolled candles using sheets of beeswax. Not only were they fun to create but they served a purpose in our home.
Recently life has been a bit stressful so I started to desire something to bring in a relaxing and calm atmosphere. DIY beeswax taper candles were just the thing our home needed! During the evening, once the kitchen closed and the chores were done, I would turn off most of the artificial lighting, sit on the couch with a warm blanket and light one of the hand dipped candles.
Peaceful. And soothing.
If you’ve been curious about how to make beeswax taper candles, this tutorial is for you. You will learn how to make taper candles without a mold, the supplies you will need and the best way to burn the candles when they are finished. Don’t forget to check out the tips section below to make beautiful hand dipped taper candles.
Why You’ll Love This Craft Idea
Non Toxic – These DIY beeswax taper candles are all-natural. No additives or chemicals are used. Just simple wax made from bees that helps to purify the air and neutralize pollutants in the home.
Handmade Craft Idea – Making a pair of these diy taper candles is easy and fun to do. If you have children, get them involved as there are many steps they can participate in.
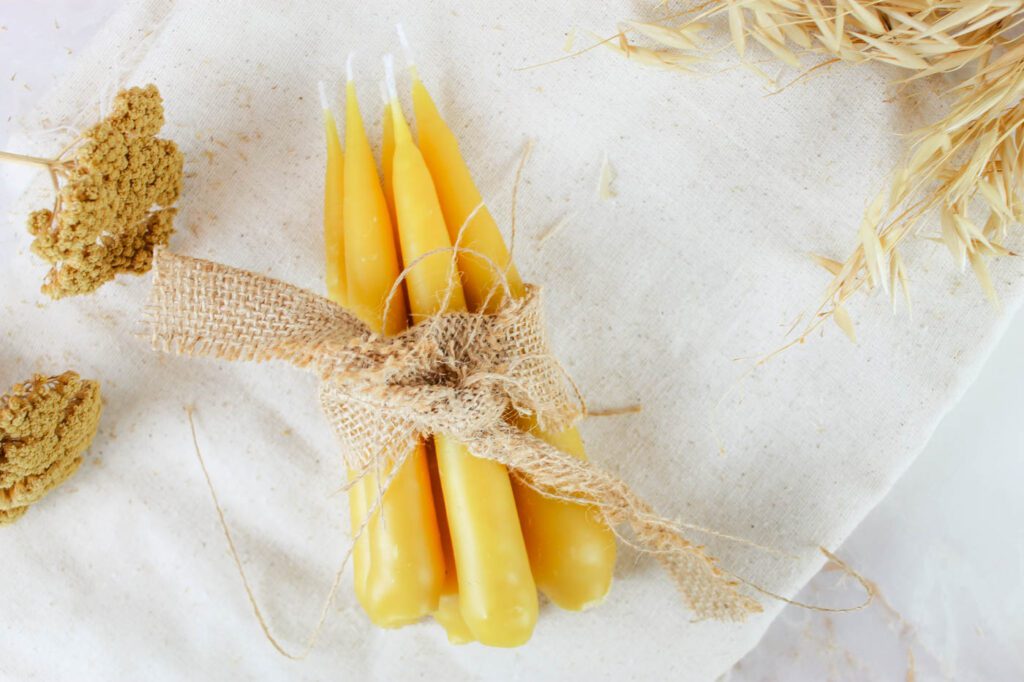
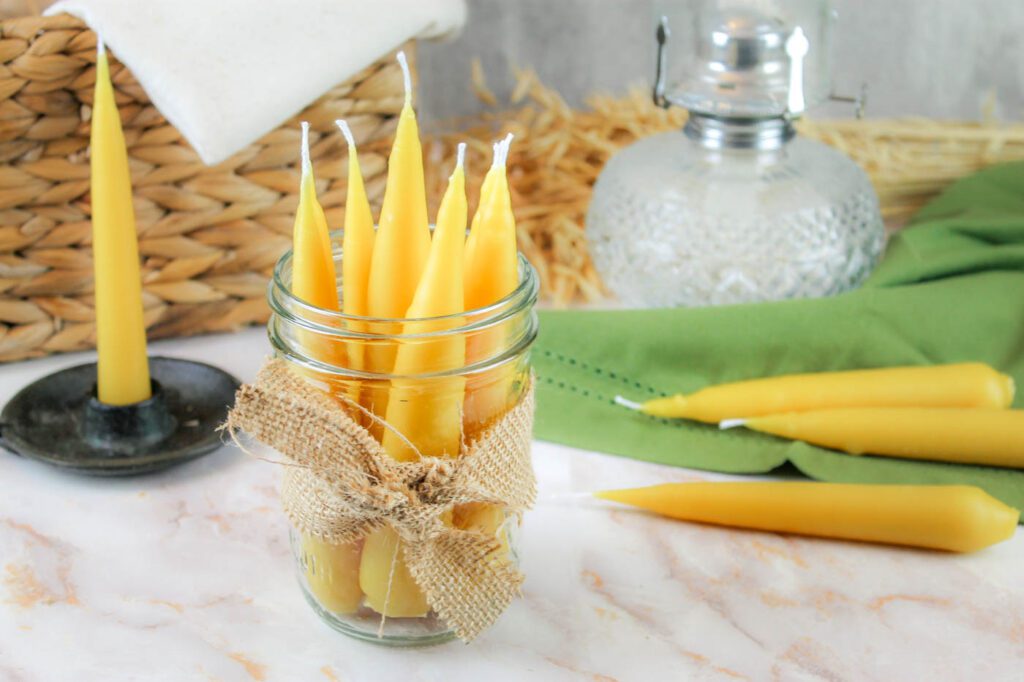
Beautiful Farmhouse Decor – Adds rustic charm to a country home or small town homestead. The hand dipped candles also make a thoughtful gift for Christmas or birthdays.
Soothing – As the beeswax candles burn, their soft, warm light is very relaxing. I like to burn the candles while I make dinner or during the evening after our daughter goes to bed and we are winding down for the day.
Tips for Making Beeswax Taper Candles
- For easy cleanup, line your work surface with paper towels or wax paper. Should you drip any wax, the paper towel will catch it instead of solidifying on your stovetop or kitchen counter.
- To make sizable dipped beeswax candles, a tall, narrow wax melting container is very important. A quart size mason jar will work but my favorite type of container to use is a wide mouth pint and a half (24 ounce) canning jar.
- The size of your finished candle is dependent on the depth of your dipping container. If you use something small like a tin can, the candles will be short.
- Beeswax pellets are most expensive but they melt very quickly. I buy a large 3-4 pound brick of beeswax from a local beekeeper. Then I cut it down to small manageable pieces using our chop saw. Smaller pieces makes for quicker candle making.
- A small screw, bolt or hex nut will work for a weight.
- Do not skip dipping the candles into a jar of cold water. While this may sound odd to do (it did to me the first time I made these candles), the cold water cools down the wax, helping to speed up the curing process.
- The more you dip the candles, the more wax is removed from your container. Be sure to add more wax to the container or all future candles will not be the same size as the first ones you created. I like to continually as pieces of wax to the melting pot to ensure I have enough to pour into the container that I dip the candles into.
- If you find the dipped pair of candles has stuck together, carefully pull them apart without squeezing the candles as you don’t want to leave imprints in the wax.
- Once you cut the weight off, dip the taper candles into the cold water quickly. Otherwise they will begin to float and you will not be able to fully submerge them into the jar.
- After you have removed the weight, tear the beeswax off of the nut/bolt and toss back into the melting pot. This is a great way to use up the wax instead of discarding it.
- A wooden drying rack is perfect for cooling down the candles and allowing them to finish solidifying. If you have a knob on your kitchen cabinet, you could also use it to cure the candles. Or you could place a ruler or paint stick across a box and dangle the candles across.
- Leftover wax can be poured into a heat proof vessel to create a container candle or into a silicone mold to use in future projects.
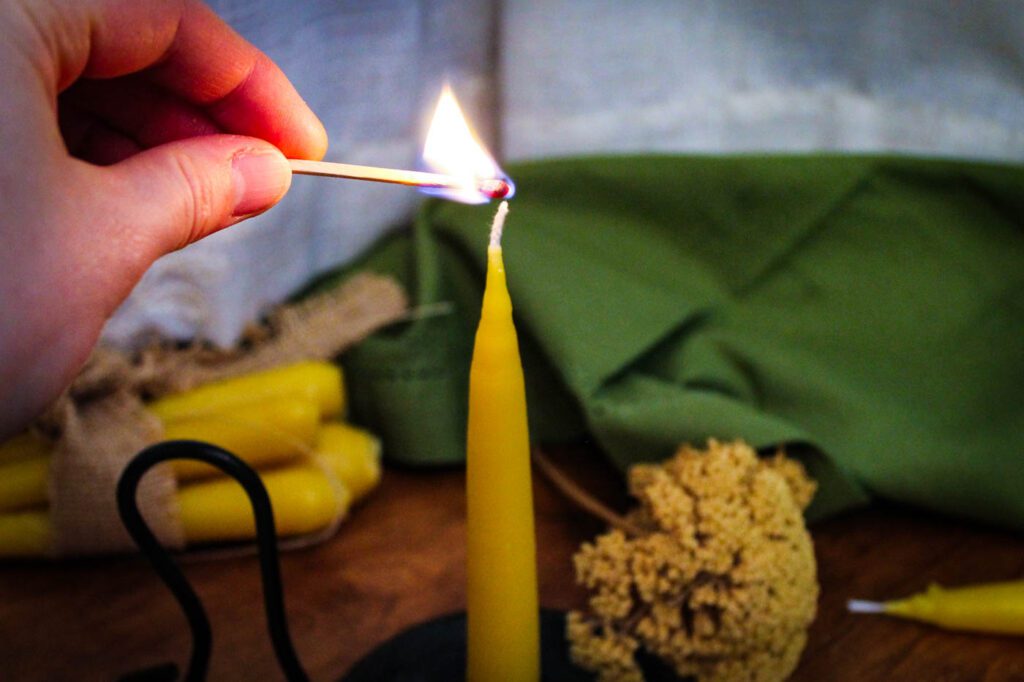
- Trim the candle wick to about 1/4-inch prior to burning.
Supplies to Make Dipped Beeswax Candles
This post contains affiliate links, which means I make a small commission at no extra cost to you. In any case, I only link to products we actually use on our homestead and that I believe can truly benefit to you. See my full disclosure here.
Beeswax brick or pellets (3 1/2 pounds)
Braided candlewick (150 inches total)
Wax melting pot, optional
2-3 tall, narrow containers such as 24 ounce mason jars
Half gallon mason jar, optional
Stock pot
Bolt, hex nut or small screw (4 total)
Scissors
How to Make Beeswax Taper Candles
Makes: 10 taper candles
Materials
3 1/2 pounds beeswax pellets or wax from local beekeeper, cut into chunks
150 inches braided candlewick, cut into five 25-inch long pieces
2-3 tall, narrow containers such as a wide mouth mason jar or a wax melting pot
Stockpot
4 nuts, bolts or hex nuts
Directions
Begin by placing a tall wide mouth mason jar, wax melting vessel or narrow heat-proof container into a stockpot filled with a few inches of water. Add beeswax to jar. Turn burner to medium-low heat. As the wax melts, you will likely want to add more wax to fill up the jar to create a deep amount of wax.
While the wax is melting, cut the wick into five pieces, 25 inches in length. Fold the wick in half and tie a bolt or nut to each end of the wick. This will act as a weight to help keep the candles in place as you dip.
Fill a tall jar with cold water. I like to use a half gallon mason jar for this step. Immersing the dipped candles into cold water speeds up the curing process.
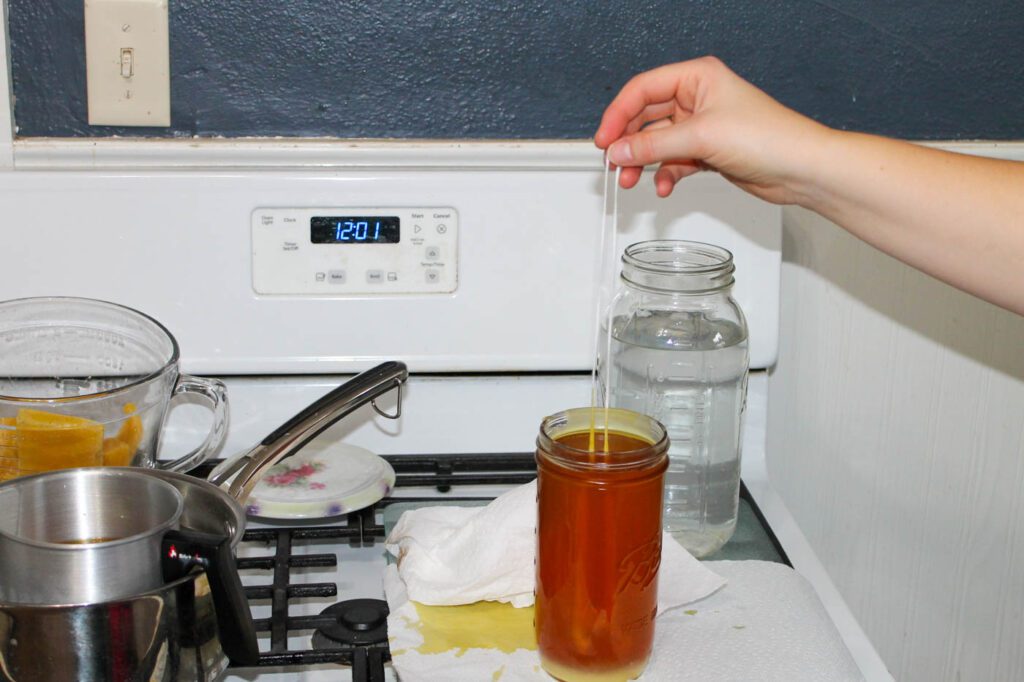
Once the wax has melted, it is time to start dipping. You can either dip the wicks directly into the melting pot or pour the hot wax into another jar. I prefer to use 3 jars — one for continually melting beeswax, one for dipping and the last jar for the cold water. Hold the center of the wick and slowly dip into the wax making sure they are as straight as possible.
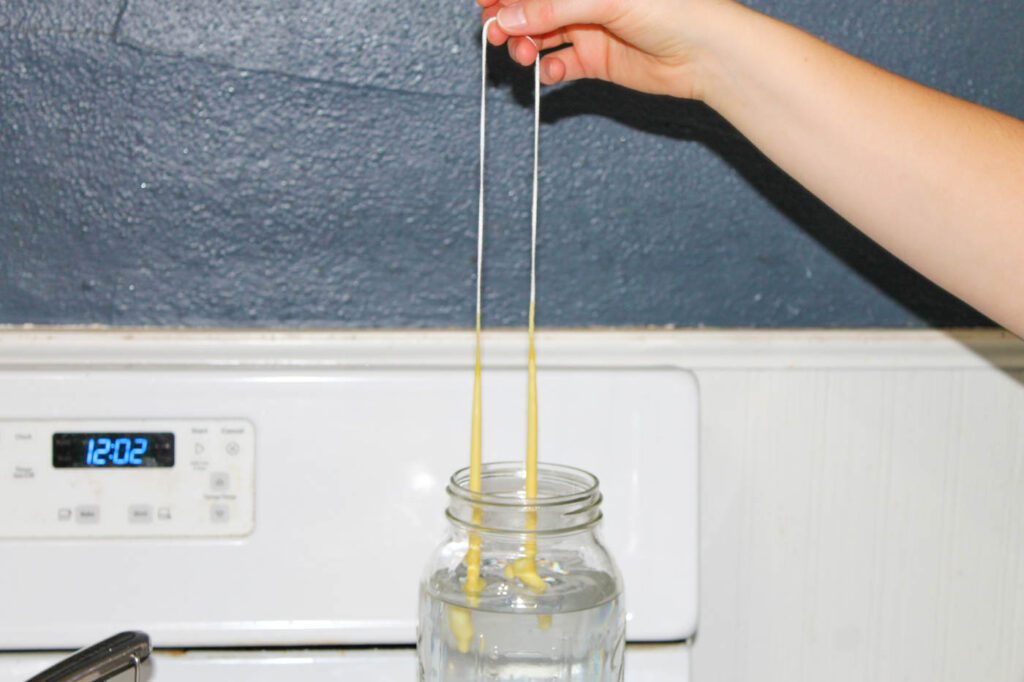
After the wicks have been dipped into the wax, immediately dip into the jar of cold water.
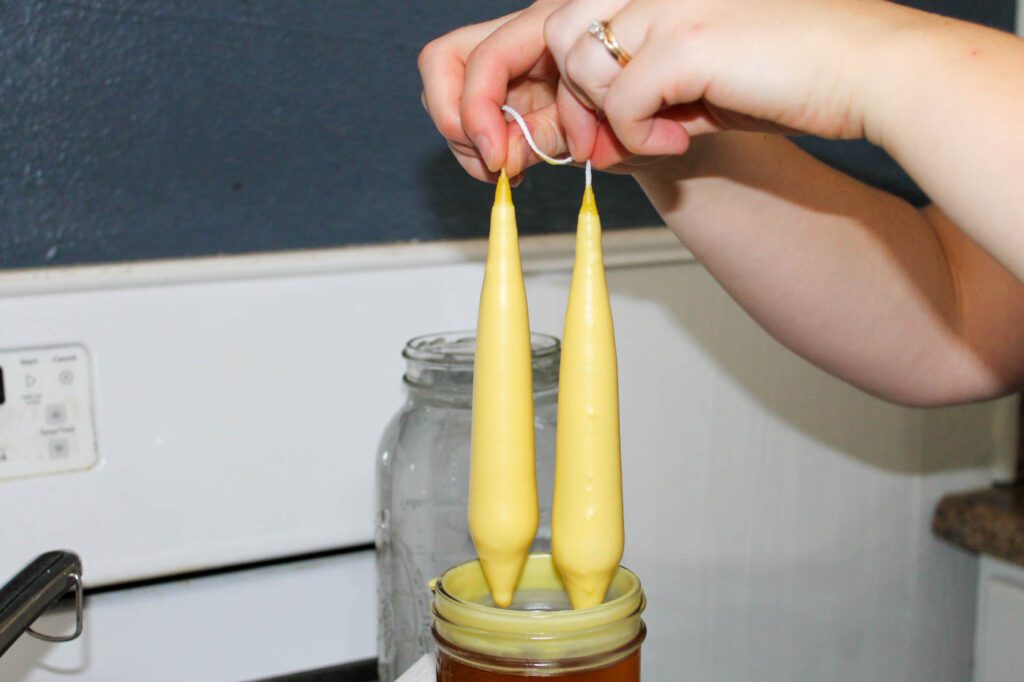
Repeat the process about 6-10 times, then use a pair of scissors to cut off the weight. Continue dipping process approximately 10-15 times, or until desired size has been achieved.
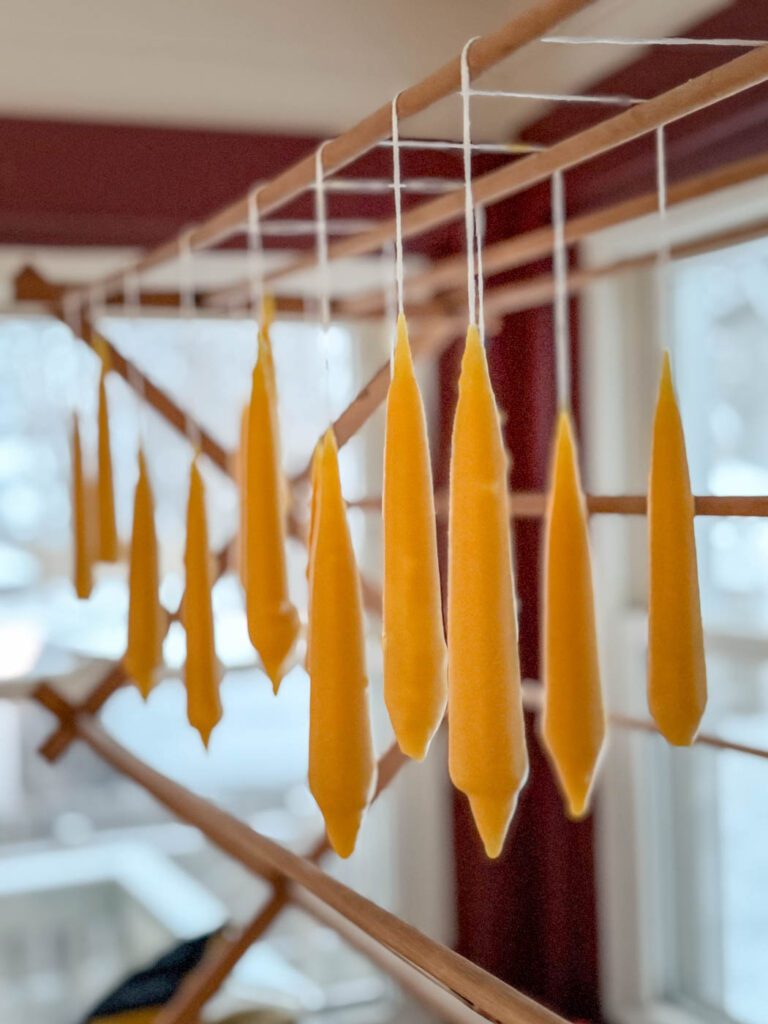
Hang finished candles on a drying rack, cabinet knob or ruler set across a box to harden. This will take a couple of hours but I prefer to leave them overnight. Any leftover wax can be poured into a heat proof vessel to create a container candle or into a silicone mold to use in future projects that need beeswax.
Trim candle wick to 1/4-inch prior to burning.
FAQ
What is the Best Wick for Hand Dipped Beeswax Candles?
A braided cotton wick is the best wick for hand dipped beeswax candles. It is easy to use, inexpensive and burns well. I like to use the braided wick spool from EricX Light.
How Many Pounds of Beeswax to Make Dipped Candles?
I recommend using 3 to 4 pounds of beeswax to make diy hand dipped taper candles. This will give you plenty of wax to create several candles without them getting stubby or too short. Should you have any leftover beeswax, simply pour into a heat proof container with a wick to create a hand-poured container candle. Or you can add the wax to a silicone mold to use to make candles in the future.

How Long Do Beeswax Taper Candles Typically Burn?
Burning times can varying depending on the size of the diy beeswax taper candles as well as an ideal burning environment (no drafts, trimmed wick, etc.). Typical burn times for taper candles can range anywhere from 8 to 14 hours.
More Handmade Craft Ideas
How to Make Crockpot Potpourri
DIY Beeswax Taper Candles

Easily make hand dipped DIY beeswax taper candles at home with just a wick, some wax and a few common supplies. They add warmth and charm to the homestead while also being a beautiful gift for any occasion.
Materials
- 3 1/2 pounds beeswax pellets or wax from local beekeeper, cut into chunks
- 150 inches braided candlewick, cut into five 25-inch long pieces
- 2-3 tall, narrow containers such as a wide mouth mason jar or a wax melting pot
- Stockpot
- 4 nuts, bolts or hex nuts
Instructions
- Begin by placing a tall wide mouth mason jar, wax melting vessel or narrow heat-proof container into a stockpot filled with a few inches of water. Add beeswax to jar. Turn burner to medium-low heat.
- As the wax melts, you will likely want to add more wax to fill up the jar to create a deep amount of wax.
- While the wax is melting, cut the wick into five pieces, 25 inches in length. Fold the wick in half and tie a bolt or nut to each end of the wick. This will act as a weight to help keep the candles in place as you dip.
- Fill a tall jar with cold water. I like to use a half gallon mason jar for this step. Immersing the dipped candles into cold water speeds up the curing process.
- Once the wax has melted, it is time to start dipping. You can either dip the wicks directly into the melting pot or pour the hot wax into another jar. I prefer to use 3 jars — one for continually melting beeswax, one for dipping and the last jar for the cold water. Hold the center of the wick and slowly dip into the wax making sure they are as straight as possible.
- After the wicks have been dipped into the wax, immediately dip into the jar of cold water.
- Repeat the process about 6-10 times, then use a pair of scissors to cut off the weight. Continue dipping process approximately 10-15 times, or until desired size has been achieved.
- Hang finished candles on a drying rack, cabinet knob or ruler set across a box to harden. This will take a couple of hours but I prefer to leave them overnight. Any leftover wax can be poured into a heat proof vessel to create a container candle or into a silicone mold to use in future projects that need beeswax.
- Trim candle wick to 1/4-inch prior to burning.
Notes
- For easy cleanup, line your work surface with paper towels or wax paper. Should you drip any wax, the paper towel will catch it instead of solidifying on your stovetop or kitchen counter.
- To make sizable dipped beeswax candles, a tall, narrow wax melting container is very important. A quart size mason jar will work but my favorite type of container to use is a wide mouth pint and a half (24 ounce) canning jar.
- The size of your finished candle is dependent on the depth of your dipping container. If you use something small like a tin can, the candles will be short.
- Beeswax pellets are most expensive but they melt very quickly. I buy a large 3-4 pound brick of beeswax from a local beekeeper. Then I cut it down to small manageable pieces using our chop saw. Smaller pieces makes for quicker candle making.
- Do not skip dipping the candles into a jar of cold water. While this may sound odd to do (it did to me the first time I made these candles), the cold water cools down the wax, helping to speed up the curing process.
- The more you dip the candles, the more wax is removed from your container. Be sure to add more wax to the container or all future candles will not be the same size as the first ones you created. I like to continually as pieces of wax to the melting pot to ensure I have enough to pour into the container that I dip the candles into.
- If you find the dipped pair of candles has stuck together, carefully pull them apart without squeezing the candles as you don’t want to leave imprints in the wax.
- Once you cut the weight off, dip the taper candles into the cold water quickly. Otherwise they will begin to float and you will not be able to fully submerge them into the jar.
- After you have removed the weight, tear the beeswax off of the nut/bolt and toss back into the melting pot. This is a great way to use up the wax instead of discarding it.


